

Wasabi Hot Cloud Storage Integration for WordPress.
The Wasabi Integration in Advanced File Manager allows you to securely connect your WordPress website with Wasabi’s reliable and scalable cloud storage. Once connected, your Wasabi storage becomes accessible directly from the WordPress dashboard.
This integration enables seamless file management between your WordPress website and Wasabi without requiring users to access the Wasabi console separately. You can browse, upload, download, rename, delete, and organize files directly from the File Manager interface while keeping your files securely stored in Wasabi.
Wasabi is designed to provide simple, cost-effective cloud storage for websites and businesses that need to manage large amounts of data without the complexity of traditional cloud storage solutions.
If you haven’t yet upgraded to the Pro business plan, now’s the perfect time! Buy now to unlock this powerful feature and take your file management to the next level. Get the Advanced File Manager Plan!
Enabling Wasabi Integration in Advanced File Manager
Follow the steps below to connect Cloudflare R2 with your website:
Enable Wasabi
- Navigate to WordPress Admin Dashboard > File Manager > Integrations tab.
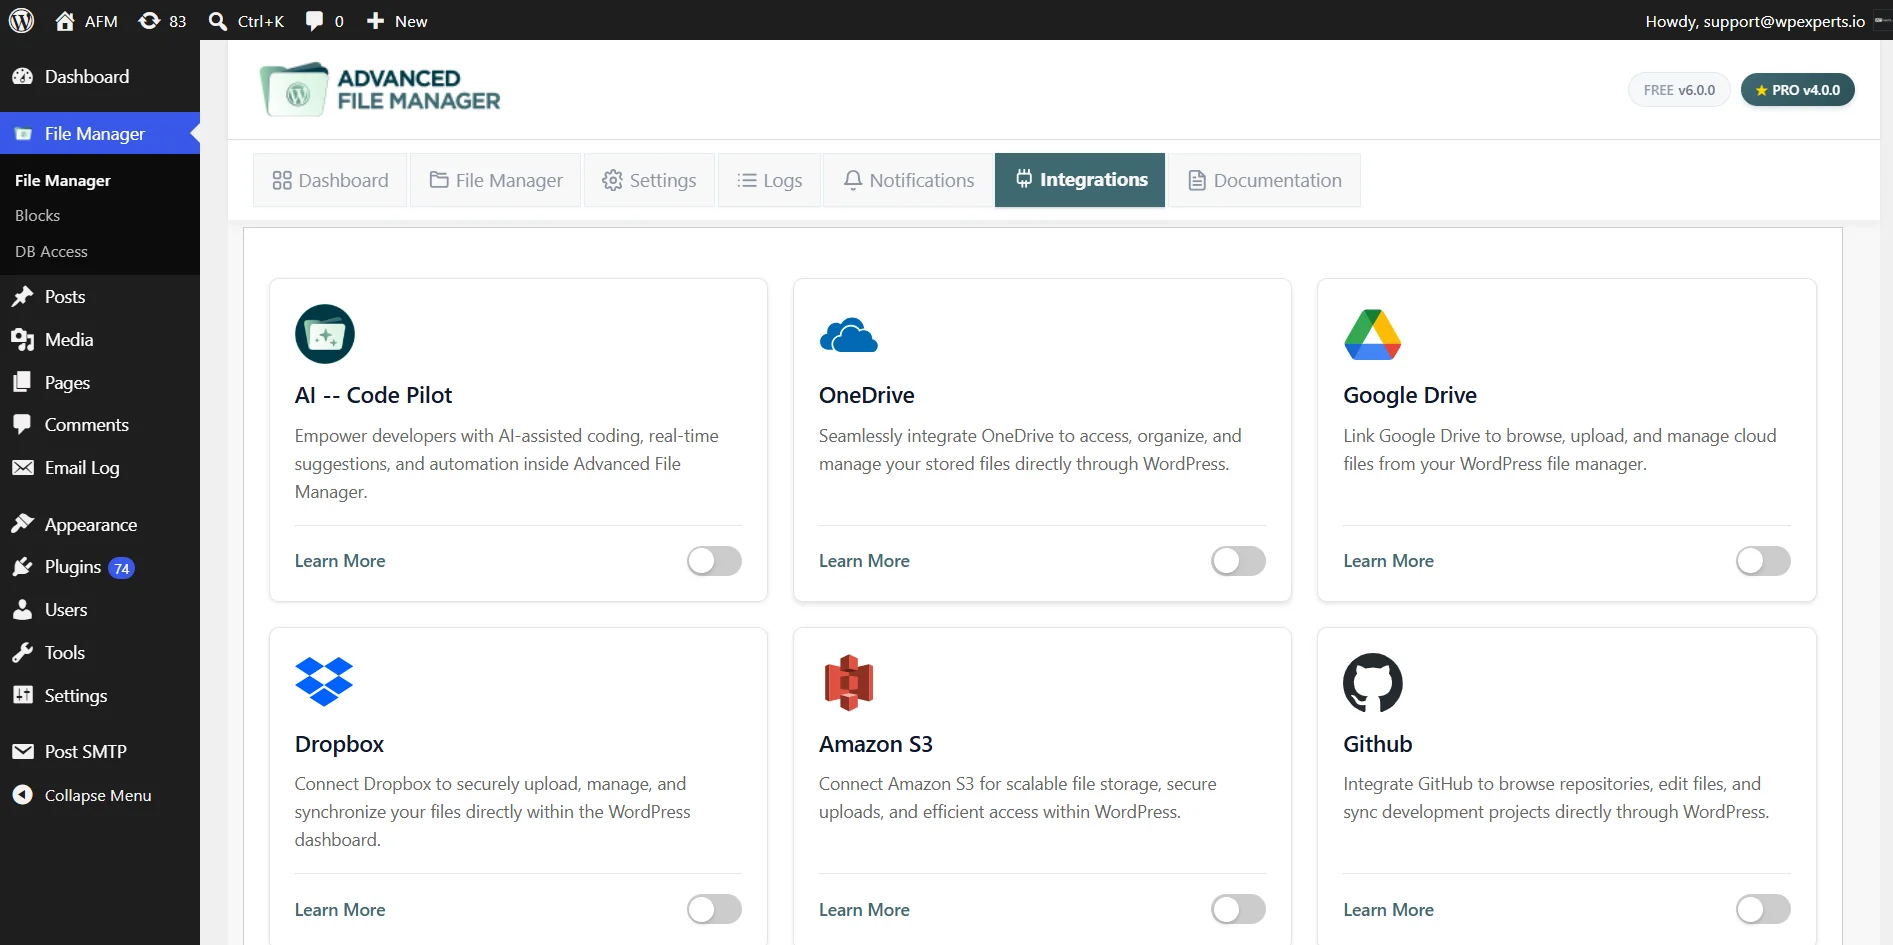
- In the Integrations, go to the Wasabi card and click on the toggle to enable the Wasabi integrations.
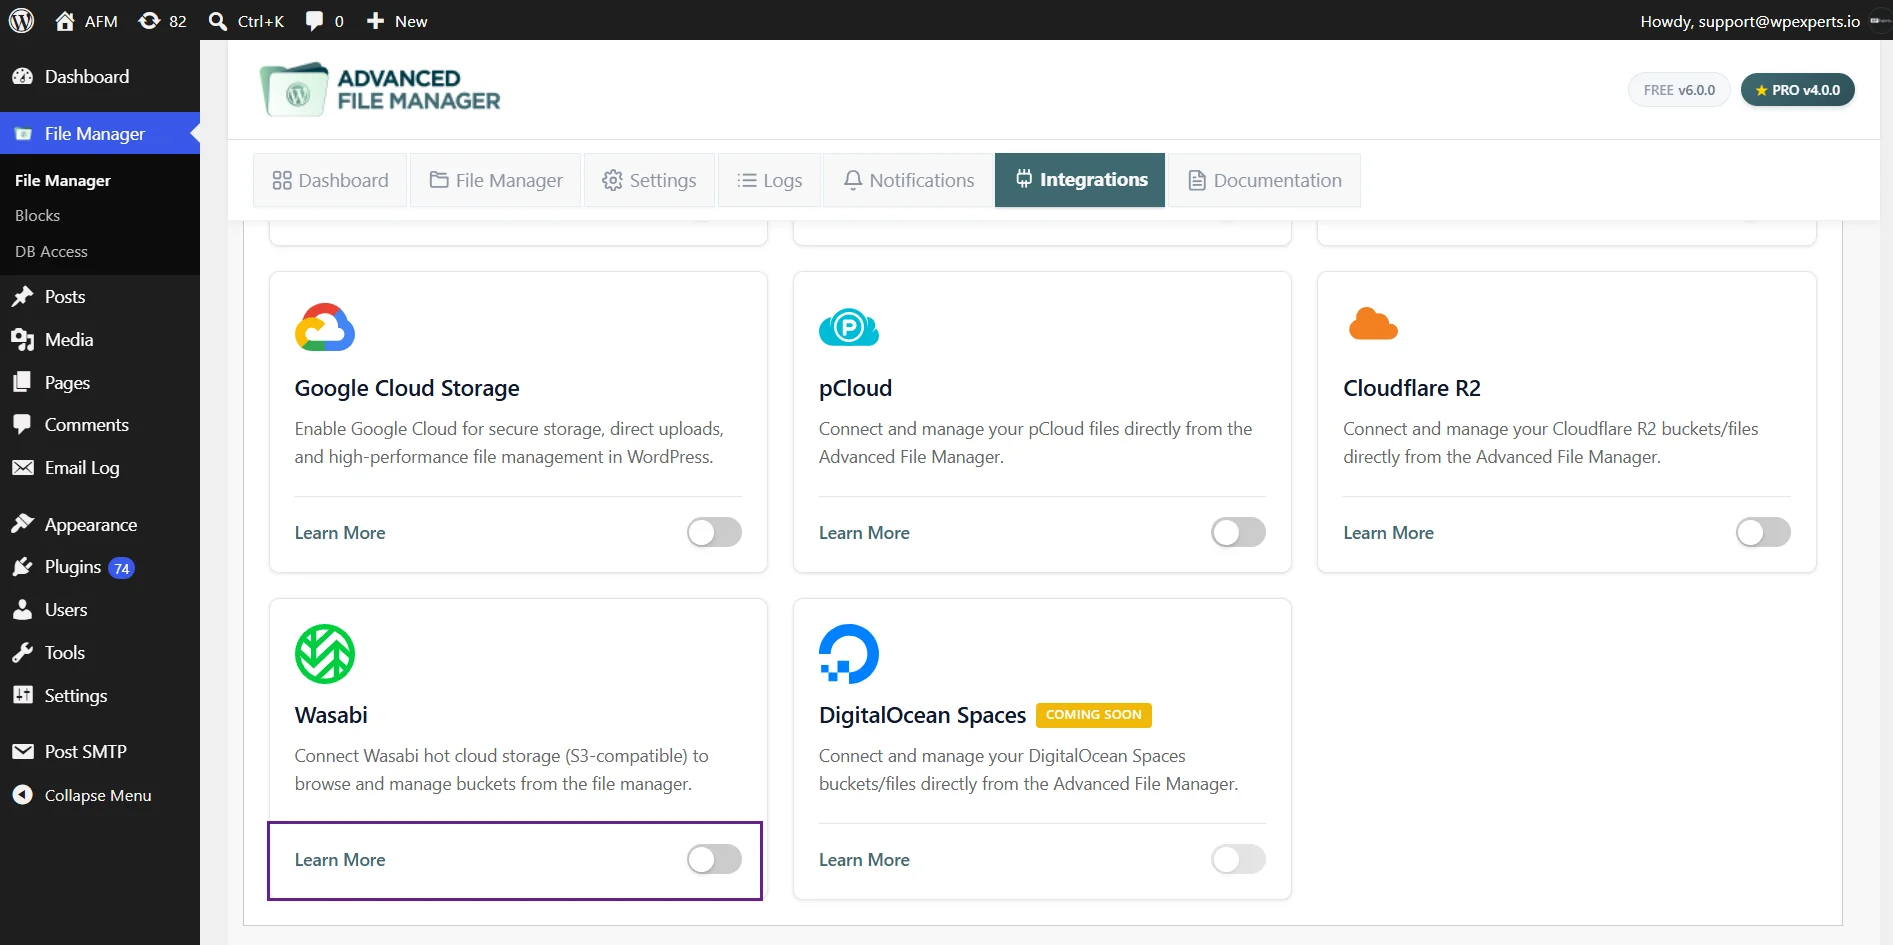
- After enabling the Wasabi , click on the Settings in the Wasabi card.
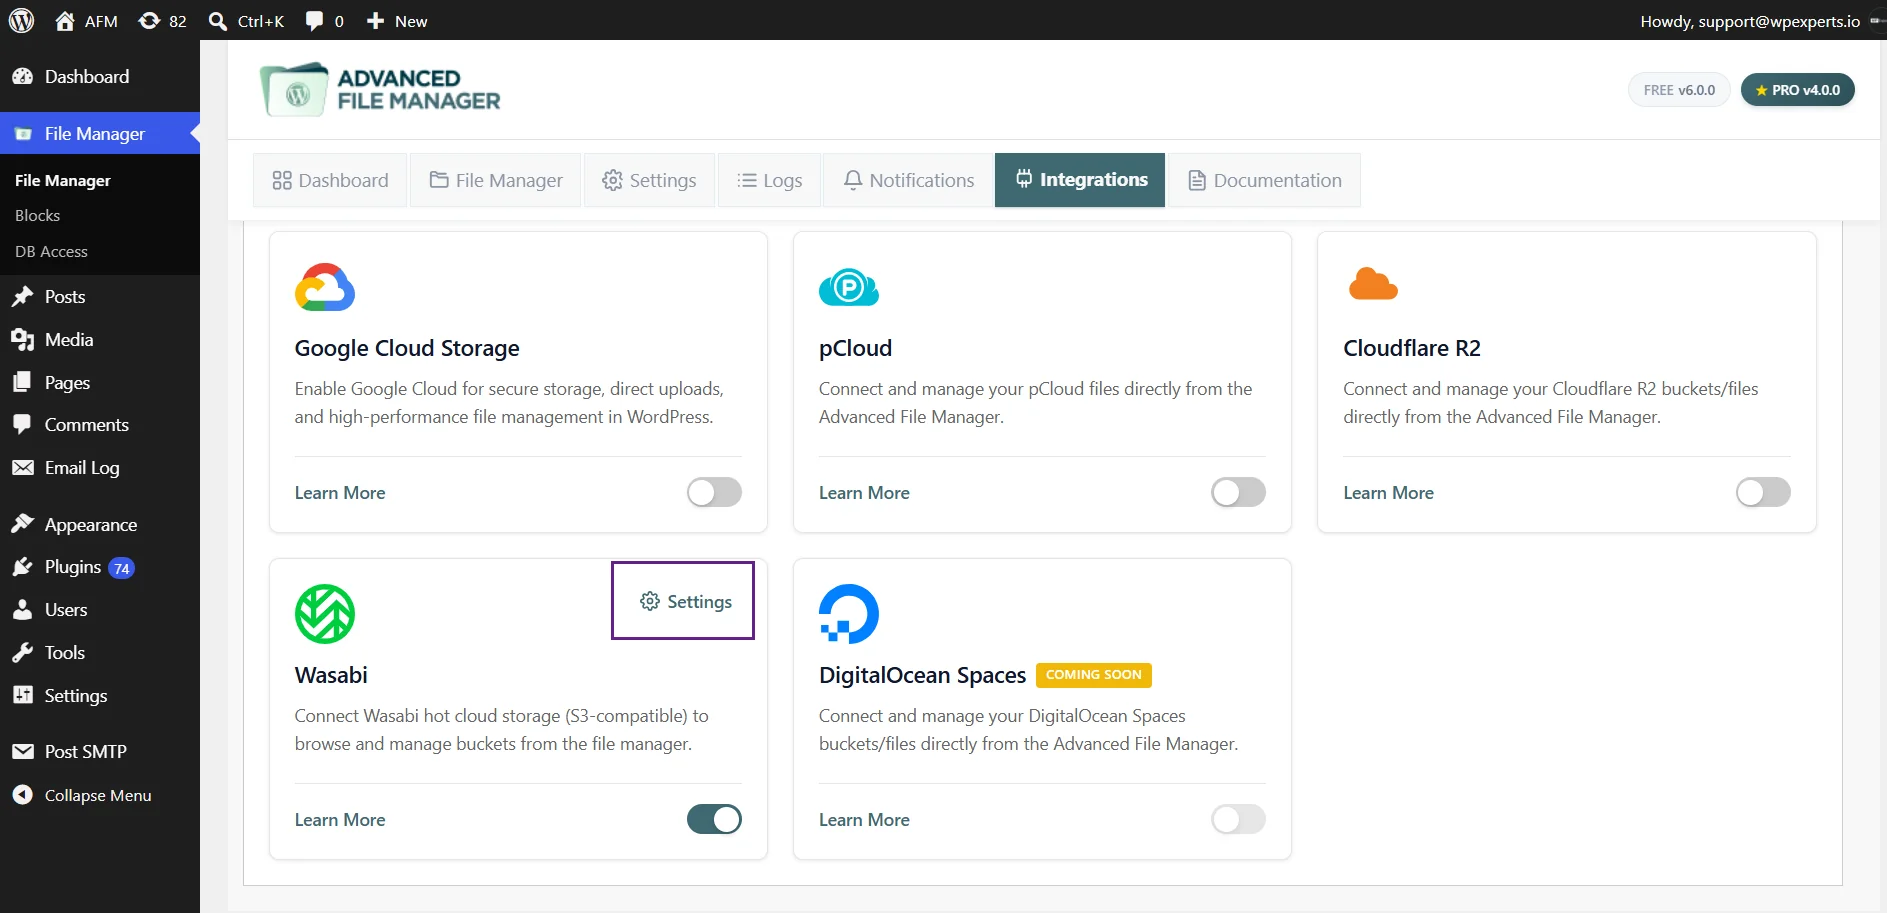
- If the Wasabi library has not been installed, click Install Wasabi Library. This is a one-time automatic installation required to communicate with Wasabi using the AWS SDK.
- In the Wasabi Settings, add your custom Alias.
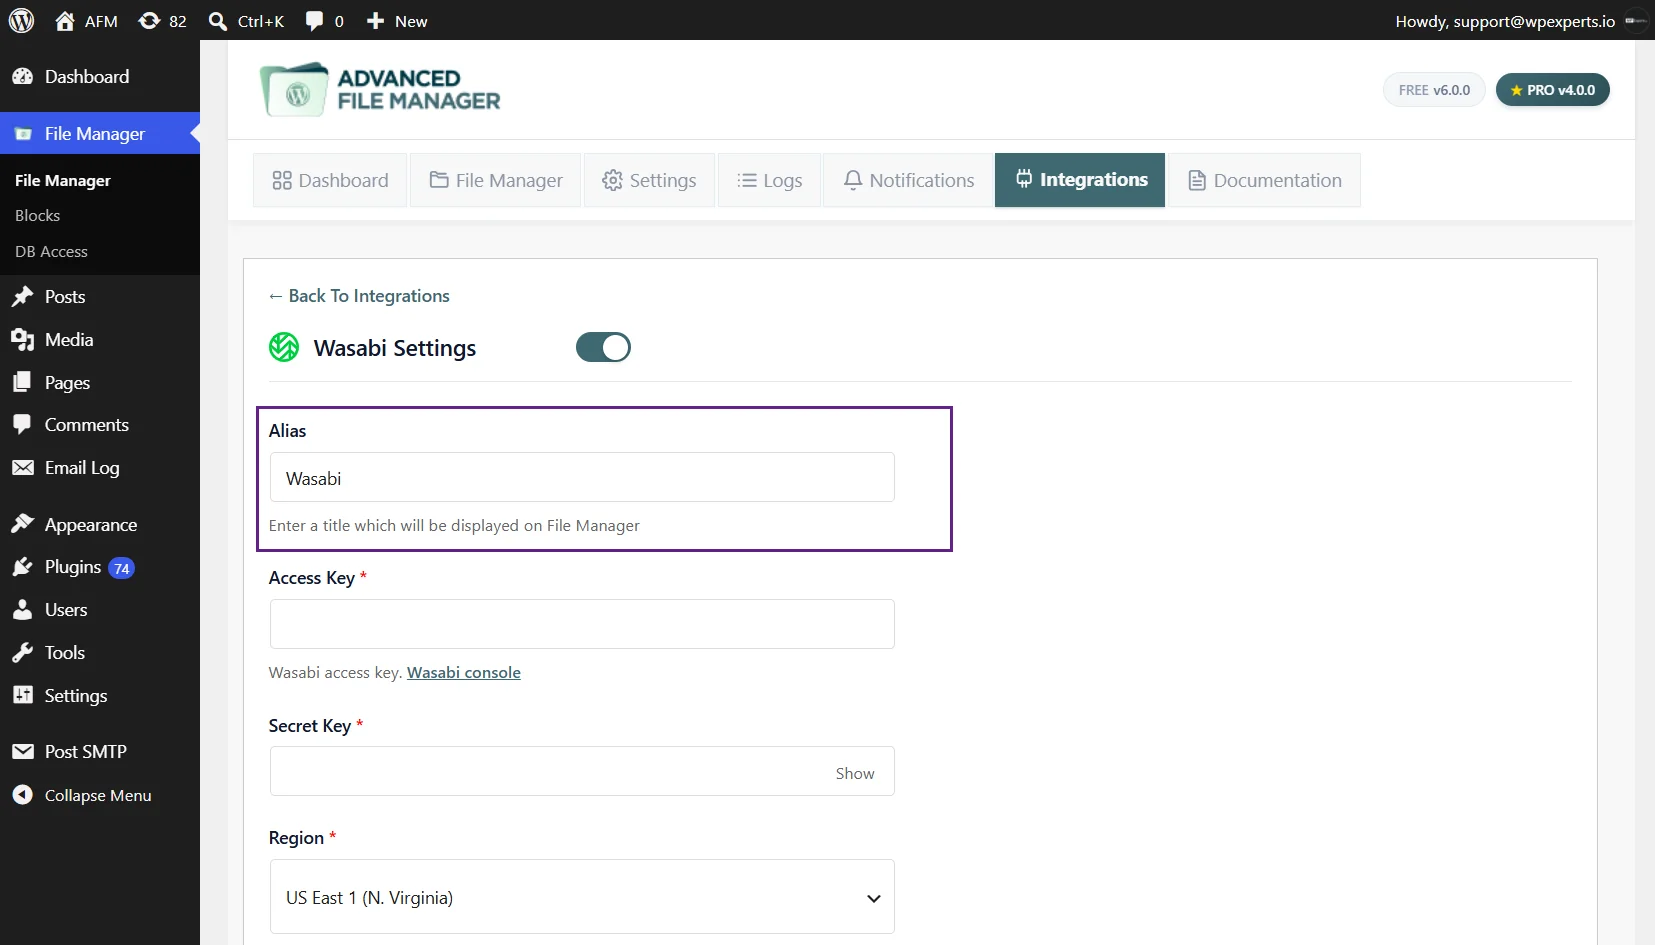
- Now you need to get the following from Wasabi:
- Access Key
- Secret Key
- Region
- Bucket Name
Get Access Key from Wasabi Dashboard
- Visit the Wasabi Dashboard and log in to your account.
- If you do not have an account yet, create one before proceeding.
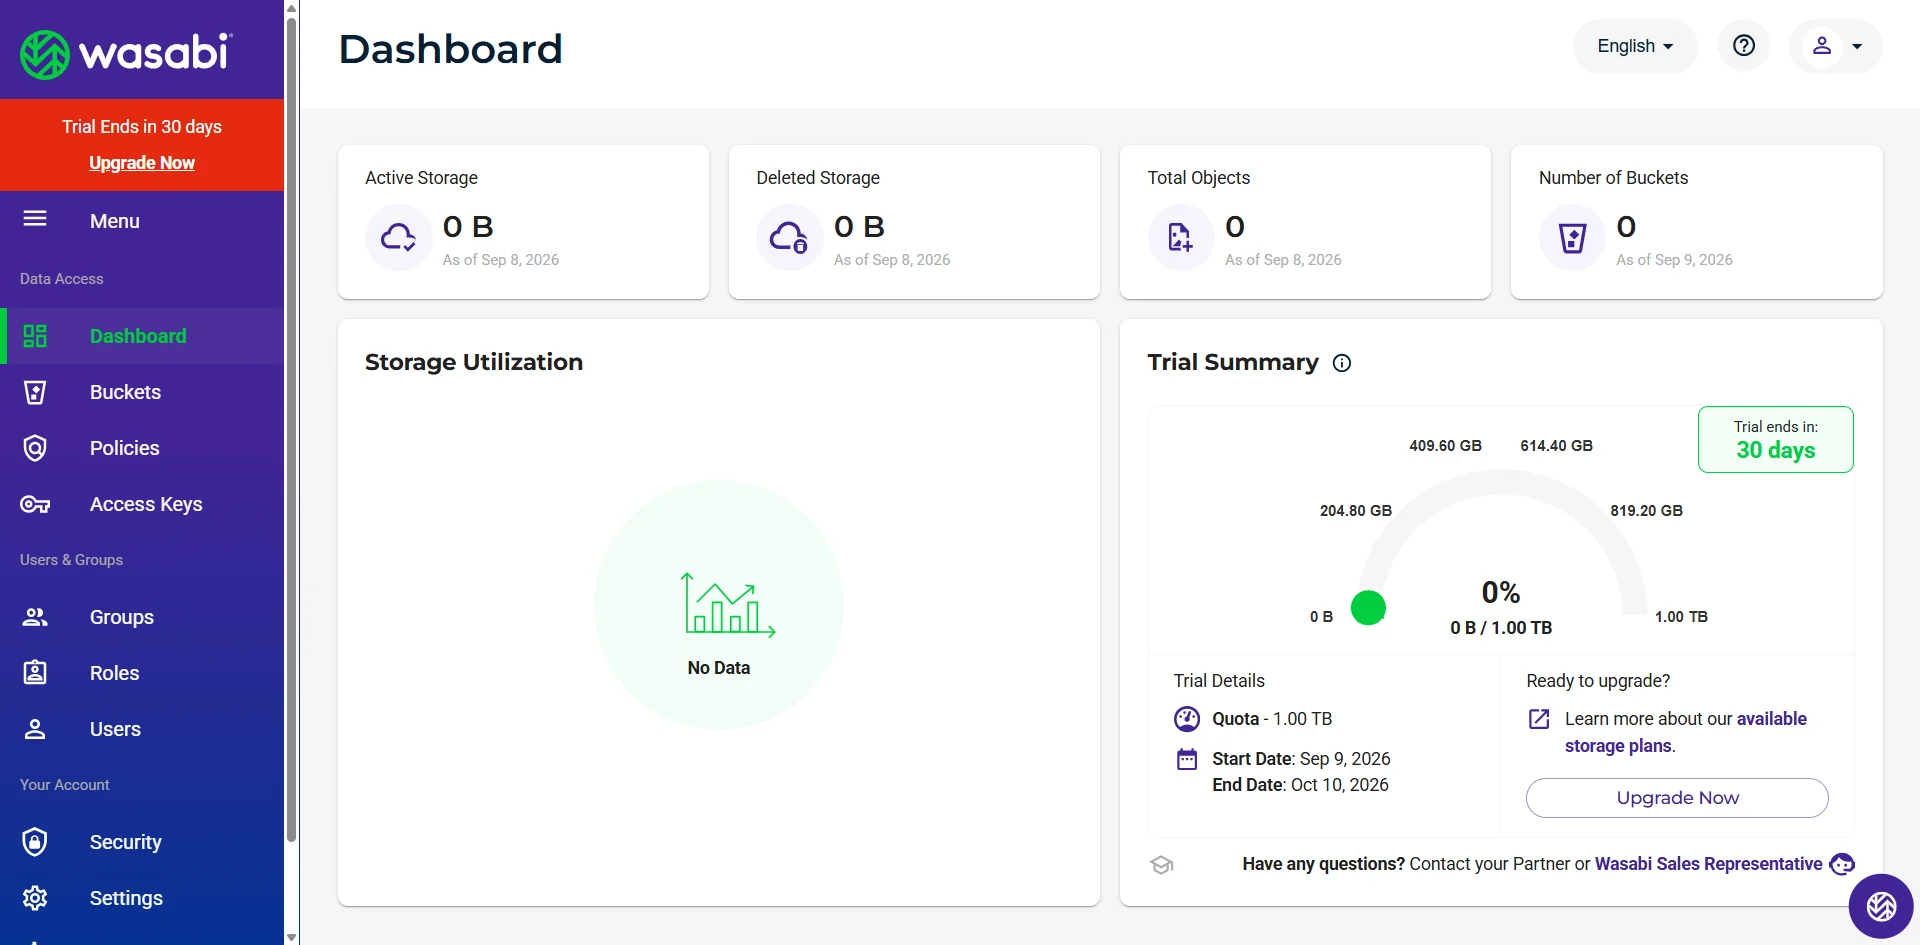
- Navigate to the Access Keys.
- Click on the Create Access Key button.
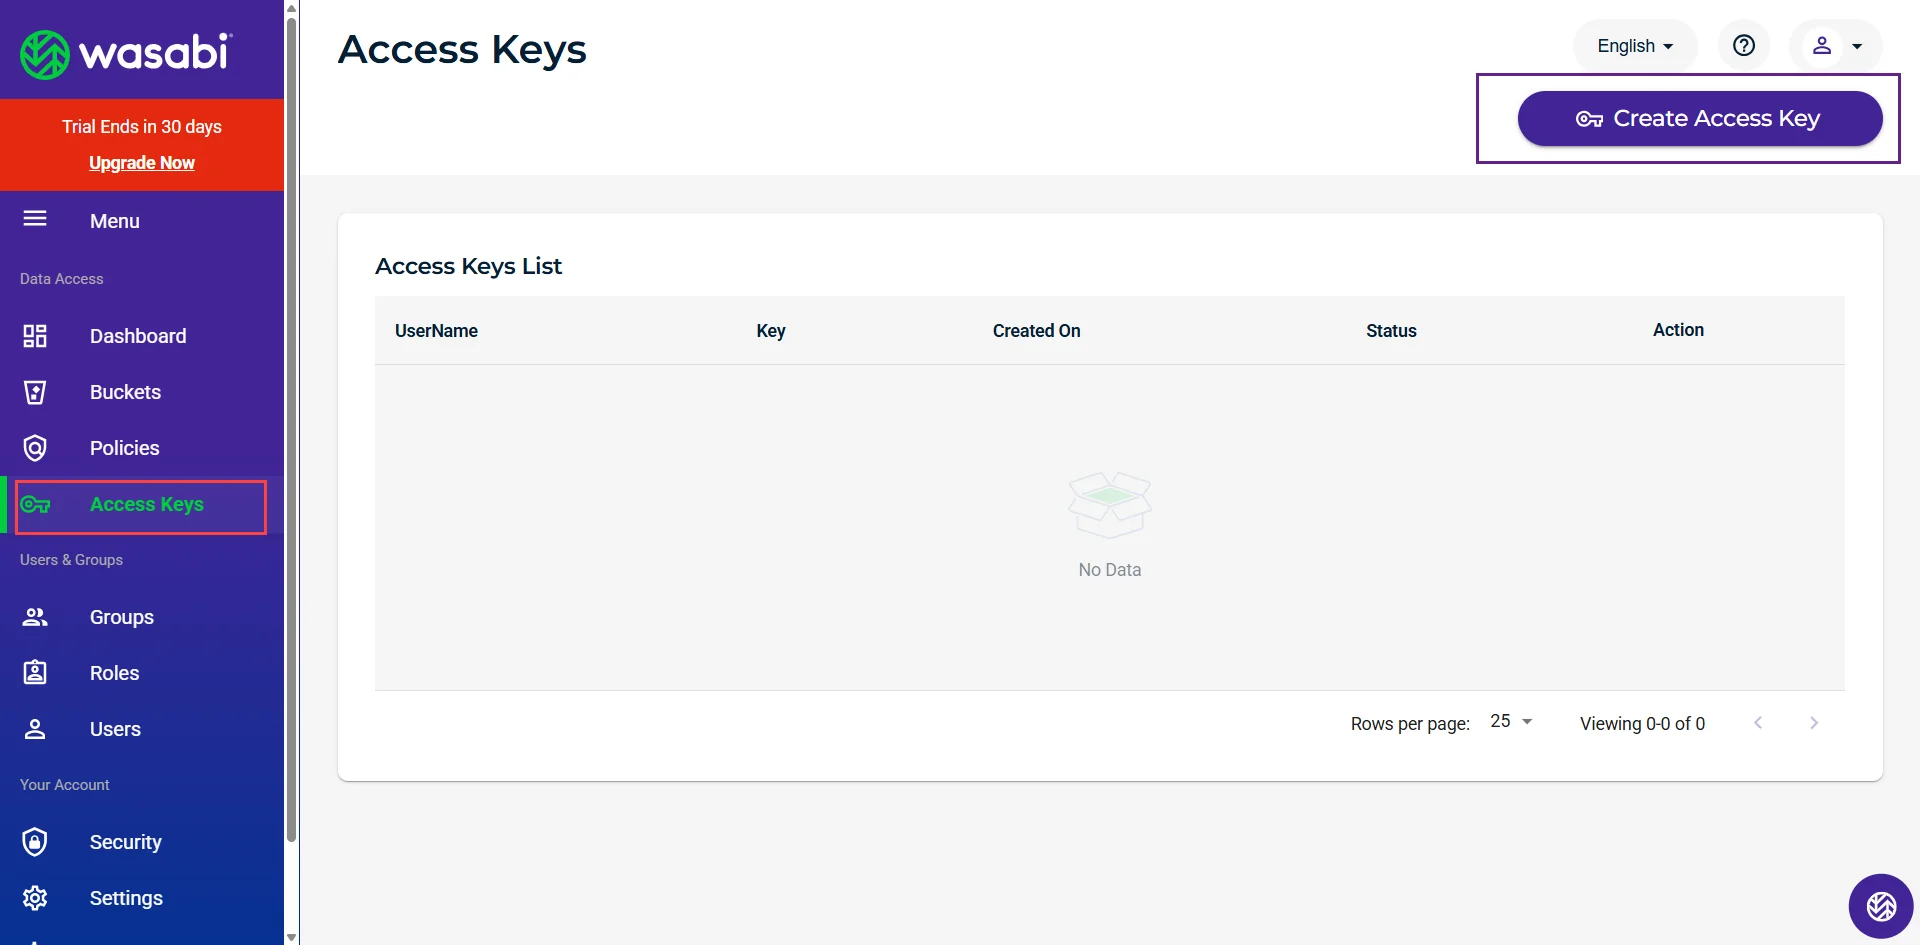
- Select the user type who can use the access key.
- Click on Create.
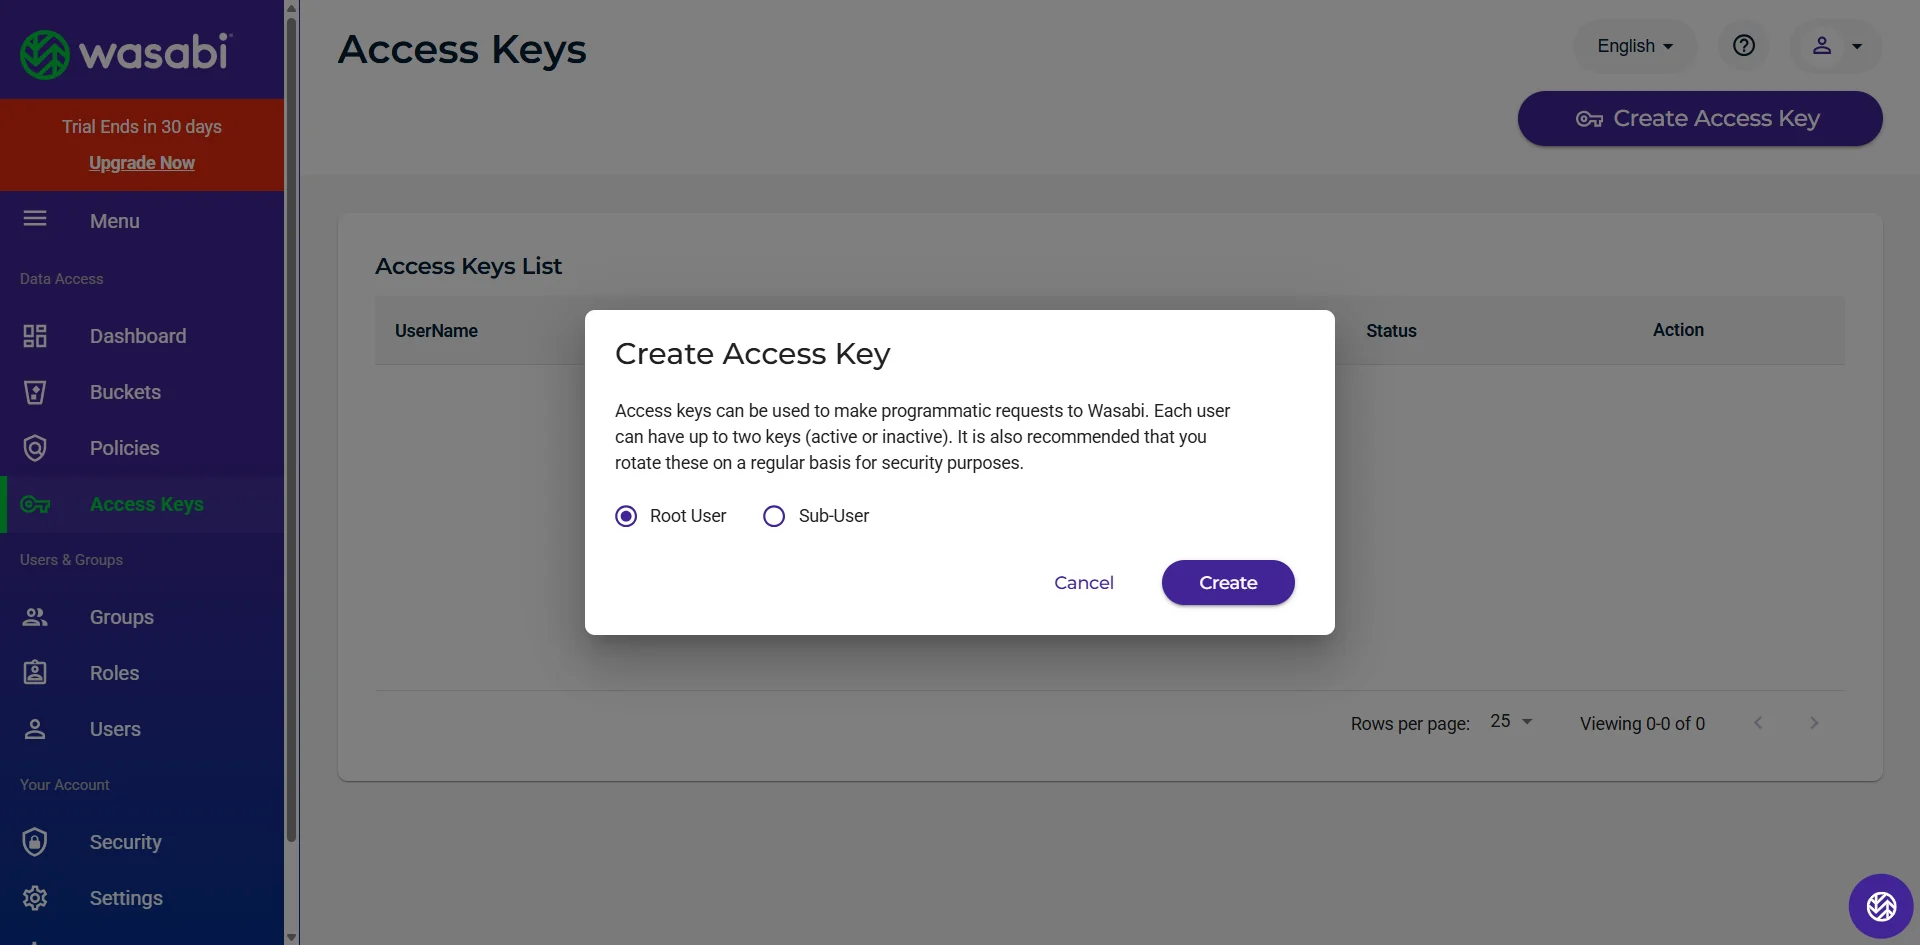
- The Access Key and Secret Key will be created.
- Copy the Access Key and Secret Key.
Create Bucket in Wasabi
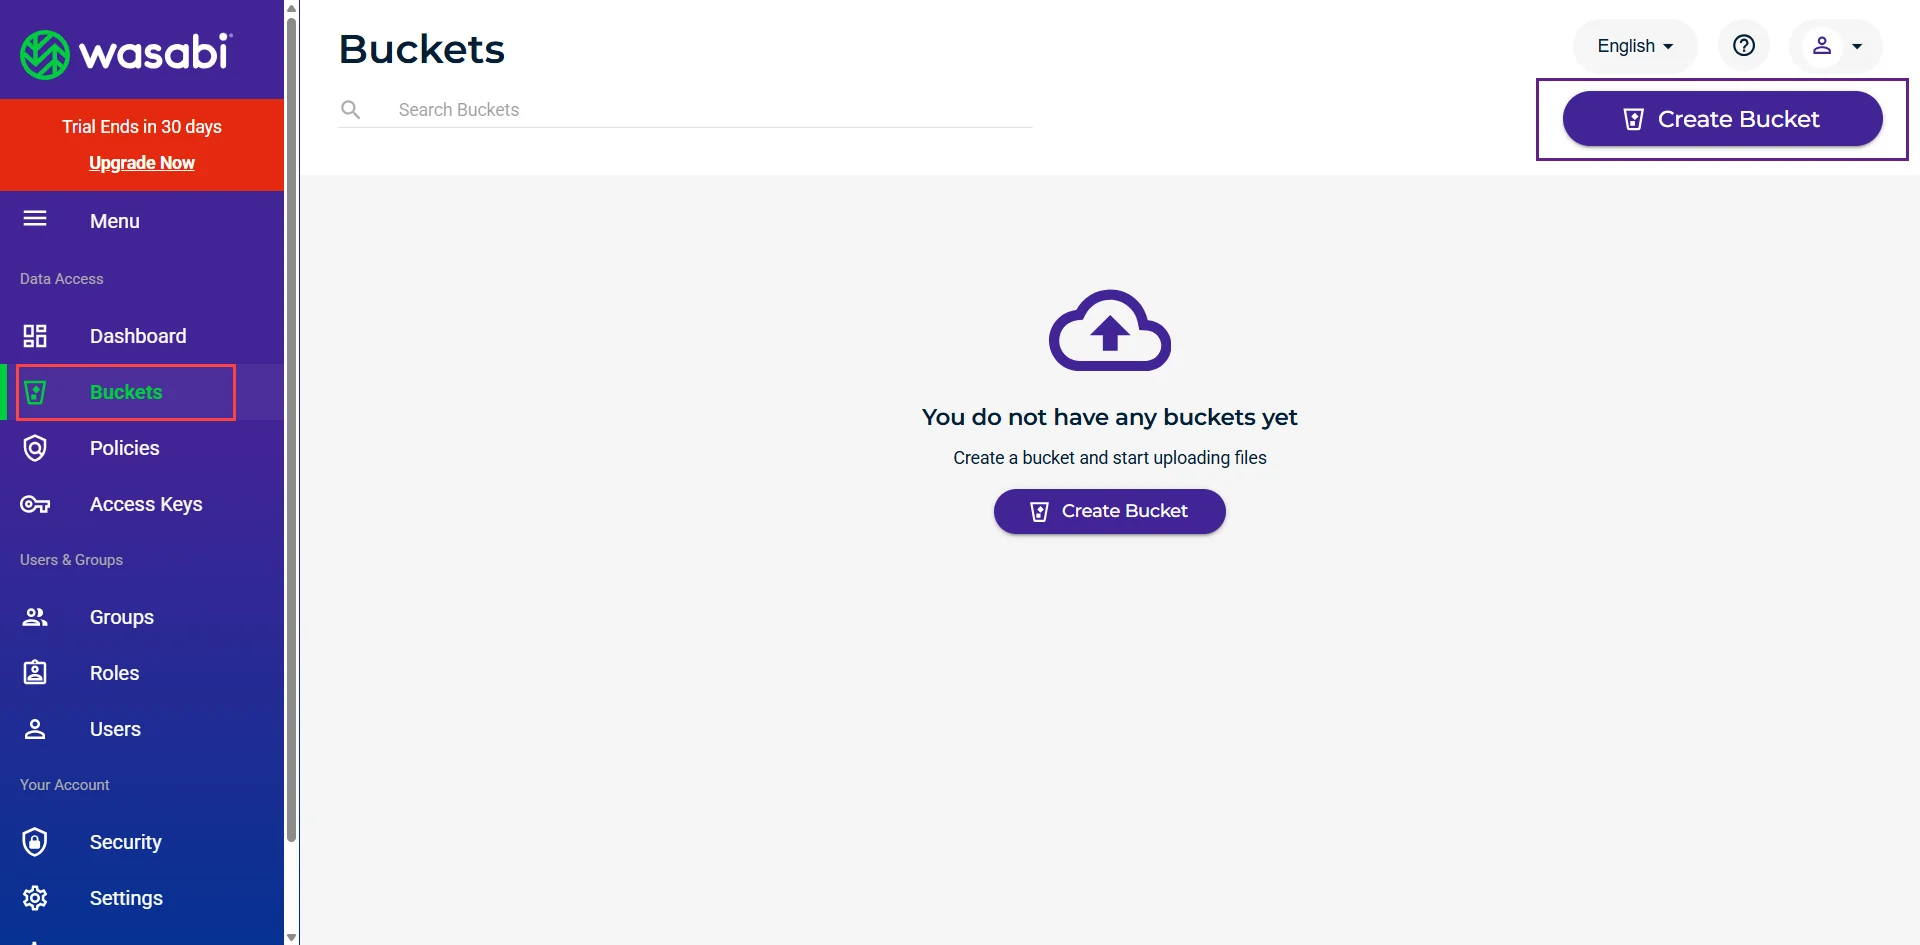
- In order to create the bucket, navigate to the Buckets in the side menu.
- Click on the Create Bucket button.
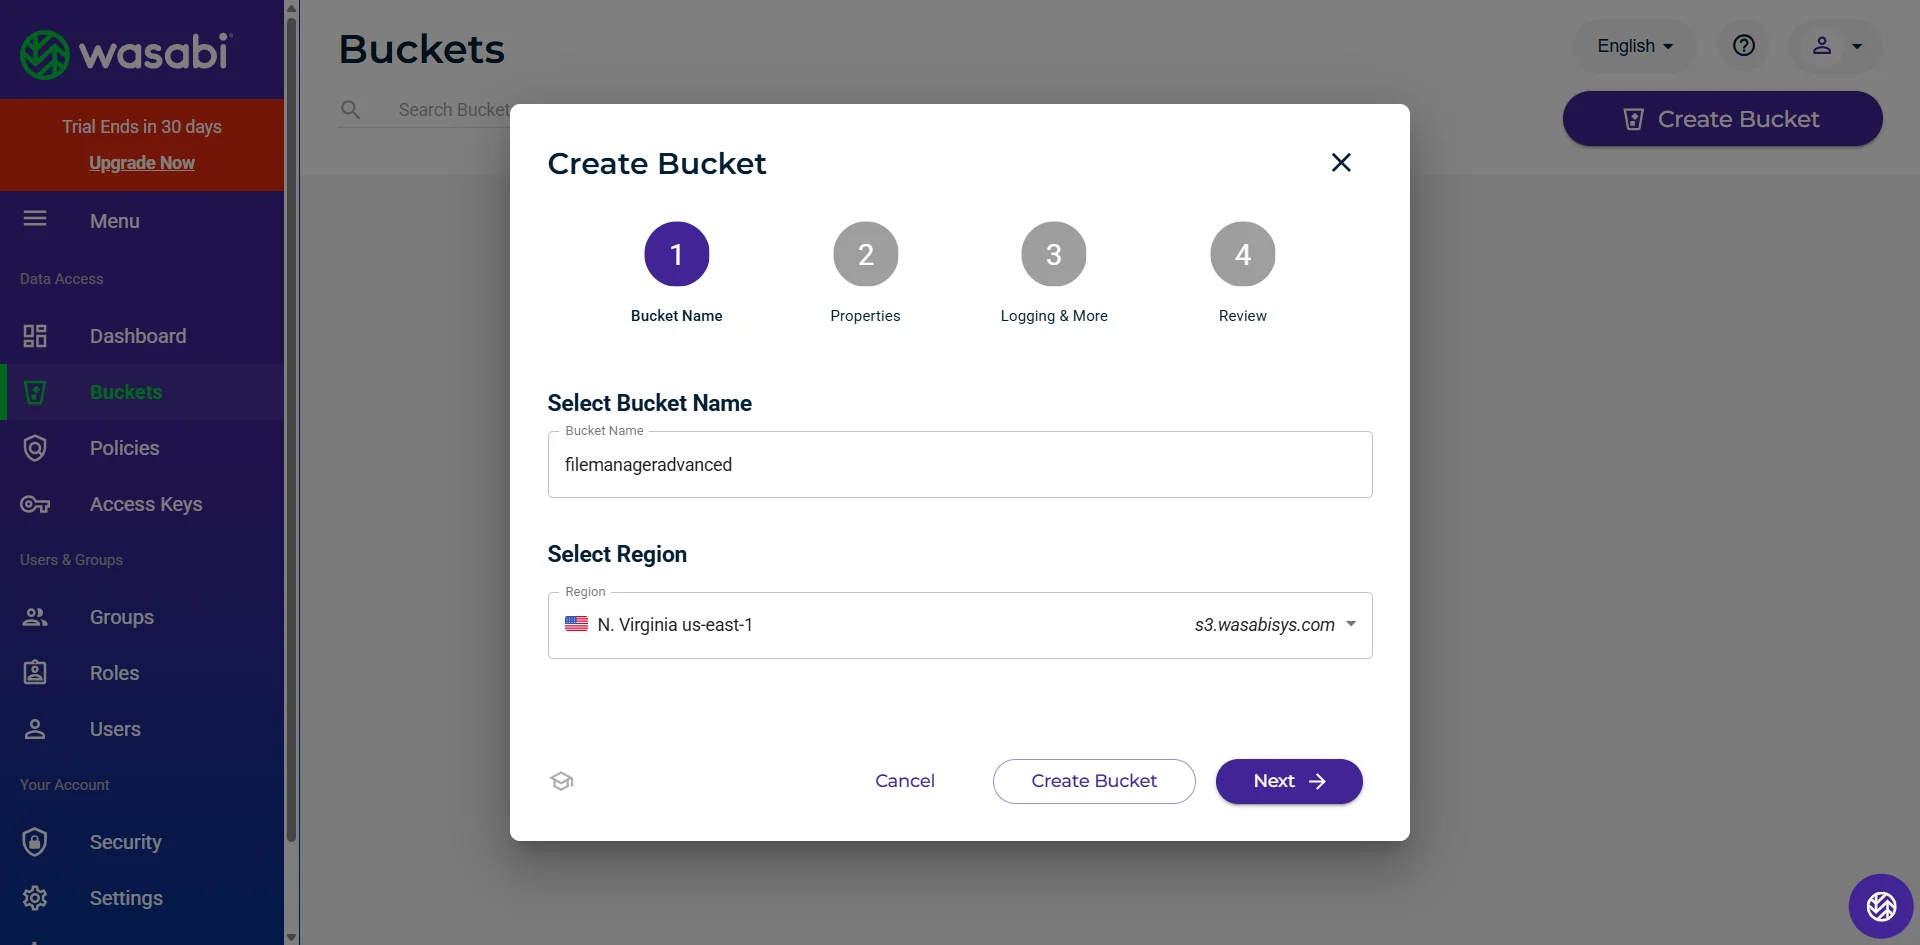
- In the Create Bucket, add the Bucket Name.
- Select the Region of the bucket.
- Click on the Create Bucket button or if you want to configure more settings, you can click Next and configure further options.
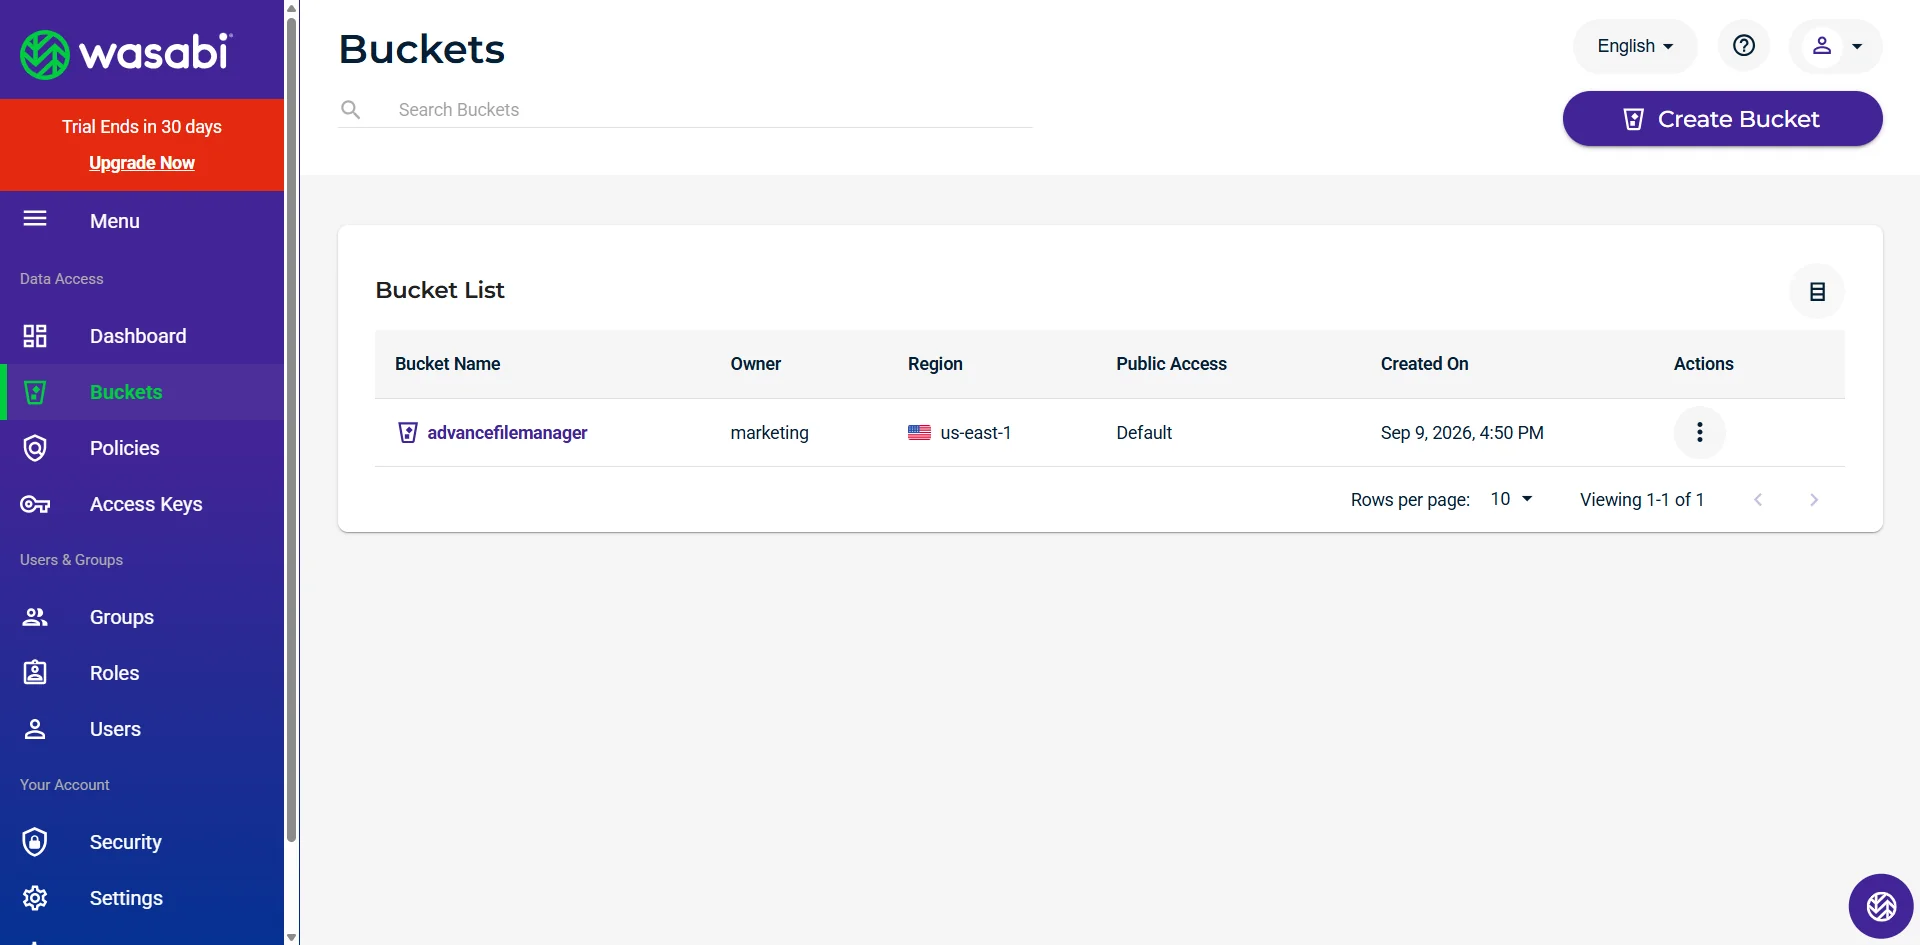
- After creating the Bucket, copy the Bucket Name and Region.
Configure the Wasabi Integration in Advanced File Manager
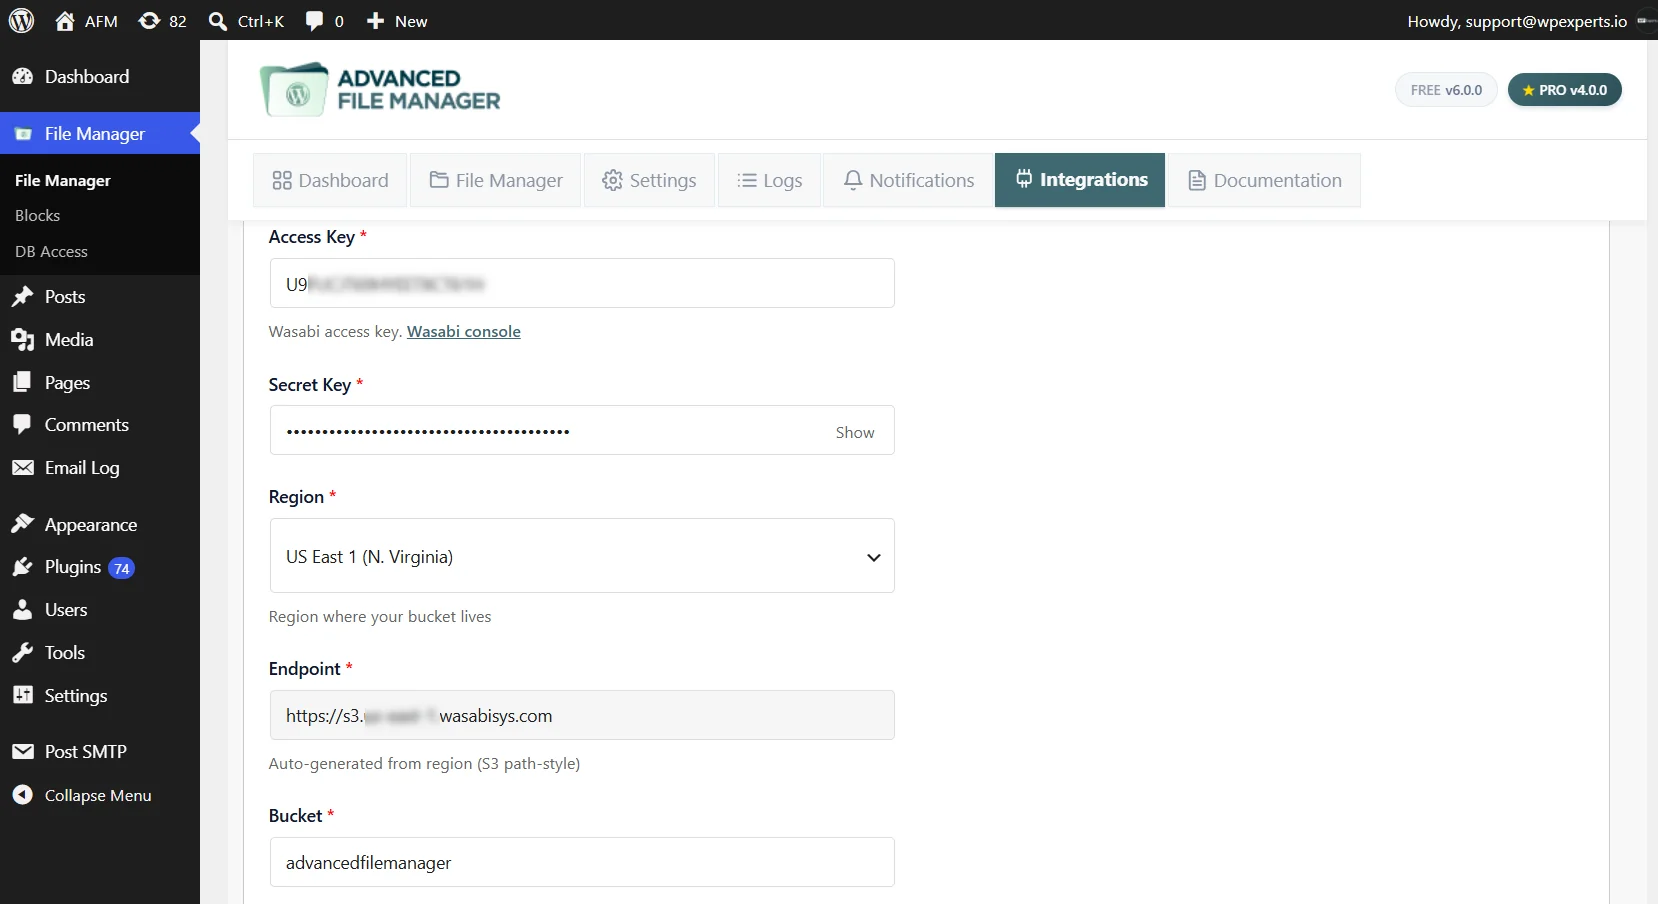
- Return to the Wasabi Settings in File Manager > Integrations and enter the following details copied from the Wasabi:
- Access Key
- Secret Key
- Region
- Bucket
- Click Save Changes.
- You can select the user roles from the User Role Access that is allowed to access the Wasabi file manager.
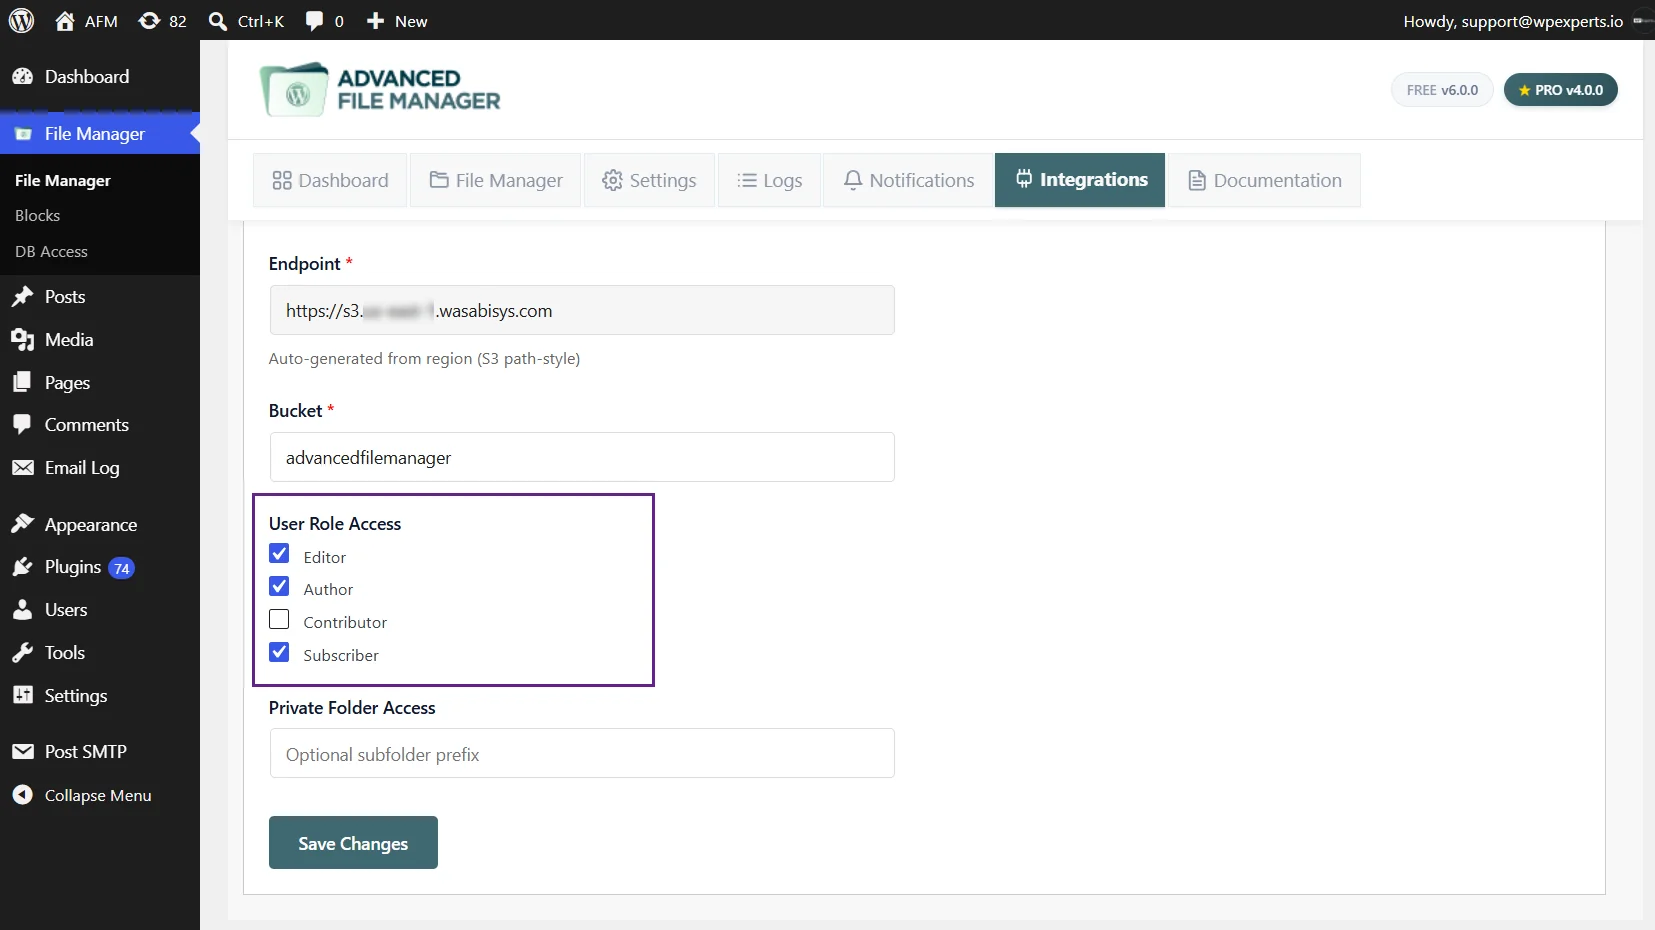
- You can also restrict access to the folder, add folder in Private Folder Access.
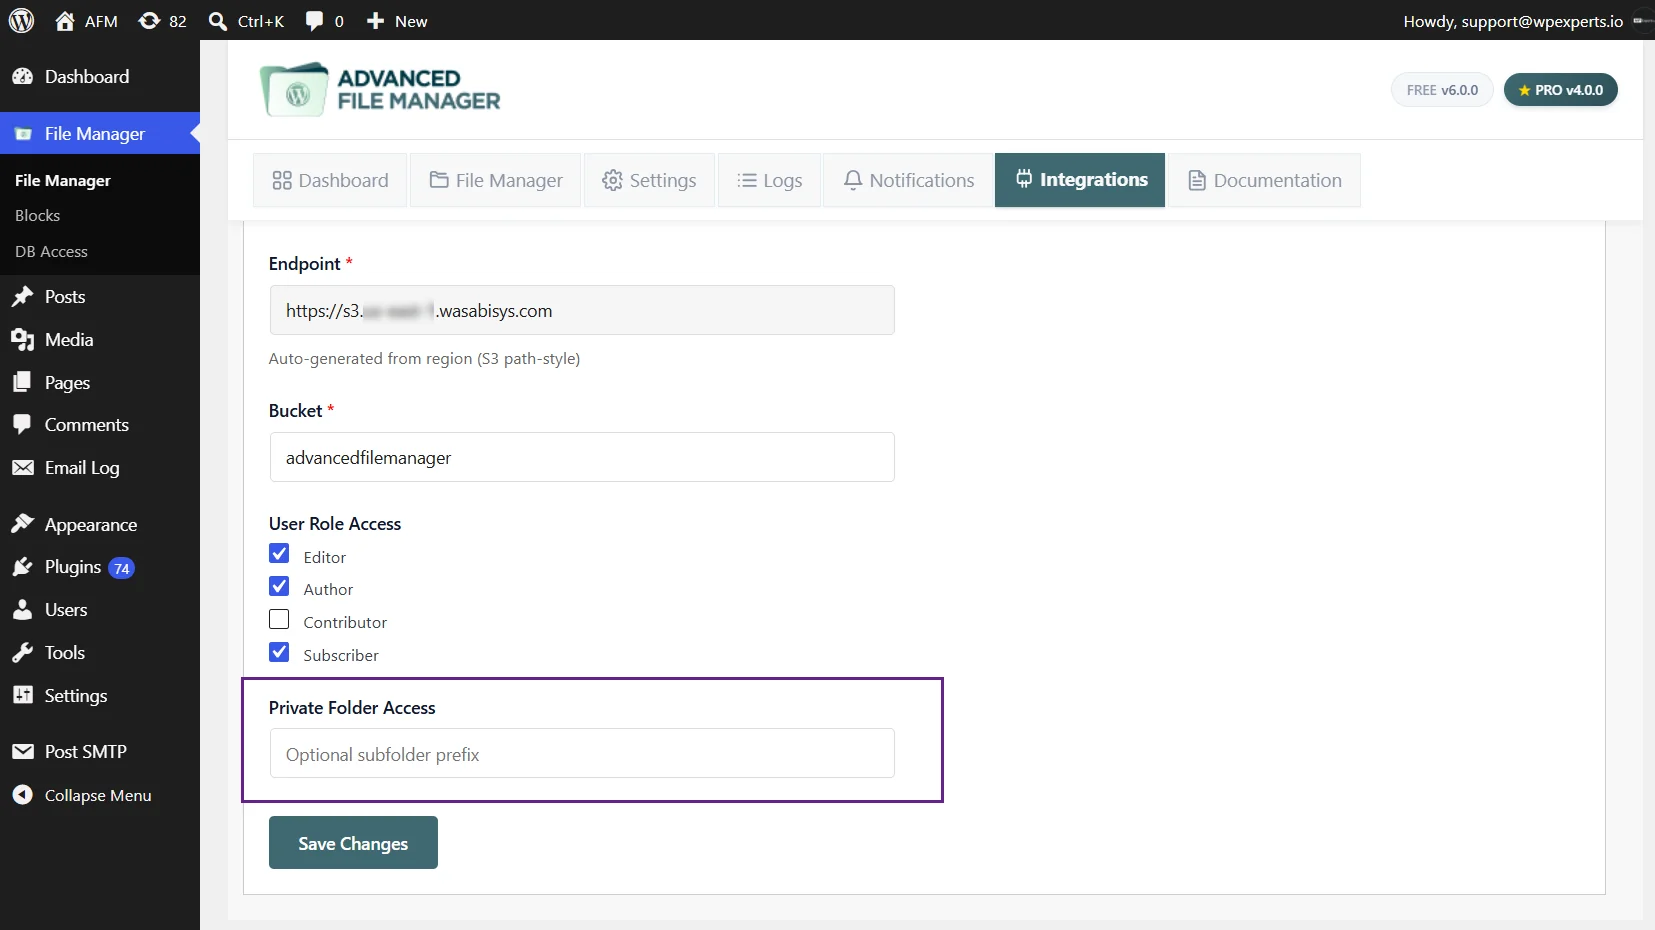
Managing Wasabi in File Manager
- Your Wasabi integration is now successfully configured. You can begin managing your cloud-stored files directly from Advanced File Manager.
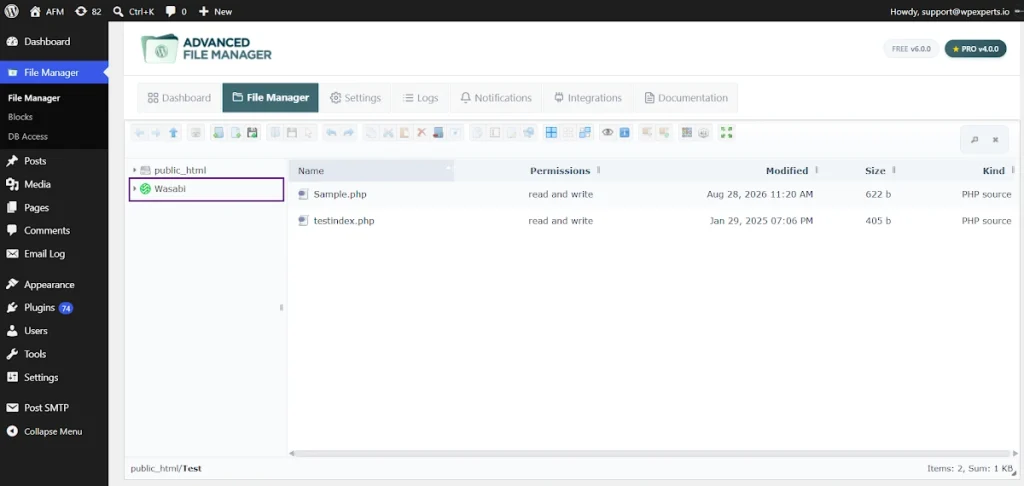
- Navigate to the WordPress Dashboard > File Manager.
- You can see the Wasabi in the tree.
Common Setup Issues
Wasabi Library Not Installed
Click Install Wasabi Library from the integration settings. This only needs to be completed once.
Invalid Access Key or Secret Key
Verify that the Access Key and Secret Key were copied correctly from your Wasabi Console.
Bucket Not Found
Ensure the bucket name matches exactly and that the correct region is selected.
Access Denied
Verify that your Access Key has permission to access the selected bucket.
Wasabi Storage Does Not Appear
Make sure:
- The integration is enabled.
- The connection status shows Connected.
- The bucket name and region are correct.
- Your configuration has been saved successfully.
Your Wasabi integration is now successfully configured. You can begin managing your cloud-stored files directly from Advanced File Manager.
Need Help?
If you encounter any issues during setup, please contact our Support Team. Our experts will troubleshoot the problem and provide a prompt resolution. We are committed to delivering excellent customer service and ensuring a smooth integration experience.
