

User Role Settings
This section will guide the admin to choose the specific roles the admin wants to grant access to the blocks displayed on the frontend of your website.
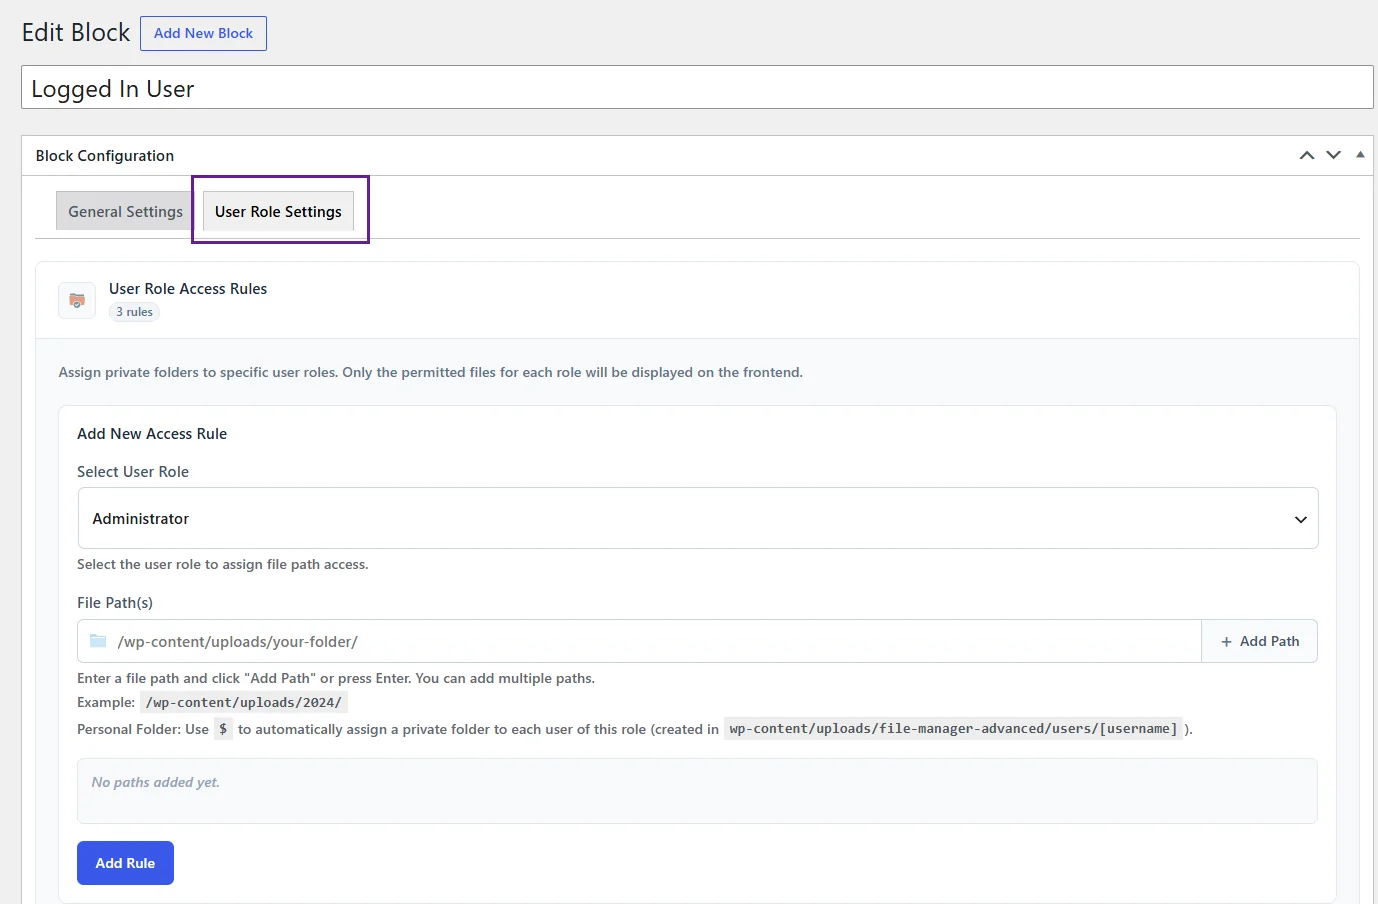
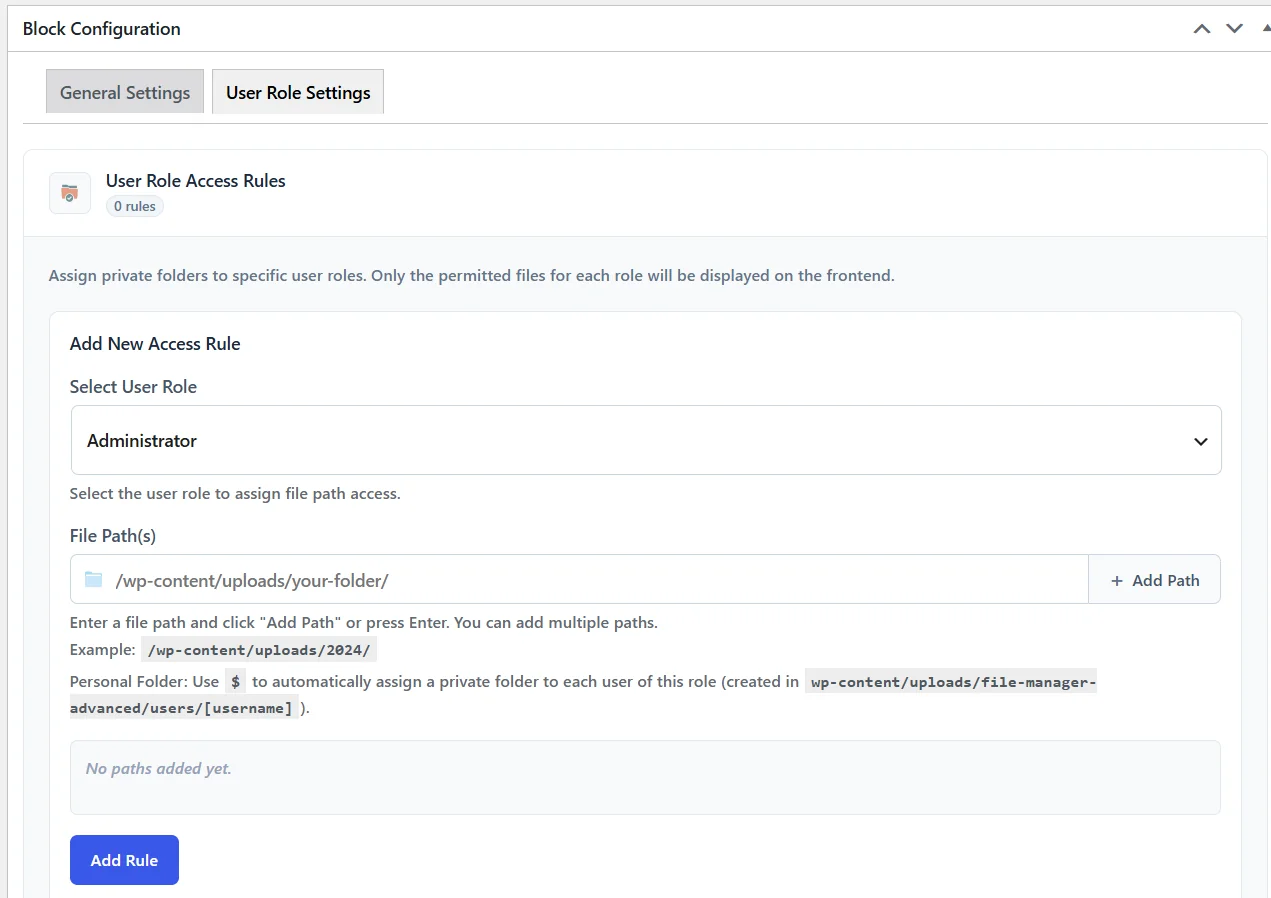
Inside Block Configuration, click the User Role Settings tab (next to General Settings).
This opens the User Role Access Rules panel, where you can:
- See how many rules currently exist (shown as a counter, e.g. “0 rules”).
- Assign private folders to specific user roles so that only the files permitted for each role appear on the front end.
Note: These user roles are fetched from the default WordPress user roles. Therefore, if you have any additional or custom roles created by other plugins, they will also appear in this list.
Access Rule
Under Add New Access Rule:
- In Select User Role, choose the role this rule applies to (e.g., Administrator, Editor, Subscriber, or a custom role) from the dropdown.
- In File Path(s), enter the folder path this role should be allowed to access, for example:
/wp-content/uploads/your-folder/
- Click + Add Path (or press Enter) to add the path to the rule.
- You can add multiple paths to a single role by repeating this step.
- A sample path is shown for reference:
/wp-content/uploads/2024/
- Personal Folder Variable will automatically give each individual user their own private folder (instead of one shared folder for the whole role),
- use the
$username variable in the path, for example:
- use the
wp-content/uploads/file-manager-advanced/users/[username]
- This creates a unique folder per user based on their username, so users of the same role don’t share files with each other.
- Once paths are added, they will appear in the list area (replacing the “No paths added yet.” placeholder).
- Click Add Rule to save the rule to the list of User Role Access Rules.
- Repeat steps 1–5 for each additional role you want to configure.
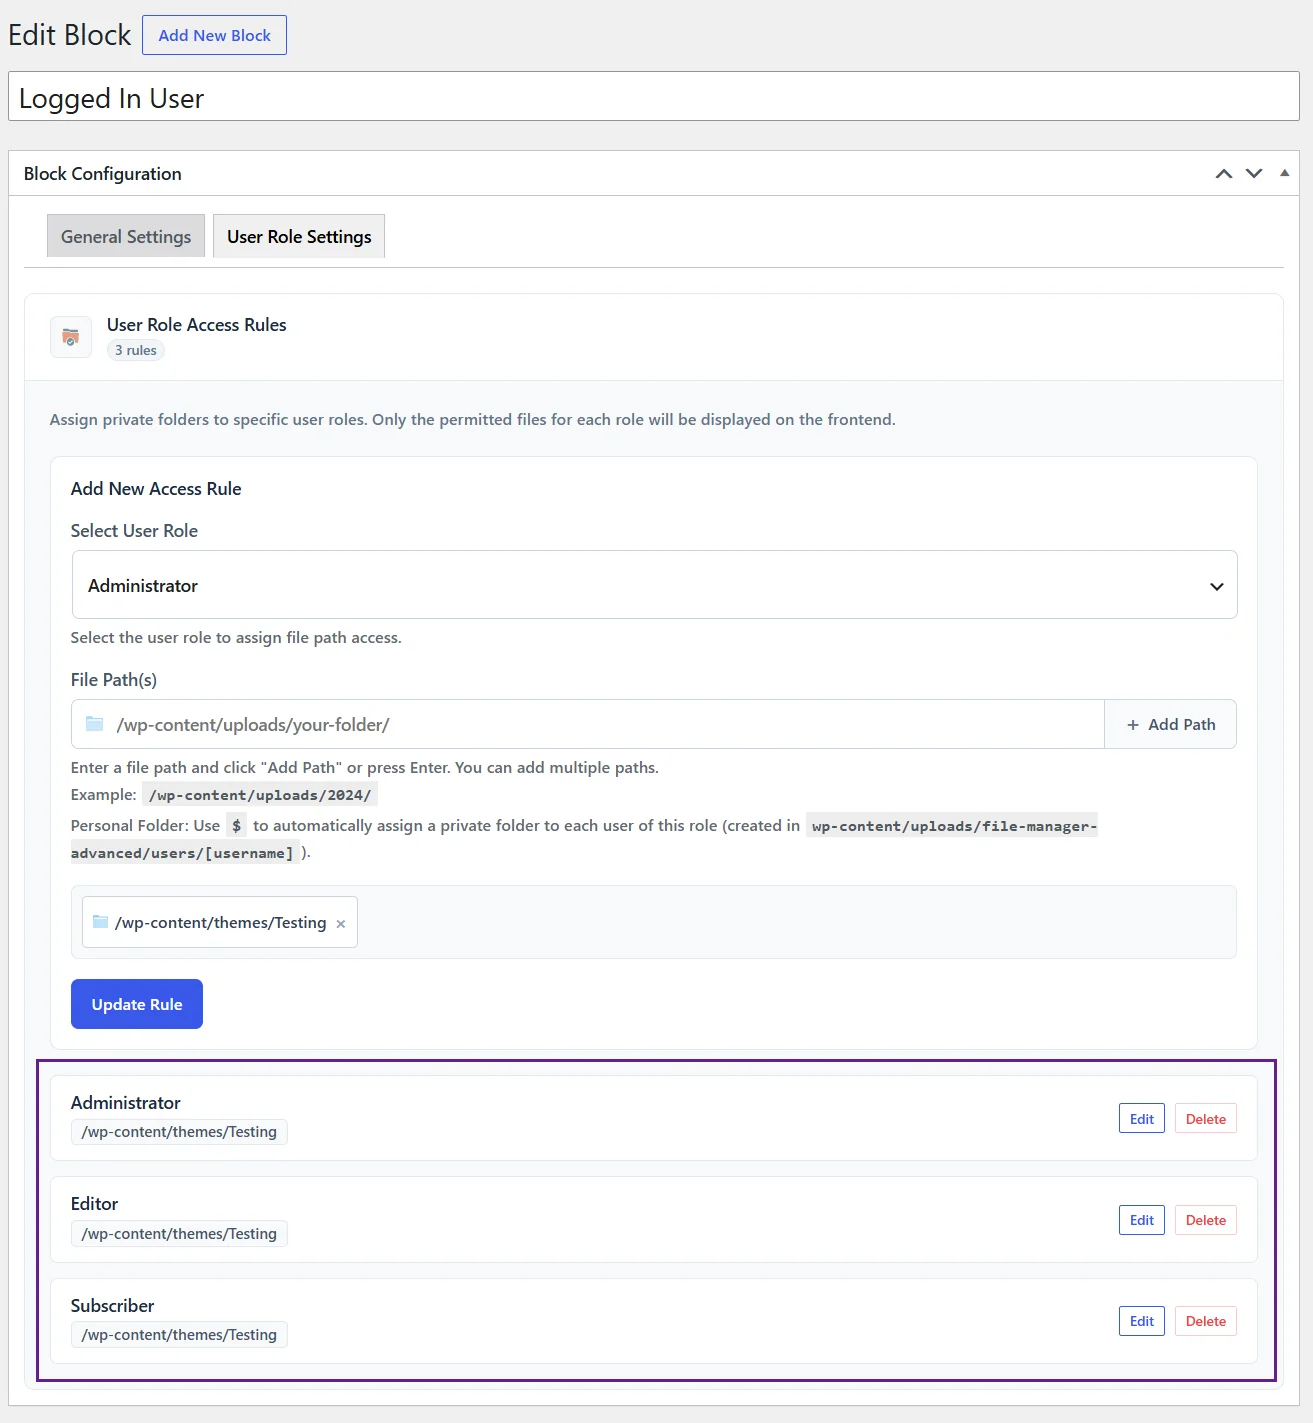
- All the rules added will be listed below.
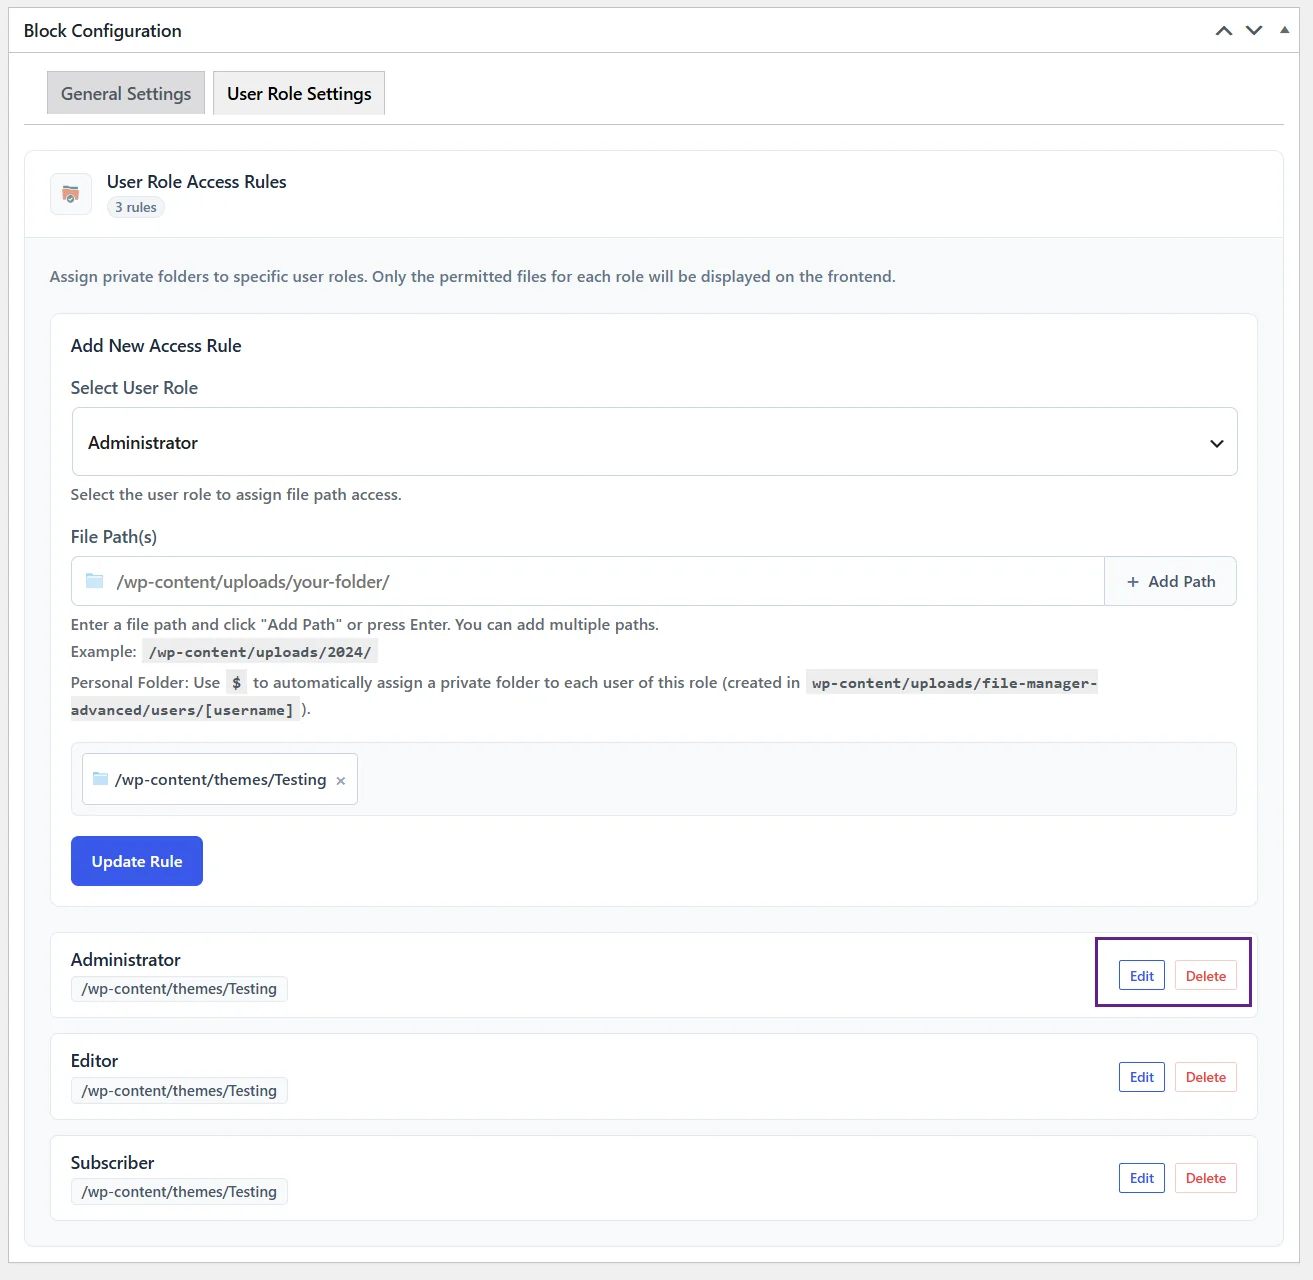
- The rules can be Edited and Deleted.
- Click on the Edit button to edit the existing rule.
- Click on the Delete button to delete the rule.
Need help?
If you face any difficulties or experience unexpected issues, don’t hesitate to reach out to our Support Team. Our experts are always ready to assist you, troubleshoot problems, and provide fast, reliable solutions. We’re committed to delivering exceptional support to ensure your workflow remains smooth and efficient.
