
Configuration Blocks
Advanced File Manager Pro gives you full control over your WordPress site’s files, both on the back end and front end. You can upload, edit, archive, or preview media, manage user access with role-based permissions, and create private or public folders.
The plugin also supports cloud storage integrations (Dropbox, OneDrive, Google Drive) and provides frontend file management through Blocks or Gutenberg blocks. Additional interface options such as themes, view types, and large file handling make file management seamless and flexible.
This document walks you through creating a Block, configuring its settings, and implementing it on the front end to display or manage files directly on your website.
Make sure you have the Advanced File Manager Pro plugin installed and activated on your WordPress site. If you don’t have it yet, explore our plans to get started. If already purchased, follow the Installation and Activation Guide before proceeding.
To access and create Blocks in Advanced File Manager Pro:
1. Go to your WordPress Dashboard.
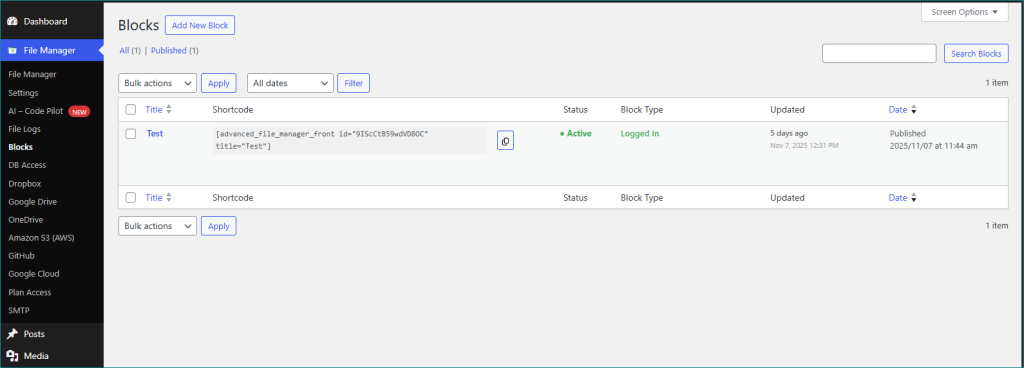
2. Navigate to Advanced File Manager > Blocks (Pro).
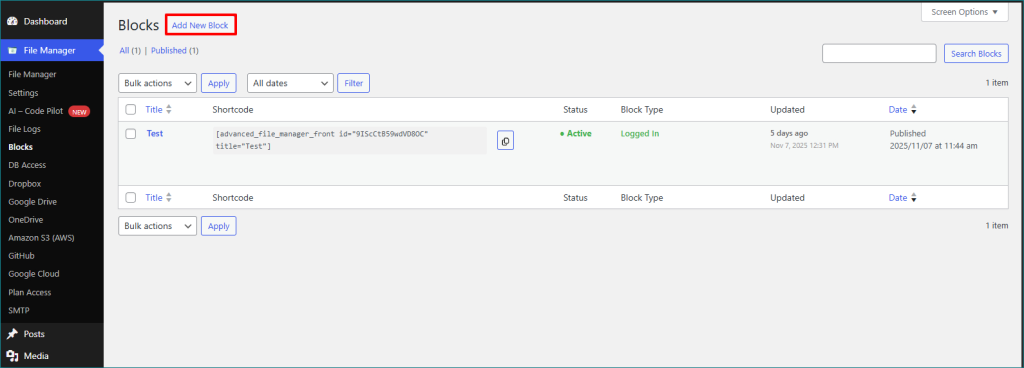
3. Click on the “Create Block” button at the top-left corner.
Block Configuration:
You can now configure your Block by selecting your preferred settings from the available options.
All configured settings will directly affect how the File Manager behaves and appears on the front end of your site.
Let’s explore each Block setting, what it does, how it impacts the front end, and any limitations you should be aware of.
Block Title
Assign a unique name to identify your Block.
Limitation: Must be unique; duplicate titles may cause confusion or overwrite previous Blocks.
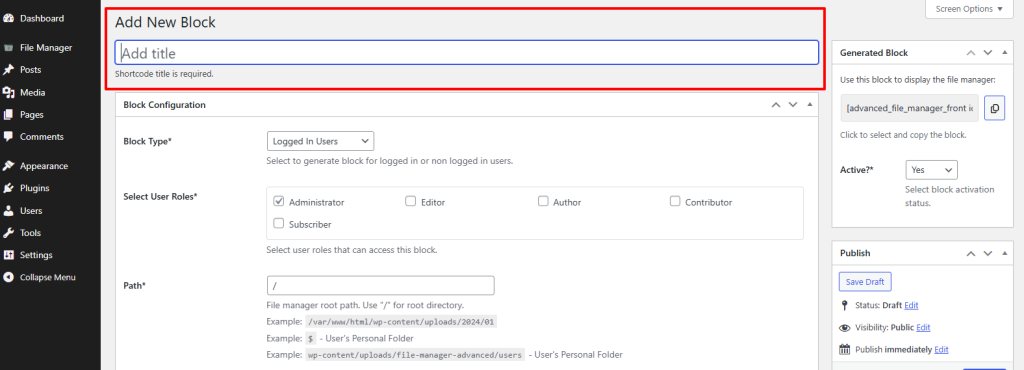
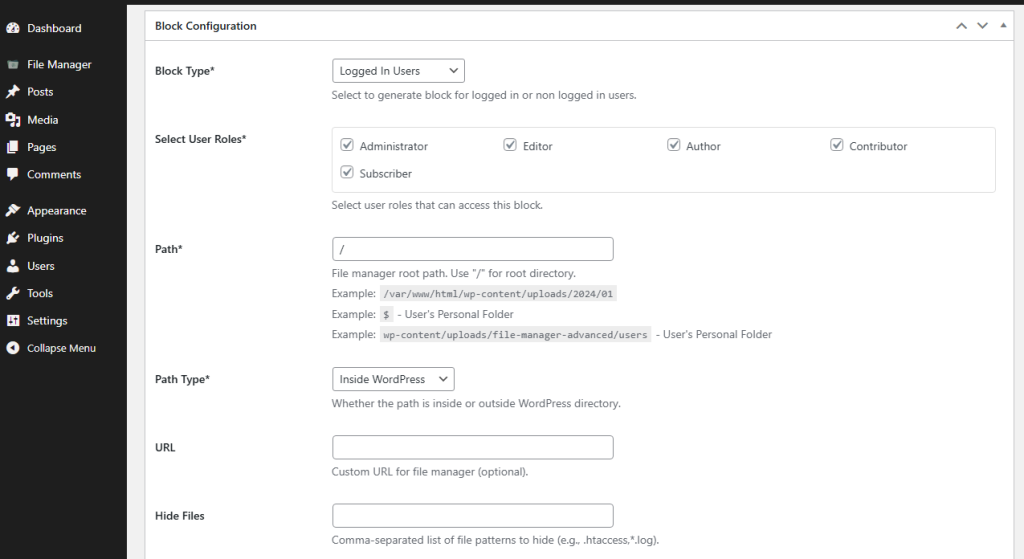
Block Type
Select the type of Block from the dropdown. You can create 2 types of Blocks, namely:
- Logged In Users: Exclusively for the users who have an account on your site & are logged in to your site either as Subscriber, Editor, Author, Contributor etc.
- Non Logged In Users (Site visitors): For the users who don’t bear an account on your site & are visitors, random or usual.
Limitation: Even Logged In Users might not be able to view the front end if their user role is not allowed.
Select User Roles
Select the User Roles, then choose the specific roles you want to grant access to the blocks displayed on the frontend of your website.
Note: These user roles are fetched from the default WordPress user roles. Therefore, if you have any additional or custom roles created by other plugins, they will also appear in this list.
Choose Path
Select the path for displaying files on the frontend according to the assigned user roles.
Before choosing the path, ensure it matches the File Manager Root Path settings.
- Use “/” for the root directory.
- Example: /var/www/html/wp-content/uploads/2024/01
- Use “$” for the user’s personal folder.
- Example: wp-content/uploads/file-manager-advanced/users — User’s Personal Folder
Path Type:
Users can select the type of path for the file manager. The available options are Inside and Outside, which determine whether the selected path is located within or outside the WordPress directory.Default the Inside will selected.
URL
From this configuration setting, users can create a custom URL for their File Manager, allowing personalized access to the file management interface. This is an optional field.
Hide Files:
In this section, users can specify which files they want to hide. Multiple files can be hidden by separating their names with commas.
Example: .htaccess, *.log
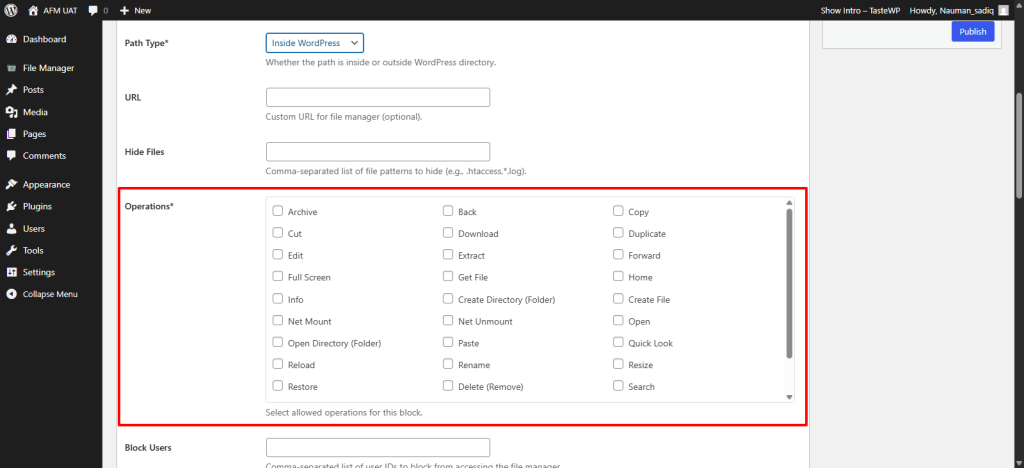
Operations:
This is a mandatory field where users must select the operations they want to allow for specific users or user roles on the frontend. At least one operation must be selected. The available operations include:
- Archive
- Back
- Copy
- Cut
- Download
- Duplicate
- Edit
- Extract
- Forward
- Full Screen
- Get File
- Home
- Info
- Create Directory (Folder)
- Create File
- Net Mount
- Net Unmount
- Open
- Open Directory (Folder)
- Paste
- Quick Look
- Reload
- Rename
- Resize
- Restore
- Delete (Remove)
- Search
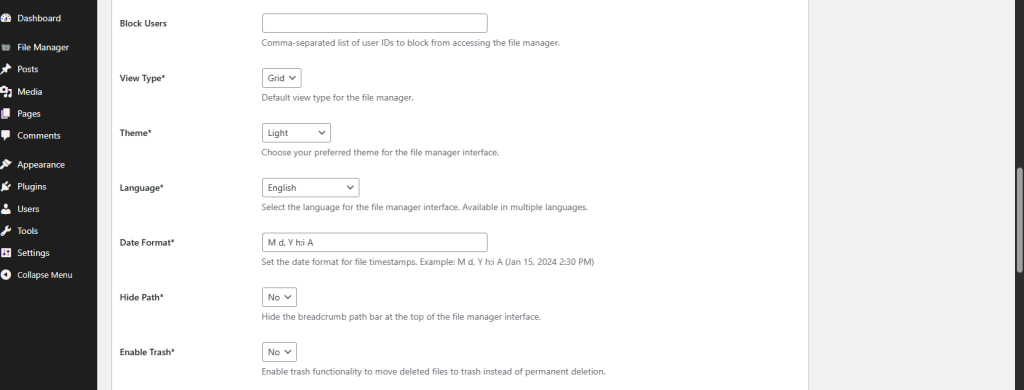
Block Users:
In this section, users can specify which users to block. The usernames should correspond to their respective user roles. Multiple users can be blocked by separating their names with commas. Once entered, the specified users will be blocked, and the blocking will apply based on their assigned user roles.
View Type:
In this section, users can select how the File Manager will be displayed on the frontend. The available display options are Grid and List. The UI will adapt based on the chosen view type, allowing users to control how the File Manager appears when using the shortcode.
Theme:
Multiple themes are available for the File Manager when using the shortcode. The options include Light, Dark, Mono, Bootstrap, Windows 10, and Grey themes.
Note: Some themes may vary depending on the plan you are using in Advanced File Manager.
Language:
Users can select the preferred language from multiple available options. The File Manager interface will automatically translate its content into the chosen local language.
Date Format
This option allows users to set the date format while creating the shortcode. They can choose the format that suits their needs, such as Month–Date–Year or Date–Month–Year, and more.
Hide Path
This setting hides the breadcrumb path bar displayed at the top of the File Manager interface. It is purely a visual preference and offers Yes/No options.
Enable Trash
When enabled, deleted files are moved to the Trash folder instead of being permanently removed. This allows users to recover files whenever needed.
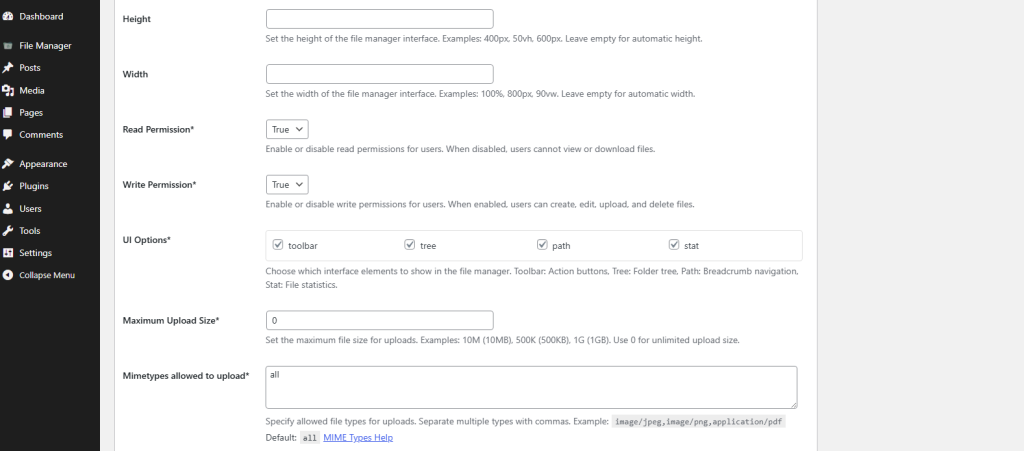
Height & Width
Users can customize the height and width of the File Manager displayed via blocks shortcode. The File Manager’s frontend appearance will adjust based on the values they set.
Note: The Width and Height values must be entered in px (pixels), such as 2000px. If no values are provided, the File Manager will automatically apply default dimensions.
Read Permission
When enabled, users can view and read files. If this permission is disabled, users will not be able to download or view any files. This setting controls read-only access for the selected users or user roles.
Write Permission
When enabled, users can create, edit, delete, and write files within the File Manager through the blocks. If disabled (set to false), the user will not be allowed to perform any write actions. This setting determines full file-editing capabilities.
UI Options:
Users can choose which interface elements should be displayed in the File Manager when using the shortcode. These options allow customizing the frontend view:
- Toolbar: Shows action buttons
- Tree: Displays the folder tree
- Path: Shows the breadcrumb navigation
- Stat: Displays file statistics
Users can enable or disable any of these elements based on their preferences.
Maximum Upload Size:
Users can define the maximum file upload size for the File Manager. This works well with user role restrictions and allows different upload limits per setup.
Examples of valid values:
- 10M → 10MB
- 500K → 500KB
- 1G → 1GB
- 0 → Unlimited upload size
Mimetypes Allowed to Upload:
Users can specify which file types (MIME types) are allowed for upload. Multiple MIME types can be added by separating them with commas.
Example:
image/jpeg, image/png, application/pdfDefault: All file types are allowed unless restricted.
For additional MIME type reference, visit MIME Types Help.
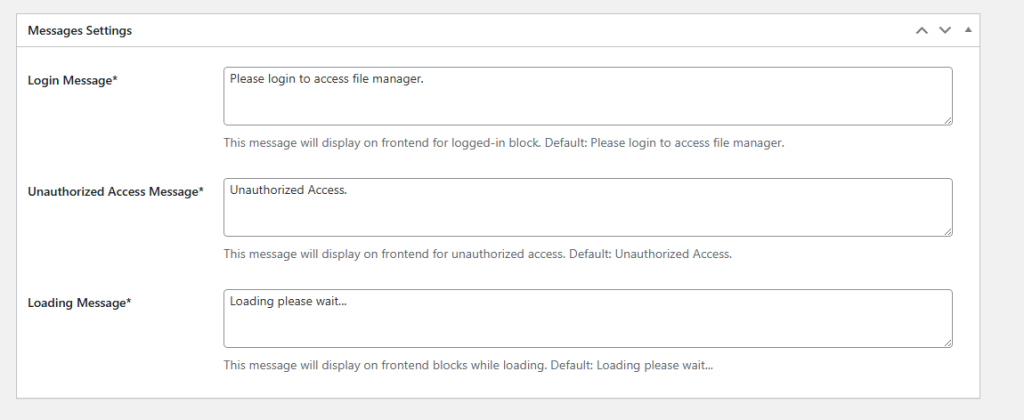
Message Settings:
The Blocks include several message settings, each triggered at specific events on the frontend when the block is displayed on the website.
Login Message
This message appears on the frontend when a user must be logged in to access the File Manager.
Default: Please login to access file manager.
Unauthorized Access Message
This message is shown when a user attempts to access the File Manager without proper permissions.
Default: Unauthorized Access.
Loading Message
This message is displayed while the File Manager block is loading on the frontend.
Default: Loading, please wait…
Need help?
If you counter any issues or need further assistance, please don’t hesitate to contact our Support Team. Our experts are always ready to help and will work with you to resolve any problems promptly. We take pride in delivering reliable support and excellent customer service.
