Managing a growing WordPress website means dealing with thousands of media assets, from high-resolution images to critical PDF documents. Over time, the default WordPress Media Library becomes cluttered and difficult to navigate.
A cluttered and disorganized Media Library can lead to site performance issues, broken links, and, most notably, difficulty locating the right media file when needed.
We have identified two highly effective methods to reclaim control over your WordPress file structure.
In this guide, we will learn what the WordPress media library is and show you how to organize your WordPress Media Library using both traditional FTP access and the modern, secure way of using a file manager plugin.
Let’s start.
What is a WordPress Media Library?
The WordPress Media Library is the central hub for all the images, videos, audio files, and documents on your website.
You can easily access this crucial area by navigating to Media ⇒ Library in your WordPress admin dashboard. It’s the place where you upload, view, edit basic details, and manage the media assets for all your content.
While you see a clean list in the dashboard, the media files are physically stored on your web server. Specifically, they live in the /wp-content/uploads/ directory of your site’s file system.
By default, WordPress automatically sorts these files into subfolders organized by the year and month they were uploaded, such as /2025/10/. While this date-based method is automatic, it does not allow for grouping files by topic or project, which is why your file management quickly becomes an issue.
Why Organize WordPress Media Library?
A primary reason to organize your files is to save time and increase efficiency.
When your site grows to include thousands of media assets, navigating through endless date-based folders becomes impossible.
Creating logical folder structures for items like “Product Photos” or “Blog Headers” allows you to find what you need instantly. This improved media file management drastically speeds up your entire content creation workflow.
Proper organization also significantly improves your site’s technical health.
A cluttered library makes it more challenging to identify and remove unused, outdated, or potentially hazardous files. More importantly, keeping your files neatly structured helps prevent common issues, such as broken links, when moving or renaming items later on.
For developers and administrators, a clean file system makes debugging and site maintenance significantly easier.
How To Organize WordPress Media Library: 2 Effective Ways
Let’s explore two methods. The first method involves the traditional, external approach using server credentials and a separate software tool. Let’s begin by exploring how to organize your library using FTP.
Method 1: Organizing WordPress Media Library Through FTP
An FTP client, or File Transfer Protocol client, is a specialized software tool that acts as a secure bridge between your local computer and the hosting server of your website. It allows you to see the actual files and folders on your server, much like you view documents on your hard drive. This will enable you to upload, download, move, and manage all your site’s raw data. Direct server access is necessary when the standard WordPress dashboard options are too limited.
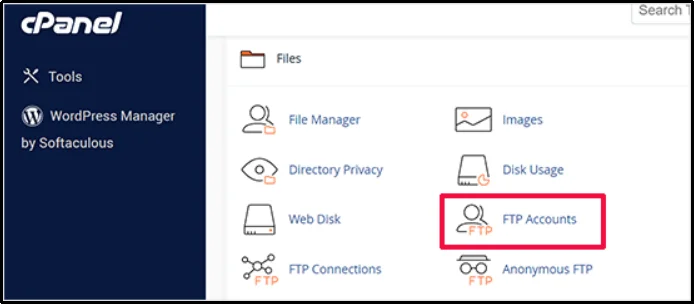
There are a couple of common ways you can connect to your server using FTP. The simplest approach is often through your hosting provider’s file manager, typically located inside your cPanel or hosting dashboard. Alternatively, you can download a dedicated desktop application, such as FileZilla, onto your computer.
If you choose to use an external FTP client, you must first complete a technical setup process.
This involves “connecting” the client to your site using specific credentials, including your host address, username, and password. Getting these crucial details right and configuring the connection can be confusing and prone to errors for new users. This complexity is why many people find this manual method time-consuming and frustrating.
While FTP gives you total control over your file system, it carries a high risk of breaking links or even your entire site if you make a mistake. Due to the technical setup and the potential for errors, this method is generally not recommended for those with limited technical knowledge.
For anyone seeking a safer, easier, and much more modern approach to organizing their media, we strongly recommend skipping this step and moving straight to Method 2.
If you want to go with the FTP, here’s what you can do:
- Access your WordPress files using FTP. You can use a desktop FTP client, such as FileZilla, or access it through your web hosting control panel (cPanel).
- Go to the /wp-content/uploads/directory. This is where WordPress stores the uploaded media.
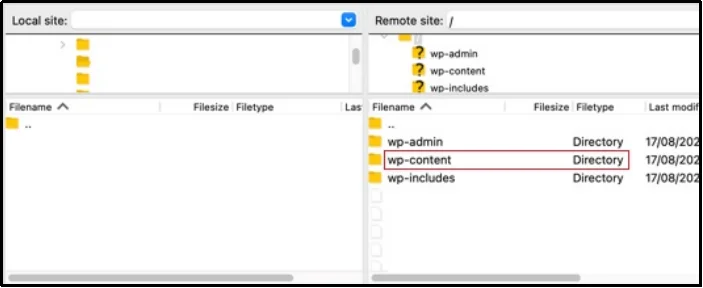
- Now, review the folder. WordPress usually generates folders categorized by date (year and month when the media was uploaded). For instance, folders such as 17/08/2025/ will contain content uploaded in August 2025.
⚠️ Before making any changes, remember to create a backup of your files. This allows for reverting changes in case anything goes wrong. This is not an optional step; please make a backup before proceeding.
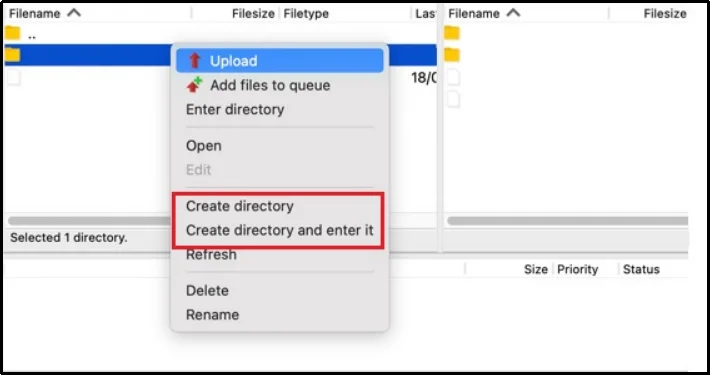
- Once the backup is complete, you can add more subdirectories inside the folders by right-clicking and selecting “Create directory.” Allowing you to create folders and subfolders to organize your content. You can create separate folders for specific blogs, images, and your other media.
- When uploading media through FTP, ensure that you place the files in the correct subdirectory.
- Not just creating new folders, but you can also utilize your FTP to rename, move, or delete existing media files as necessary.
If this process was a little intimidating for you, don’t worry! We have a much easier and better option for you. Keep reading for the second method, which is simple enough that even someone with little to no technical knowledge can easily follow.
Method 2: Using a File Manager Plugin
The simplest and most secure way to organize your WordPress Media Library is by using a dedicated file manager plugin.
For this method, we will use Advanced File Manager, which is widely regarded as the best file management solution available for WordPress. Trusted by over 200,000+ website owners with a high rating, this tool brings the full power of an FTP client right into your dashboard. It completely eliminates the need for complex external server access.
Unlike the traditional FTP method, a plugin like Advanced File Manager prevents broken links when you move files between locations.
It keeps your WordPress database and your file system synchronized automatically.
This intuitive interface makes quick work of renaming folders, moving files, and bulk operations without needing any technical server knowledge. It’s the modern, non-technical way to achieve perfect file organization.
TO learn more, why we are recommending the file manager plugin instead of FTP, check out our detailed comparison guide on WordPress File Manager Plugin vs FTP.
Now that you understand the importance of a file management plugin, let’s keep your media library organized and clear. Follow the steps below:
- Log in to your admin dashboard.
- Navigate to Plugins ⇒ Add Plugin.
- Search for the plugin using the Search plugin bar by typing in “Advanced File Manager.” The plugin will appear as the first result, showing its logo and a summary of its features.
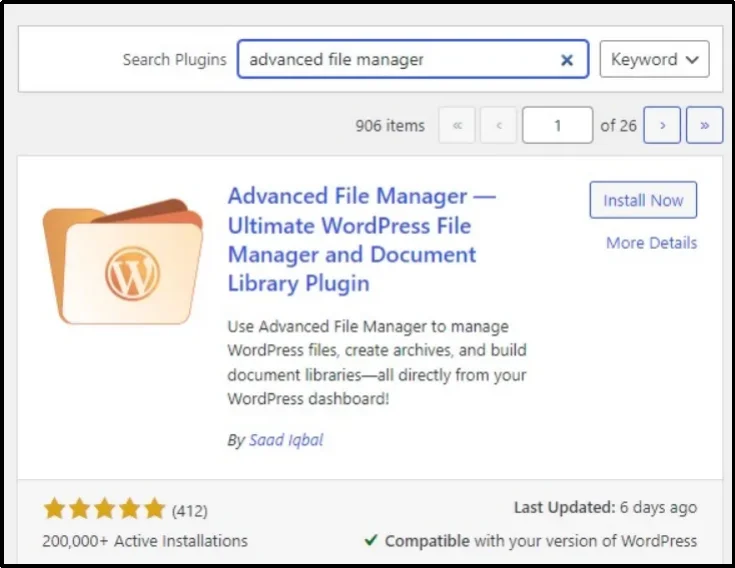
- Click the Install Now button located next to the plugin’s name.
- WordPress will automatically download and install the files onto your site. Once the installation is complete, the button will change to ‘Activate’; click it immediately to enable the plugin’s features.
There, you have the best file manager plugin for WordPress; now all we need is to access the files and start organizing.
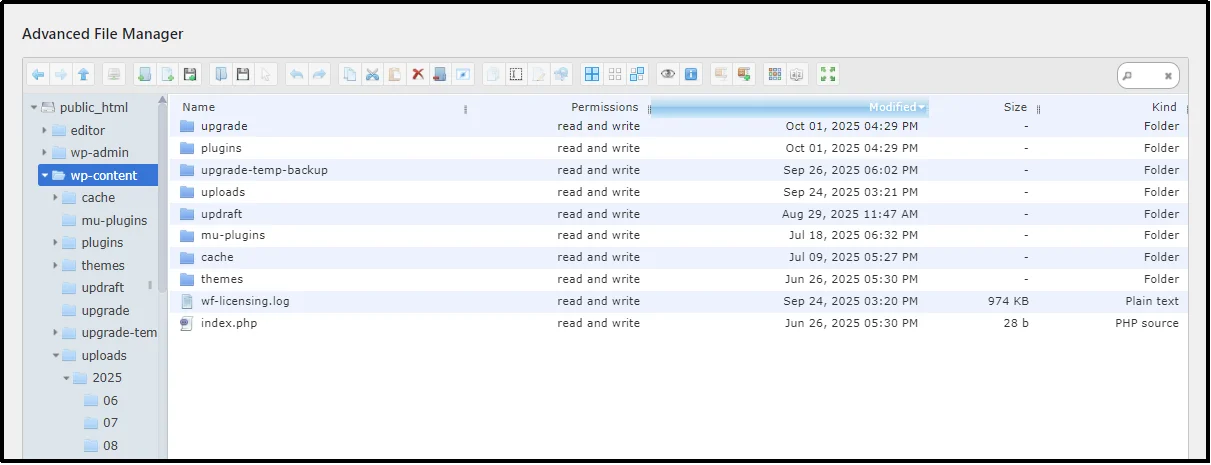
- Navigate to your admin dashboard ⇒ File Manager.
- Now, head over to public_html ⇒ wp-contents ⇒ uploads ⇒ the year, which means 2025 ⇒ select the month of the upload; in this case, it’s October by the time of writing this article, so the folder’s name would be 10.
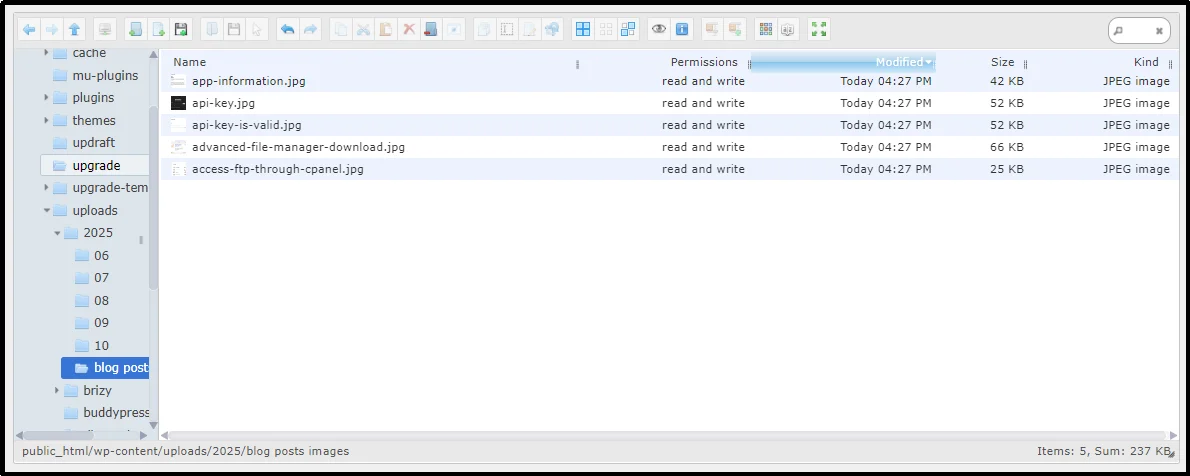
Here’s how it looks. As you can see, we went to public_html ⇒ wp-content ⇒ uploads ⇒ 2025 ⇒ 10. We have all the uploads in here sitting together unorganized. Let’s make it look clean and sharp.
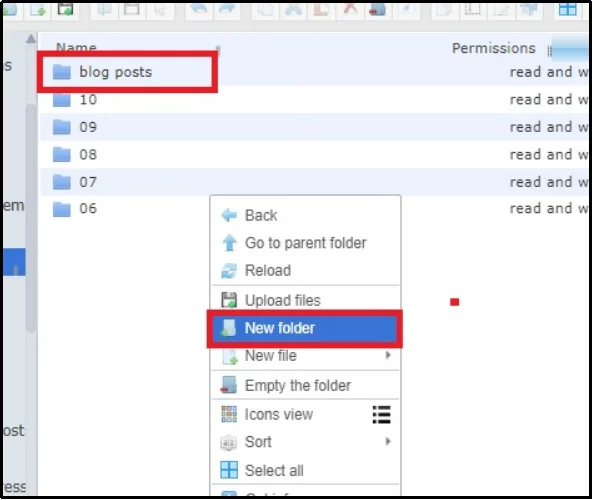
- Again, create a backup so that we can revert changes to the previous state in case something unexpected occurs.
- By right-clicking on the empty area, we get the various options, including “New folder.” Using this option, we created a new folder that will contain all the images to be used in a blog post.
- Inside the folder, upload all the necessary files using the Upload button from either the toolbar or by right-clicking and selecting “Upload”.
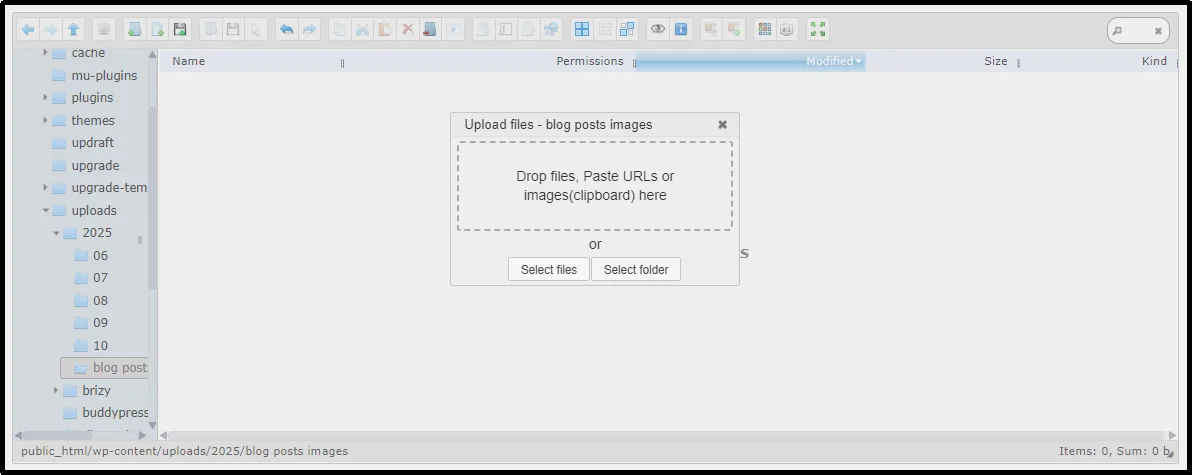
- There you have it! We have uploaded the files to a new folder specifically created for the images to be used in the blog posts.
Similarly, you can organize your files using convenient folders, allowing for an easier file management experience and fewer errors.
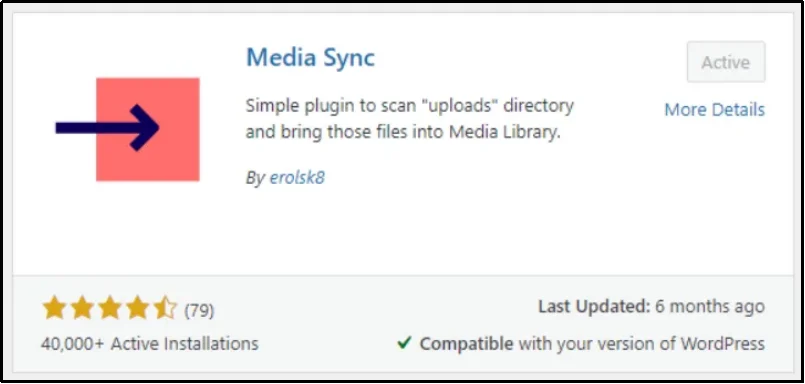
To sync these files to your WordPress Media Library, use the Media Sync plugin. Download the plugin just like we did with the Advanced File Manager.
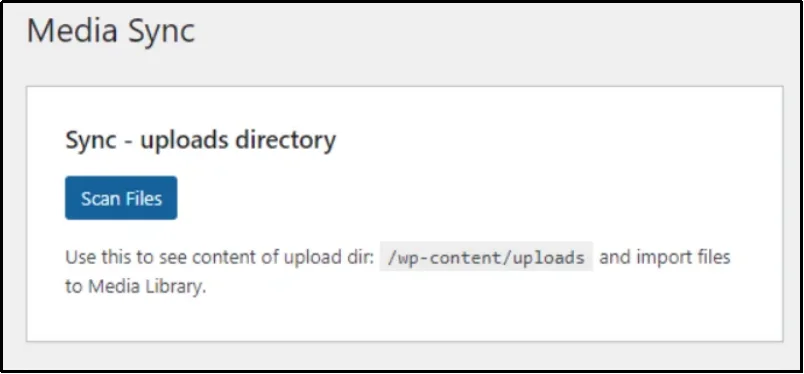
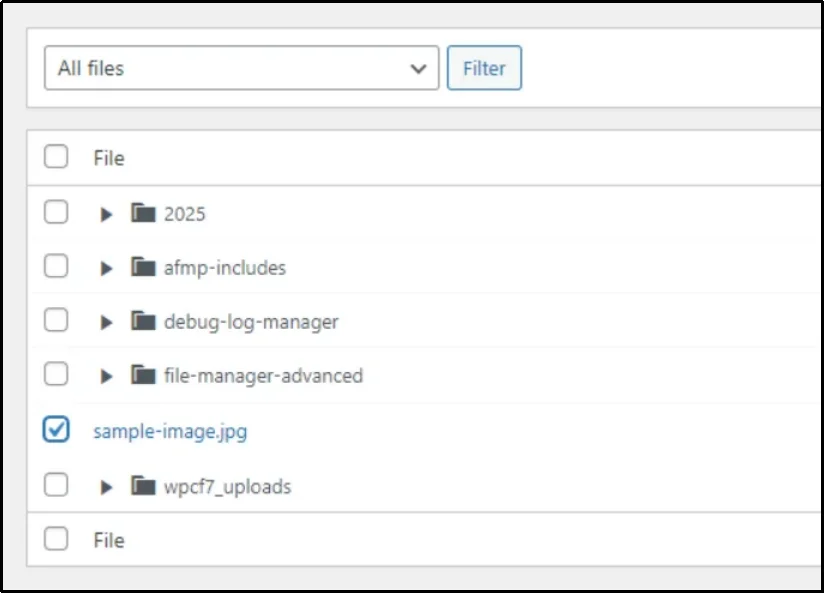
- Navigate to Media ⇒ Media Sync.
- Click Scan Files.
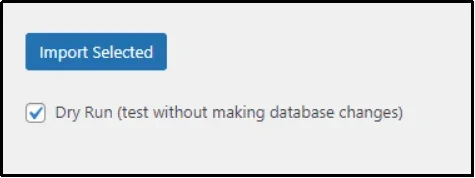
- Uncheck the “Dry Run (test without making database changes)” checkbox.
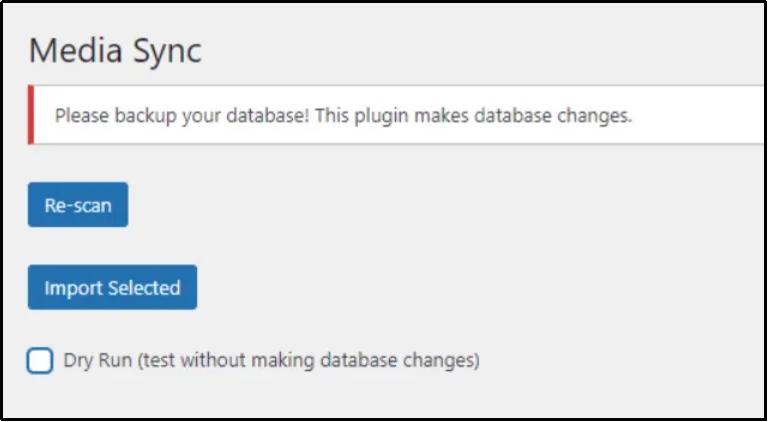
- Media Sync plugin dashboard in WordPress
- Scroll down and select the files you want to view in the Media Library.
- Click “Import Selected” to sync files to the Media Library
That’s how you do it!
You now know how to install the plugin and structure your existing media for perfect organization. But efficient file management doesn’t stop with your own uploads. A common, powerful use case for Advanced File Manager is creating a frontend document library where clients or team members can upload their own files. This raises a new question: how do you maintain your organized file structure when others are adding content?
How to Allow Sync Document Library Files in Media Library
If you’ve created a document library using Advanced File Manager and would like to add files uploaded by users to the Media Library, simply move the file to public_html/wp-content/uploads and use the Media Sync plugin to make it appear in your library, allowing you to use it whenever and wherever you need.
That’s about it. But there’s more to Advanced File Manager. Let’s examine the best practices for WordPress media library management, and then we can proceed to the Advanced File Manager.
Best Practices for WordPress Media Library Management
Organizing your WordPress Media Library involves more than just setting up folders; it requires ongoing best practices.
A proactive approach to media file management ensures your library remains clean, fast, and optimized for site speed and SEO. Following these standards will help you reclaim control over your digital assets and benefit your users.
These best practices cover everything from file preparation before you upload to routine maintenance after your content is live. Use this checklist as your standard for uploading and managing all future media:
- Optimize Images Before Uploading: High-resolution images dramatically slow down page loading speeds, directly impacting user experience and search engine optimization (SEO) scores. Use image compression tools (like TinyPNG) to reduce the file size without losing noticeable visual quality. Always ensure your images are correctly sized in pixels for their final placement on your website.
- Adopt a Consistent File Naming Convention: Never upload files named generically, like IMG_0021.jpg or download.png. Instead, adopt a clear, descriptive, and consistent naming convention for every file. Rename your files to include relevant keywords and descriptions, always using hyphens instead of spaces (e.g., advanced-file-manager-screenshot.jpg). This practice improves both your internal organization and your image SEO.
- Utilize Alt Text and Captions: It is a critical best practice always to fill out the Title, Alt Text, and Caption fields for every media file. Alt Text (Alternative Text) is essential for accessibility, as it describes the image for visually impaired users and screen readers. It also provides search engines with important context about the image’s content, which is vital for search ranking.
- Schedule Regular Media Cleanup: Over time, websites accumulate numerous unused images, temporary files, and failed uploads that remain idle on the server. These files clutter your file system and waste server space. Schedule a routine cleanup time to regularly review your library, delete any unnecessary files, and ensure your backups are not bloated with redundant data.
- Consider External Storage for Large Files: Videos, large documents, and massive files can quickly strain your website’s hosting resources and bandwidth. For these assets, consider utilizing dedicated external services, such as YouTube, Vimeo, or a cloud storage solution—we will show you the way. You can then link to or embed these files, which saves precious space and reduces the load on your web server.
What’s More in Advanced File Manager Pro?
Here are some of the advanced features that make this plugin a complete file management solution:
- Complete File Operations: Quickly perform all file-related tasks like copying, moving, renaming, archiving, extracting, and more. The plugin supports multi-file selection for bulk actions and can handle large files and entire folder uploads.
- Role-Based & User-Specific Access: Limit file viewing, editing, or deletion based on user roles. You can also create private folders for individual users or clients to safeguard sensitive information.
- Stealth Mode for File Security: Conceal actual file paths to prevent unauthorized access or tampering. This enhances the security of your site’s file structure.
- Operations Control for Users: Specify which actions users can perform, such as restricting editing, deleting, or uploading files, to enforce your security policies.
- Integrations: Easily connect with services like Google Drive, Dropbox, OneDrive, Amazon S3, GitHub, or Slack.
- AI Integration (AI Coding Assistant): Access smarter coding assistance within the built-in code editor, helping accelerate development and debugging.
- Front-end File Management: Front-end file management enables logged-in users or visitors to upload and manage files directly, making it useful for client portals and membership sites.
- Media & Document Previews: View previews of common file types instantly in the file manager without downloading.
- Debug Code-in Editor: Debug your code and identify issues to avoid fatal errors.
Unlock the full power of Advanced File Manager Pro today and gain all the features discussed above and much more. Don’t wait to simplify your workflow!
File Management Made Easy with Advanced File Manager
You have seen that organizing your WordPress Media Library is essential for efficiency, site health, and security. While the traditional FTP method gives you control, it is complex and carries the risk of accidentally breaking your site’s file paths and links.
The clear path forward is to adopt a modern solution: Advanced File Manager Pro. By installing this powerful plugin, you shift your file management from a technical, high-risk server process into a simple, intuitive task performed right inside your WordPress dashboard.
This tool ensures that your file system and database remain perfectly synchronized, guaranteeing stability while saving you countless hours.
Ready to stop searching through endless date-based folders and start managing your digital assets with confidence? Get Advanced File Manager and transform your cluttered media library into a clean, secure, and highly efficient organization hub.