
If you’ve ever tried uploading a big file to WordPress, whether it’s a high-resolution video, a long PDF guide, or a batch of images, you’ve probably hit a wall. By default, WordPress has strict upload limits, and your hosting provider may cap file sizes too.
The usual advice is to jump into cPanel or connect via FTP, but let’s be honest: most site owners, marketers, and even some developers don’t want to deal with that. FTP tools are clunky, cPanel can be confusing, and sharing login credentials creates security risks.
But you don’t have to worry!
In this guide, we will walk you through how to upload large files in WordPress without FTP, using a file manager plugin. You’ll also learn how to sync those files to your Media Library, manage them safely, and avoid common pitfalls.
Ready? Let’s get started!
Why Uploading Large Files in WordPress Is Tricky
Uploading large files in WordPress isn’t always straightforward. Hosting providers set a maximum upload limit, which can go as low as 2MB. That might be fine for a few images, but not for longer videos, training materials, or big documents.
Here are the main challenges most users run into:
- Upload Size Restrictions: Server settings like php.ini, .htaccess, or wp-config.php control the file size cap. If you don’t know how to edit those, you’ll hit an error message when uploading.
- FTP Isn’t Beginner-Friendly: FTP clients require setup, technical knowledge, and credentials that many site owners don’t want to share with team members.
- cPanel Confusion: Hosting dashboards often look overwhelming. It’s frustrating to have to go through a long navigation process to upload a simple file.
- Security Concerns: Passing FTP logins around increases the risk of unauthorized access. Plus, considering the principle of least privilege, not every team member should have full server access.
For these reasons, using FTP or cPanel just to upload a large file doesn’t sound right.
What you really need is a file manager plugin, which is a simpler and safer way to manage files directly from your WordPress dashboard.
Why Do You Need a File Manager in WordPress?
Managing files on a WordPress site often means juggling between your hosting panel and an FTP client. Developers might be comfortable with that setup, but for business owners, marketers, or site admins, it’s time-consuming and unnecessarily complicated.
FTP isn’t always available, and even when it is, many people find it intimidating. On top of that, constantly switching tools just to upload a PDF, rename a file, or reach the root directory can quickly become frustrating.
That’s where a WordPress file manager plugin comes in.
NOTE: In this guide, we will use the Advanced File Manager plugin, which allows you to do the following:
- Upload, edit, and organize files without ever leaving your dashboard.
- Control access with role-based permissions so only the right people see the right files.
- Replace multiple small plugins with one solution that handles renaming, archiving, and previews.
- Allow clients or members to manage files from the frontend.
It’s no surprise that thousands of website owners already use Advanced File Manager to handle their daily tasks. From bloggers and agencies to schools and large organizations, it’s become a go-to solution because it simplifies work that used to feel like a chore.
And the best part? Setting it up only takes a few minutes.
Benefits of Choosing the Advanced File Manager Plugin
Before we get into the step-by-step process, it’s worth highlighting why Advanced File Manager stands out as one of the most reliable options for handling large files in WordPress.
Here’s what makes it a favorite among site owners:
- No More FTP or cPanel Hassles: Everything happens inside WordPress. You don’t need to switch between tools or share sensitive FTP credentials.
- Frontend File Access: If you want clients, students, or team members to upload or manage files, you can allow specific roles—or even guests—to use the file manager on the frontend.
- Complete File Operations: Copy, move, rename, delete, zip, and unzip files directly from your dashboard. It feels just like using a desktop file manager.
- Private Document Libraries: Create secure folders for clients, employees, or students. Access can be restricted by role or even by individual users.
- Customizable Interface: Choose from multiple themes (like Windows 10, Bootstrap, etc.), switch between list and grid views, and even use handy keyboard shortcuts for faster navigation.
- Instant Previews: View PDFs, images, videos, and audio files without downloading them.
- Cloud Storage Integration: Seamlessly connect with cloud platforms like Google Drive, Dropbox, Amazon S3, and OneDrive. This makes it easy to manage both local and cloud files from one place.
💡 Quick Fact: Advanced File Manager has over 200,000 active installations and an impressive 4.8-star rating on WordPress.org.
4 Easy Steps to Upload Large Files in WordPress Securely (No FTP Needed)
Now that you know why a file manager is the smarter choice, let’s walk through the process of uploading large files safely without using FTP or cPanel.
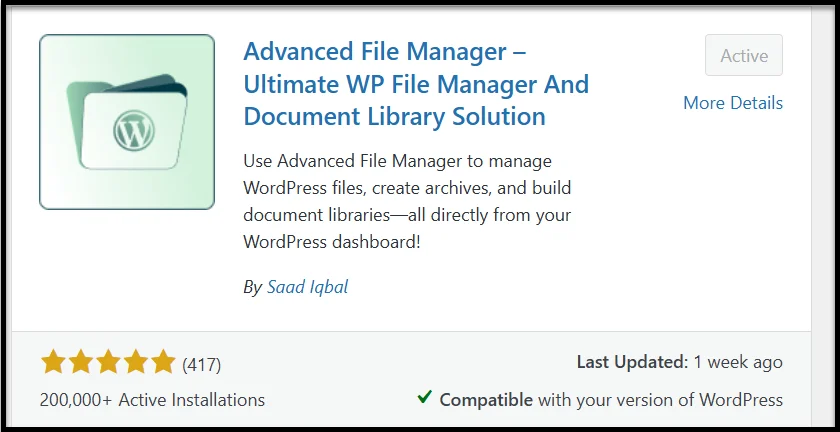
Step #1 – Install and Activate Advanced File Manager
- Log in to your WordPress dashboard.
- Go to Plugins → Add Plugin.
- Type Advanced File Manager into the search bar.
- Click Install Now, then Activate.
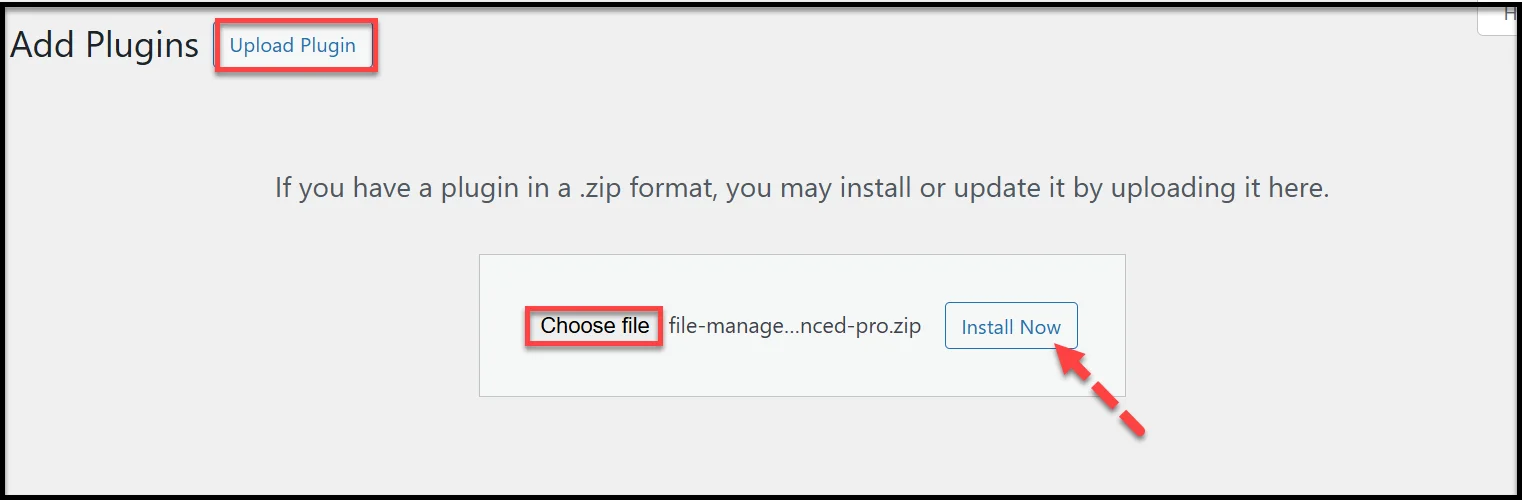
👉 If you’ve purchased the Pro version, download the plugin ZIP file and upload it via Plugins → Add Plugin → Upload Plugin, then activate it.
Step #2 – Access the File Manager in Your Dashboard
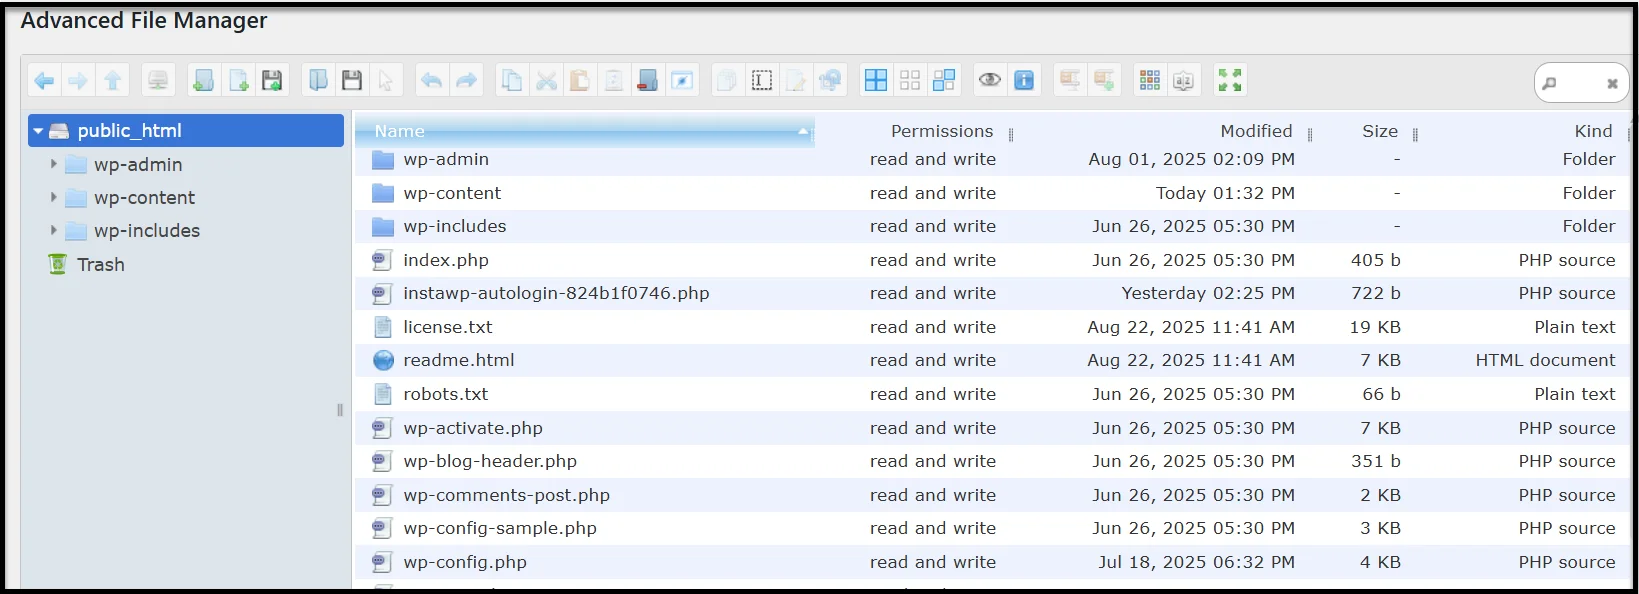
Once activated, you’ll see a new menu item labeled File Manager in your WordPress sidebar.
Click it, and you’ll enter the file manager interface. By default, it displays:
- Your site’s root directory
- A folder tree on the left
- Files on the right
- A toolbar packed with file operations
From here, you can already upload, rename, move, preview, or delete files—all without leaving WordPress.
Step #3 – Upload Large Files to the Uploads Folder
If you want to upload files directly into WordPress’s main storage area, head to:
public_html → wp-content → uploads
This is the same folder WordPress uses for storing images, videos, and documents. Here, you can:
- Upload new files directly into specific folders
- Create custom directories for organization
- Manage files with the context menu or toolbar
📌 For Example, we have uploaded a file named ‘Large File’, which is 400 MB, directly into the uploads folder. You can see in the screenshot below:

This method is beneficial if you’re handling files that don’t need to appear in the Media Library but still need to be stored on your site. However, if you want these large files to appear in the Media Library of WordPress, then check out the following step.
Step #4 – Sync Uploaded Files with the Media Library (Optional)
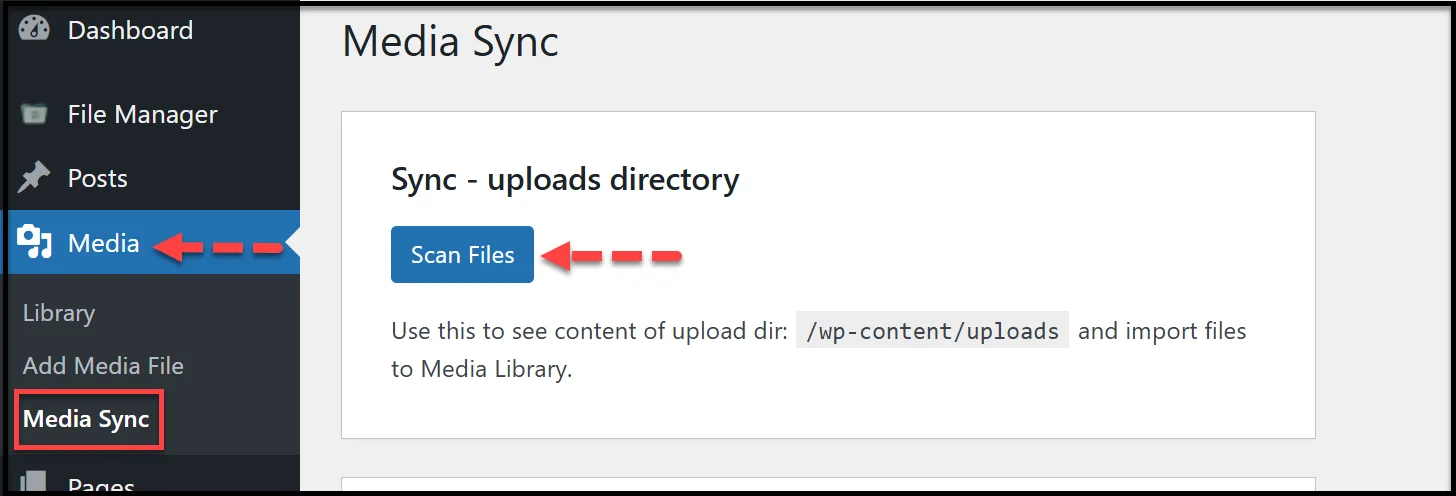
Files uploaded through a file manager are stored on your server but don’t automatically show up in the WordPress Media Library. To fix this, install the free Media Sync plugin.
- Go to Plugins → Add Plugin and search for “Media Sync.”
- Install and activate it.
- In your dashboard, go to Media → Media Sync.
- Click Scan Files to detect unregistered uploads.
- Uncheck Dry Run, select the files you want, and click Import Selected.
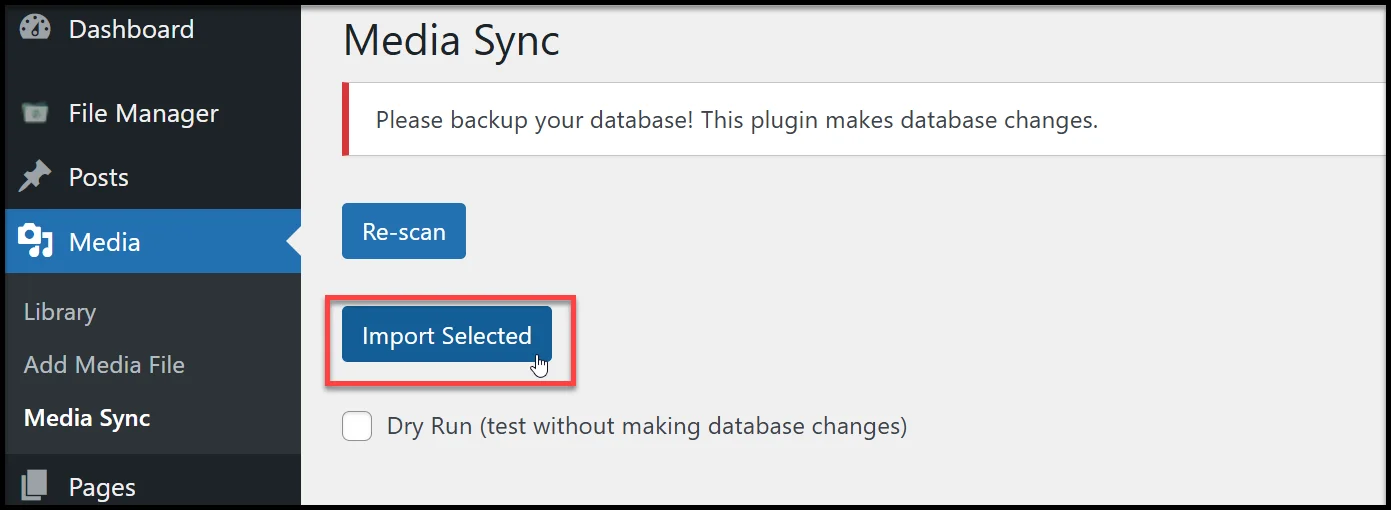
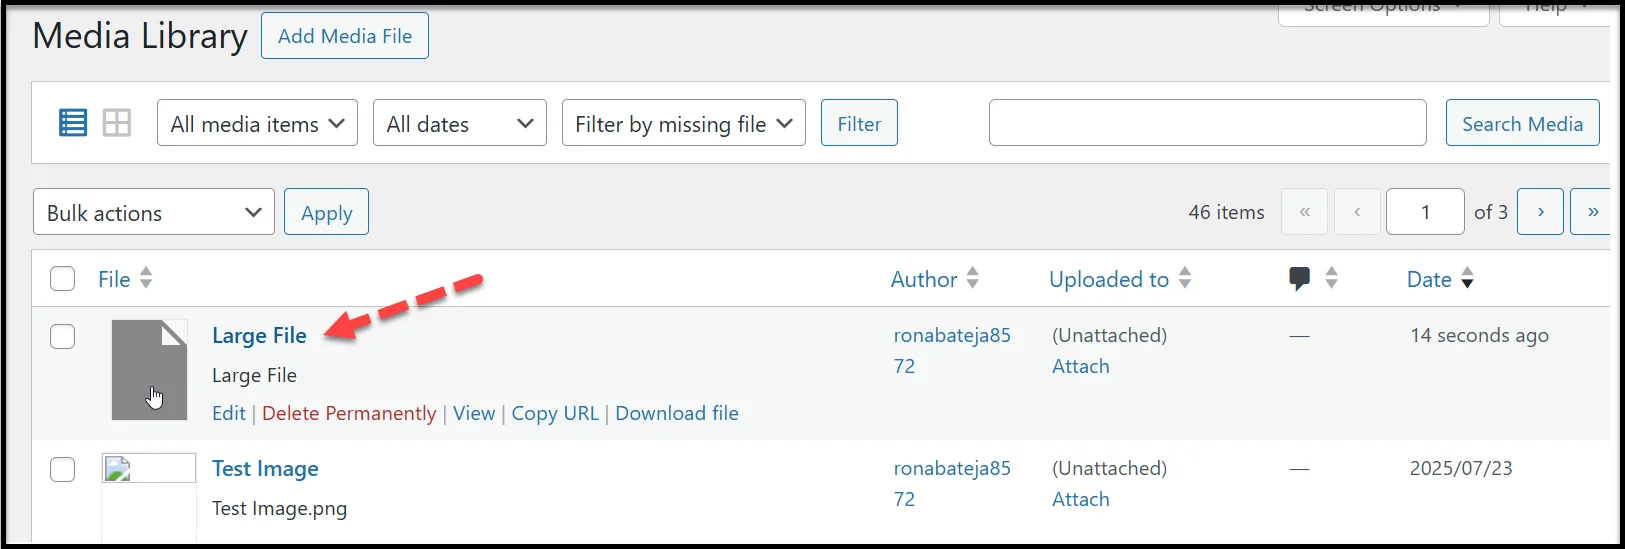
Now those files will appear in your Media Library, ready to use in posts, pages, and galleries.
For Example, after syncing, the ‘Large File’ is fully available in WordPress.
Troubleshooting Large File Upload Issues
Even with the right plugin, you may run into problems when uploading large files. Most of these issues are related to server settings or conflicts with other plugins. Here’s how to handle the most common ones:
- Hitting the Upload Size Limit
If you see an error like “File exceeds the maximum upload size”, it usually means your server’s PHP settings are too low. You can try:
- Editing the php.ini file and increasing upload_max_filesize and post_max_size.
- Adding rules to .htaccess to raise the limit.
- Adding custom values to wp-config.php.
If you’re not comfortable editing server files, ask your hosting provider’s support team to increase the limits for you.
- Plugin Conflicts
Sometimes other plugins can interfere with uploads. If files won’t upload at all, try temporarily deactivating other plugins to see if the issue resolves. Then reactivate them one by one to find the culprit.
- File Too Large for Server Resources
On shared hosting, a very large file (like a 1GB video) might fail because the server times out. In that case:
- Compress the file before uploading.
- Split it into smaller chunks if possible.
- Alternatively, consider hosting massive media files on a cloud service (such as Google Drive, OneDrive, Dropbox, Amazon S3, or YouTube for videos) and embedding them instead.
- Permissions Error
If you get an error saying you don’t have permission to upload or edit files, check:
- User roles and capabilities in WordPress.
- Folder permissions on your hosting server (typically 755 for directories and 644 for files).
- Corrupted Uploads
If files upload but won’t open, the transfer may have been interrupted. Try re-uploading the file, or check if your hosting storage is running out of space.
Install Advanced File Manager Today and Upload Large Files in WordPress Securely
Uploading large files in WordPress doesn’t have to be a frustrating process. While default upload limits, FTP clients, and cPanel dashboards can slow you down, there’s a much easier way to handle it.
By using the Advanced File Manager plugin, you can:
- Upload and organize files directly from your dashboard.
- Avoid the risks of sharing FTP access.
- Give clients, team members, or students secure access to the files they need.
- Keep everything safe with role-based permissions and smart file restrictions.
And if you want those files available inside the WordPress Media Library, simply pair it with the free Media Sync plugin.
Thousands of site owners—from small bloggers to big organizations—already rely on this setup every day. If you’ve been struggling with file size limits or clunky FTP tools, now is the time to simplify the way you manage files.👉 Take control of your WordPress uploads today with Advanced File Manager and say goodbye to FTP headaches for good.