If you’re juggling content between your WordPress Media Library and Dropbox, you know how time-consuming it is to switch tabs, upload manually, and keep everything organized.
But what if you could cut that entire process out?
That would be amazing, wouldn’t it?
That’s exactly what the Advanced File Manager plugin allows you to do. You can connect Dropbox directly to your WordPress dashboard. That means you can upload, access, and organize Dropbox files without ever leaving your WordPress dashboard.
In this guide, we will show you how to sync Dropbox to WordPress media library using Advanced File Manager.
Ready? Let’s get started!
Why Sync Dropbox with WordPress?
Apart from a well-known cloud storage service, Dropbox is a digital hub for your files, folders, backups, and creative assets. When you connect it directly to WordPress, your entire workflow starts to move faster.
Here’s why this integration is worth setting up:
- Save Time with Direct Access: No more downloading from Dropbox and re-uploading to WordPress. Syncing the two lets you use files stored in Dropbox directly in your Media Library.
- Keep Files Organized in One Place: Whether it’s graphics, videos, documents, or audio files, keeping everything centralized inside Dropbox reduces clutter and confusion in your uploads folder.
- Use Dropbox as Your External Backup: If you are tired of bloated hosting accounts, then store site backups, theme files, or logs in Dropbox for easier backups and more space.
- Collaborate with Teams or Clients: Let your team upload assets to Dropbox and instantly access them on your WordPress dashboard, which eliminates the need for endless emails and duplicate file issues.
In short, this kind of setup gives you real control over how your website handles files, whether you’re managing a single blog or a network of client sites.
How Different WordPress Users Benefit from Dropbox Sync
Dropbox integration solves real problems for different types of WordPress users. Whether you’re building sites, managing content, or running a team, Dropbox and WordPress sync bring speed, flexibility, and control to your daily workflow.
Let’s check out how different types of users can benefit from this:
- Developers
Developers often deal with logs, backups, additional theme files, or even temporary assets that don’t belong in WordPress permanently. Instead of uploading them to WordPress and cluttering your server, you can push them straight to Dropbox from inside your dashboard.
- Content Creators & Bloggers
Let’s say you’re working on a blog post or uploading portfolio images. Normally, you’d drag those files into Dropbox, then later upload the same ones into WordPress. That’s double the work.
Now, when you upload files to Dropbox, they are already available in your file manager. No need to upload twice. Just connect and use.
- Agencies & Remote Teams
If you’re part of a team managing multiple sites, keeping track of who uploaded what, and where, can get messy. Dropbox helps you set up shared folders for assets, templates, or client files. Once it’s synced with WordPress, anyone on your team can drop in assets, and they’ll be accessible from your site.
Prerequisites for Syncing Dropbox To WordPress Media Library
Before you can connect Dropbox to your WordPress Media Library, there are a few things you’ll need to have ready, including:
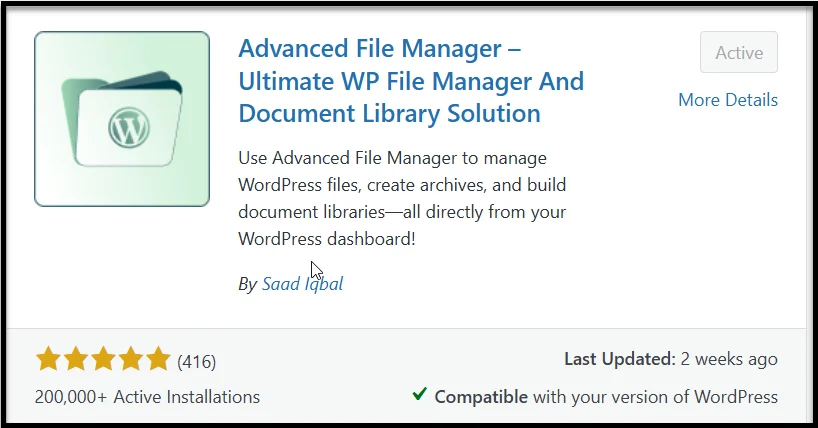
- Advanced File Manager Pro Plugin: Dropbox integration is a premium feature, so you’ll need the Pro version of the Advanced File Manager plugin. If you’re currently using the free version, now’s the time to upgrade and unlock cloud syncing and other advanced capabilities.
- Dropbox Account: If you don’t already have one, head over to dropbox.com and create a free account. You’ll use this account to generate an app key and secret key, which are required for linking Dropbox to your site.
- Administrator Access to Your WordPress Site: You’ll need access to the WordPress dashboard as an admin user. Because the setup process involves installing plugins, editing settings, and configuring keys so basic admin-level permissions are required.
Once these three things are ready, you’re all set. Let’s dive into the full setup.
Step-by-Step Process to Connect Dropbox to WordPress Media Library
Now that you’ve got everything ready, let’s walk through the full process of connecting Dropbox to your WordPress Media Library using Advanced File Manager Pro.
Step 1: Install and Activate Advanced File Manager Pro
If you haven’t installed the plugin yet, first you will need to install the free version.
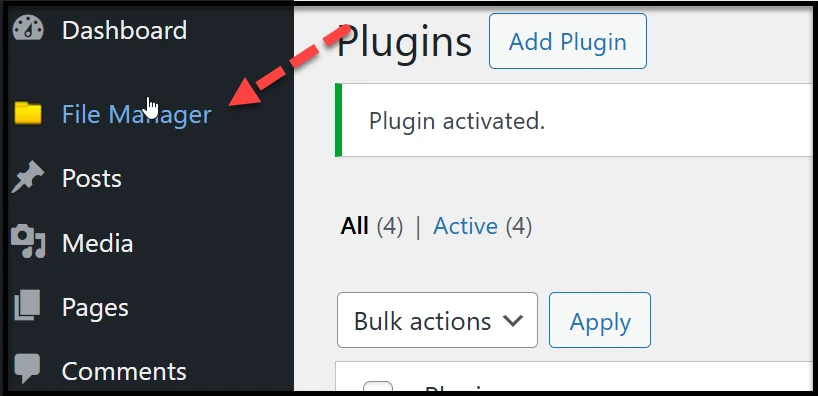
- Log in to your WordPress dashboard.
- Go to Plugins → Add Plugin and search for “Advanced File Manager.”
- Install and activate the free version.
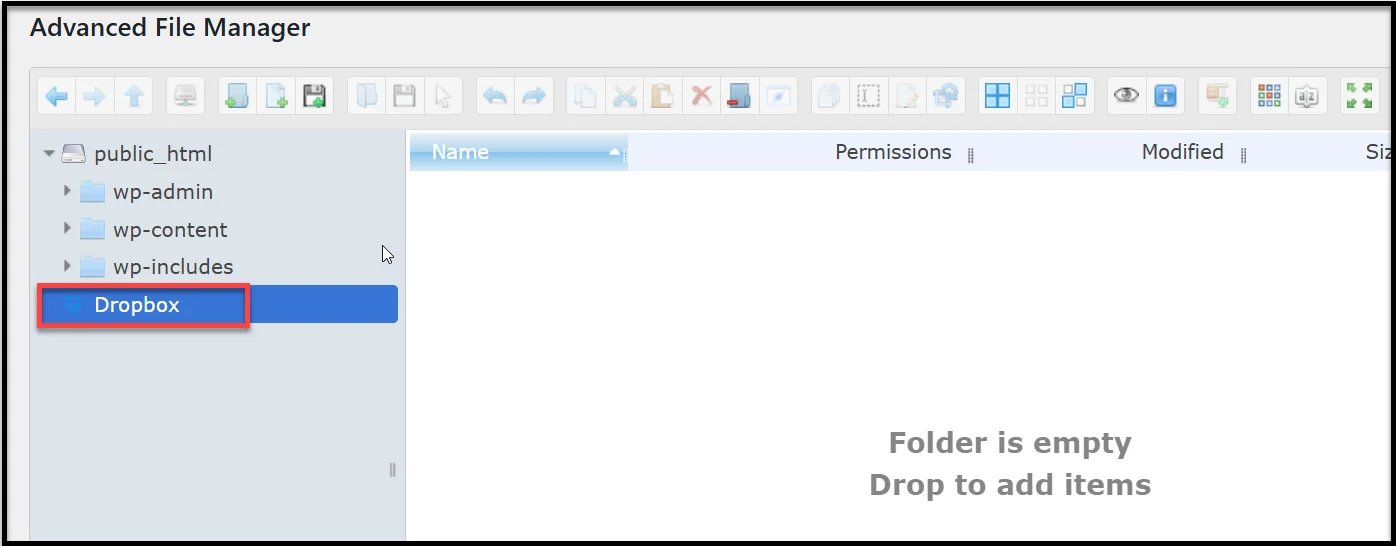
Once activated, you’ll see the ‘File Manager’ option in your WordPress sidebar.
- After installing the free version, visit the official Advanced File Manager website to obtain the premium version.
- Then, upload and install the zip file that you have received in the welcome email after purchasing.
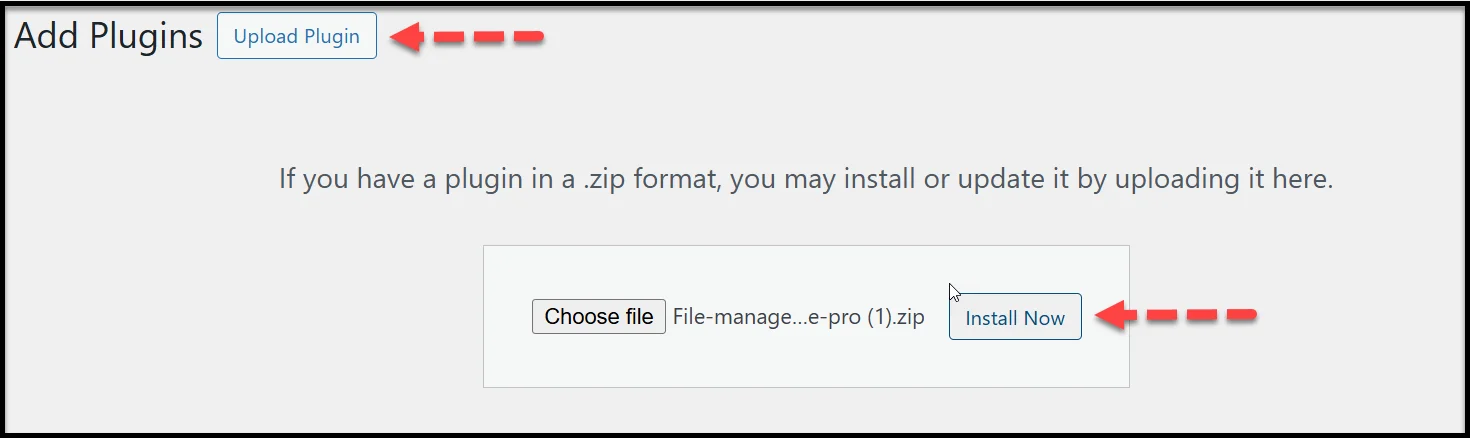
- Next, enter the license key and activate the plugin.
After successful activation, you will see the following additional features in the File Manager menu.
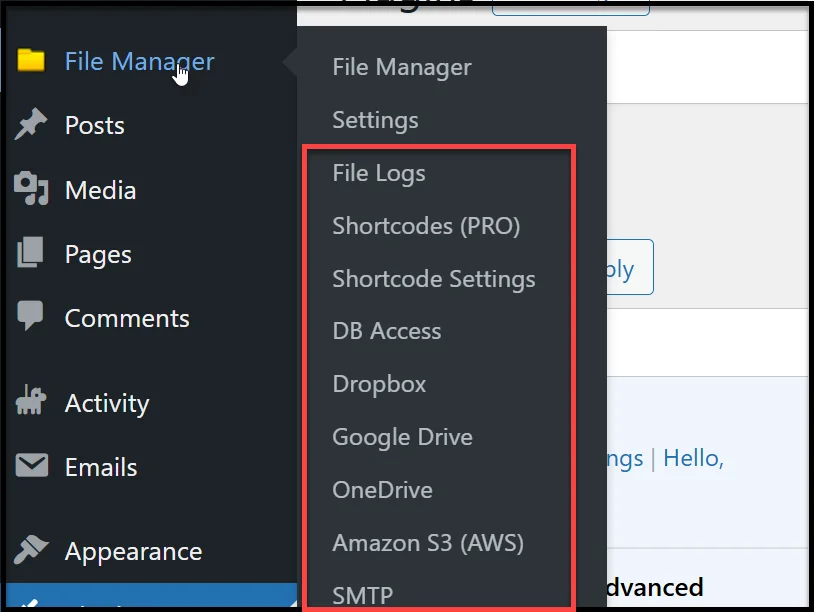
Step 2: Enable Dropbox Integration in Plugin Settings
- In your dashboard, go to File Manager → Dropbox.
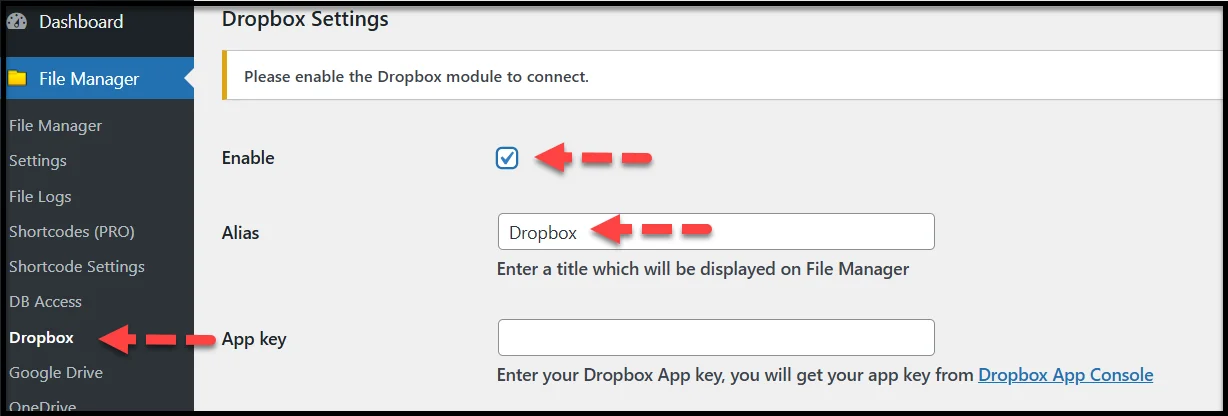
- In the Dropbox settings, tick the checkbox next to ‘Enable.’
- Set a custom alias to easily identify this connection (e.g., “My Dropbox Media”).
- You’ll see two empty fields labeled ‘App Key’ and ‘App Secret’. Leave these blank for now—we’ll create them next.
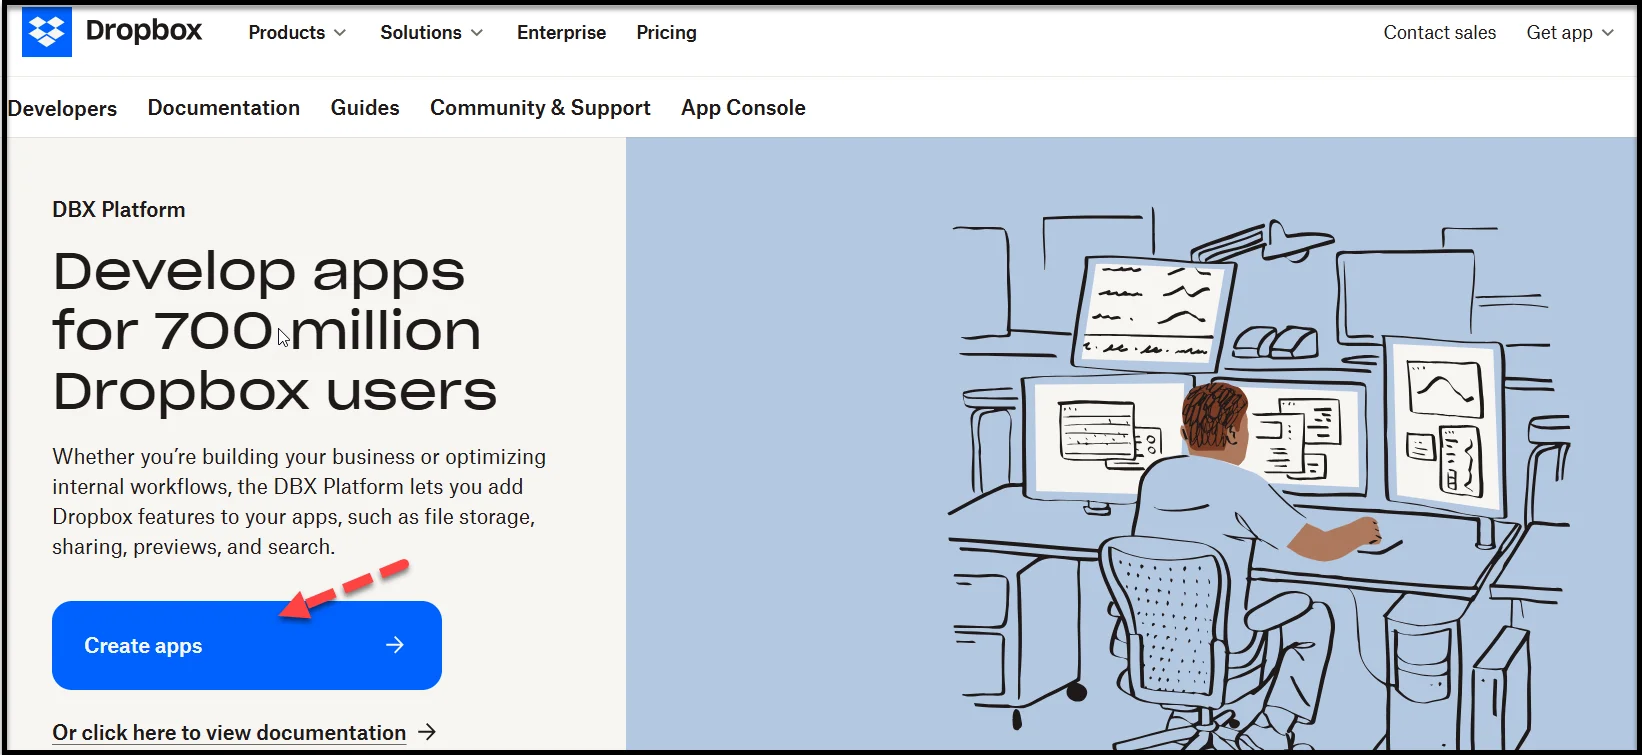
Step 3: Create Your Dropbox App
- In a separate tab, log in to the Dropbox dashboard.
- Click the app launcher icon in the top right corner.
- In the app launcher menu, scroll down and click ‘App Center’ option.
- Next, find the ‘Build an app’ option under the ‘Manage’ section.
- On the subsequent screen, click ‘Create apps.’
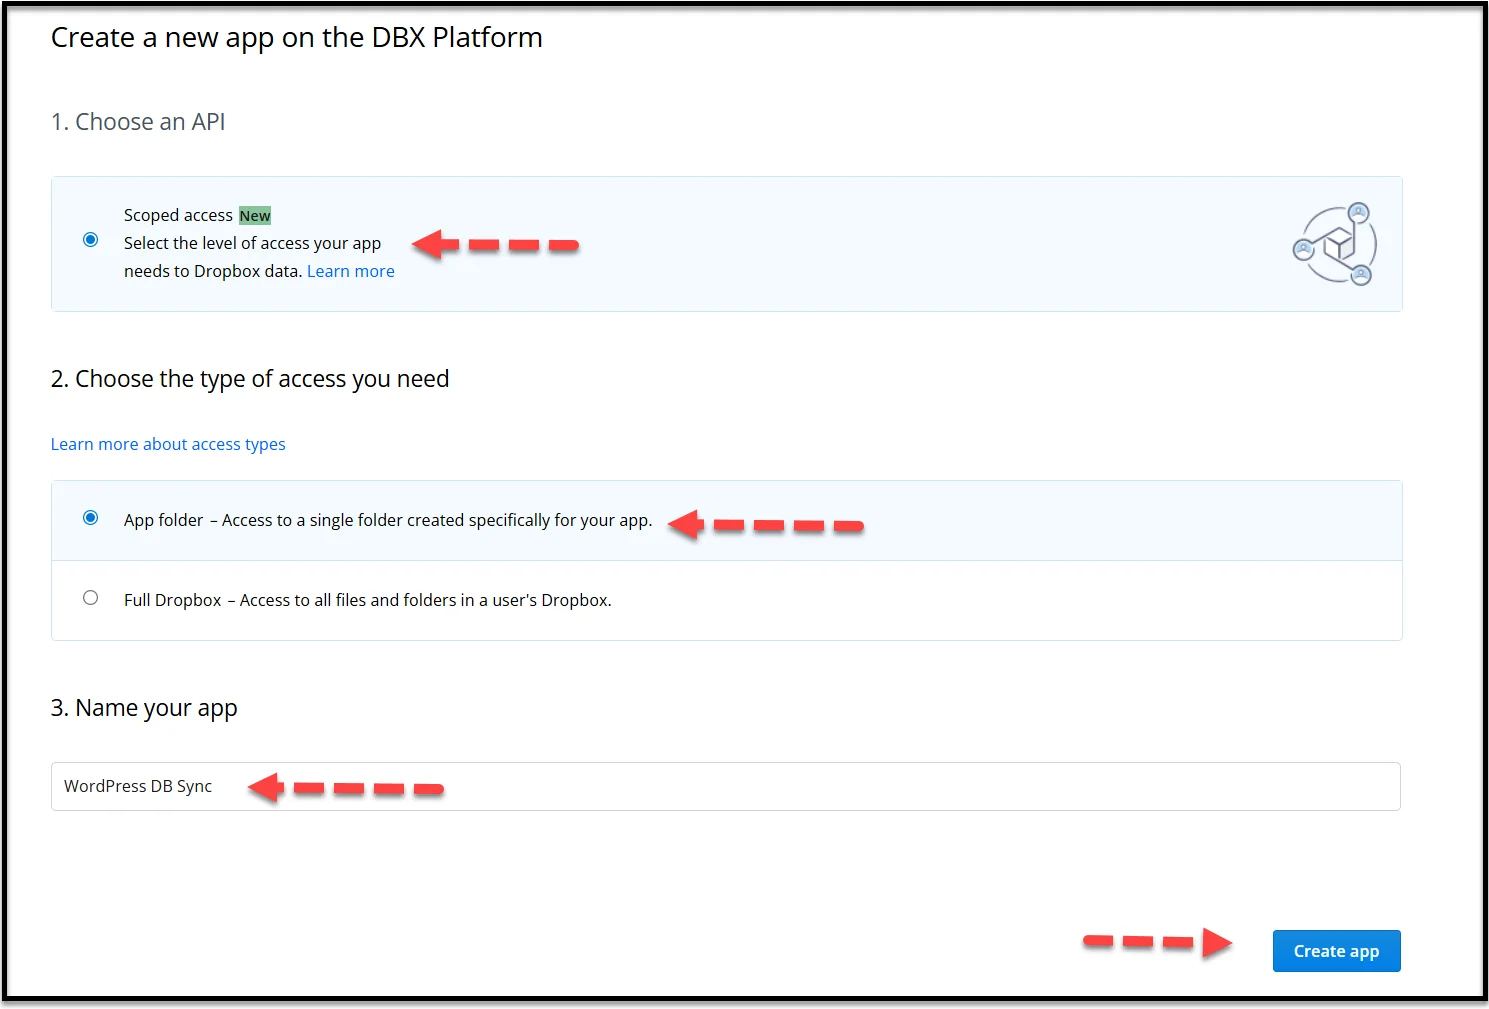
- Next, choose Scoped Access (recommended).
- Select either:
- Full Dropbox (if you want full access to your Dropbox)
- App Folder (if you want to limit access to just one folder)
- Give your app a unique name (e.g., “WordPress DB Sync”).
- Accept the terms and hit ‘Create App.
Step 4: Configure App Settings and Permissions
After your app is created:
- Go to the ‘Settings’ tab in your new Dropbox app.
- Find the field labeled OAuth 2 Redirect URIs.
- Copy the Redirect URL from your WordPress Dropbox settings and paste it here. Click Add.

- Now, click on the Permissions tab. Check boxes like:
- files.content.read
- files.content.write
- Account_info.read, etc.
- Submit the changes.
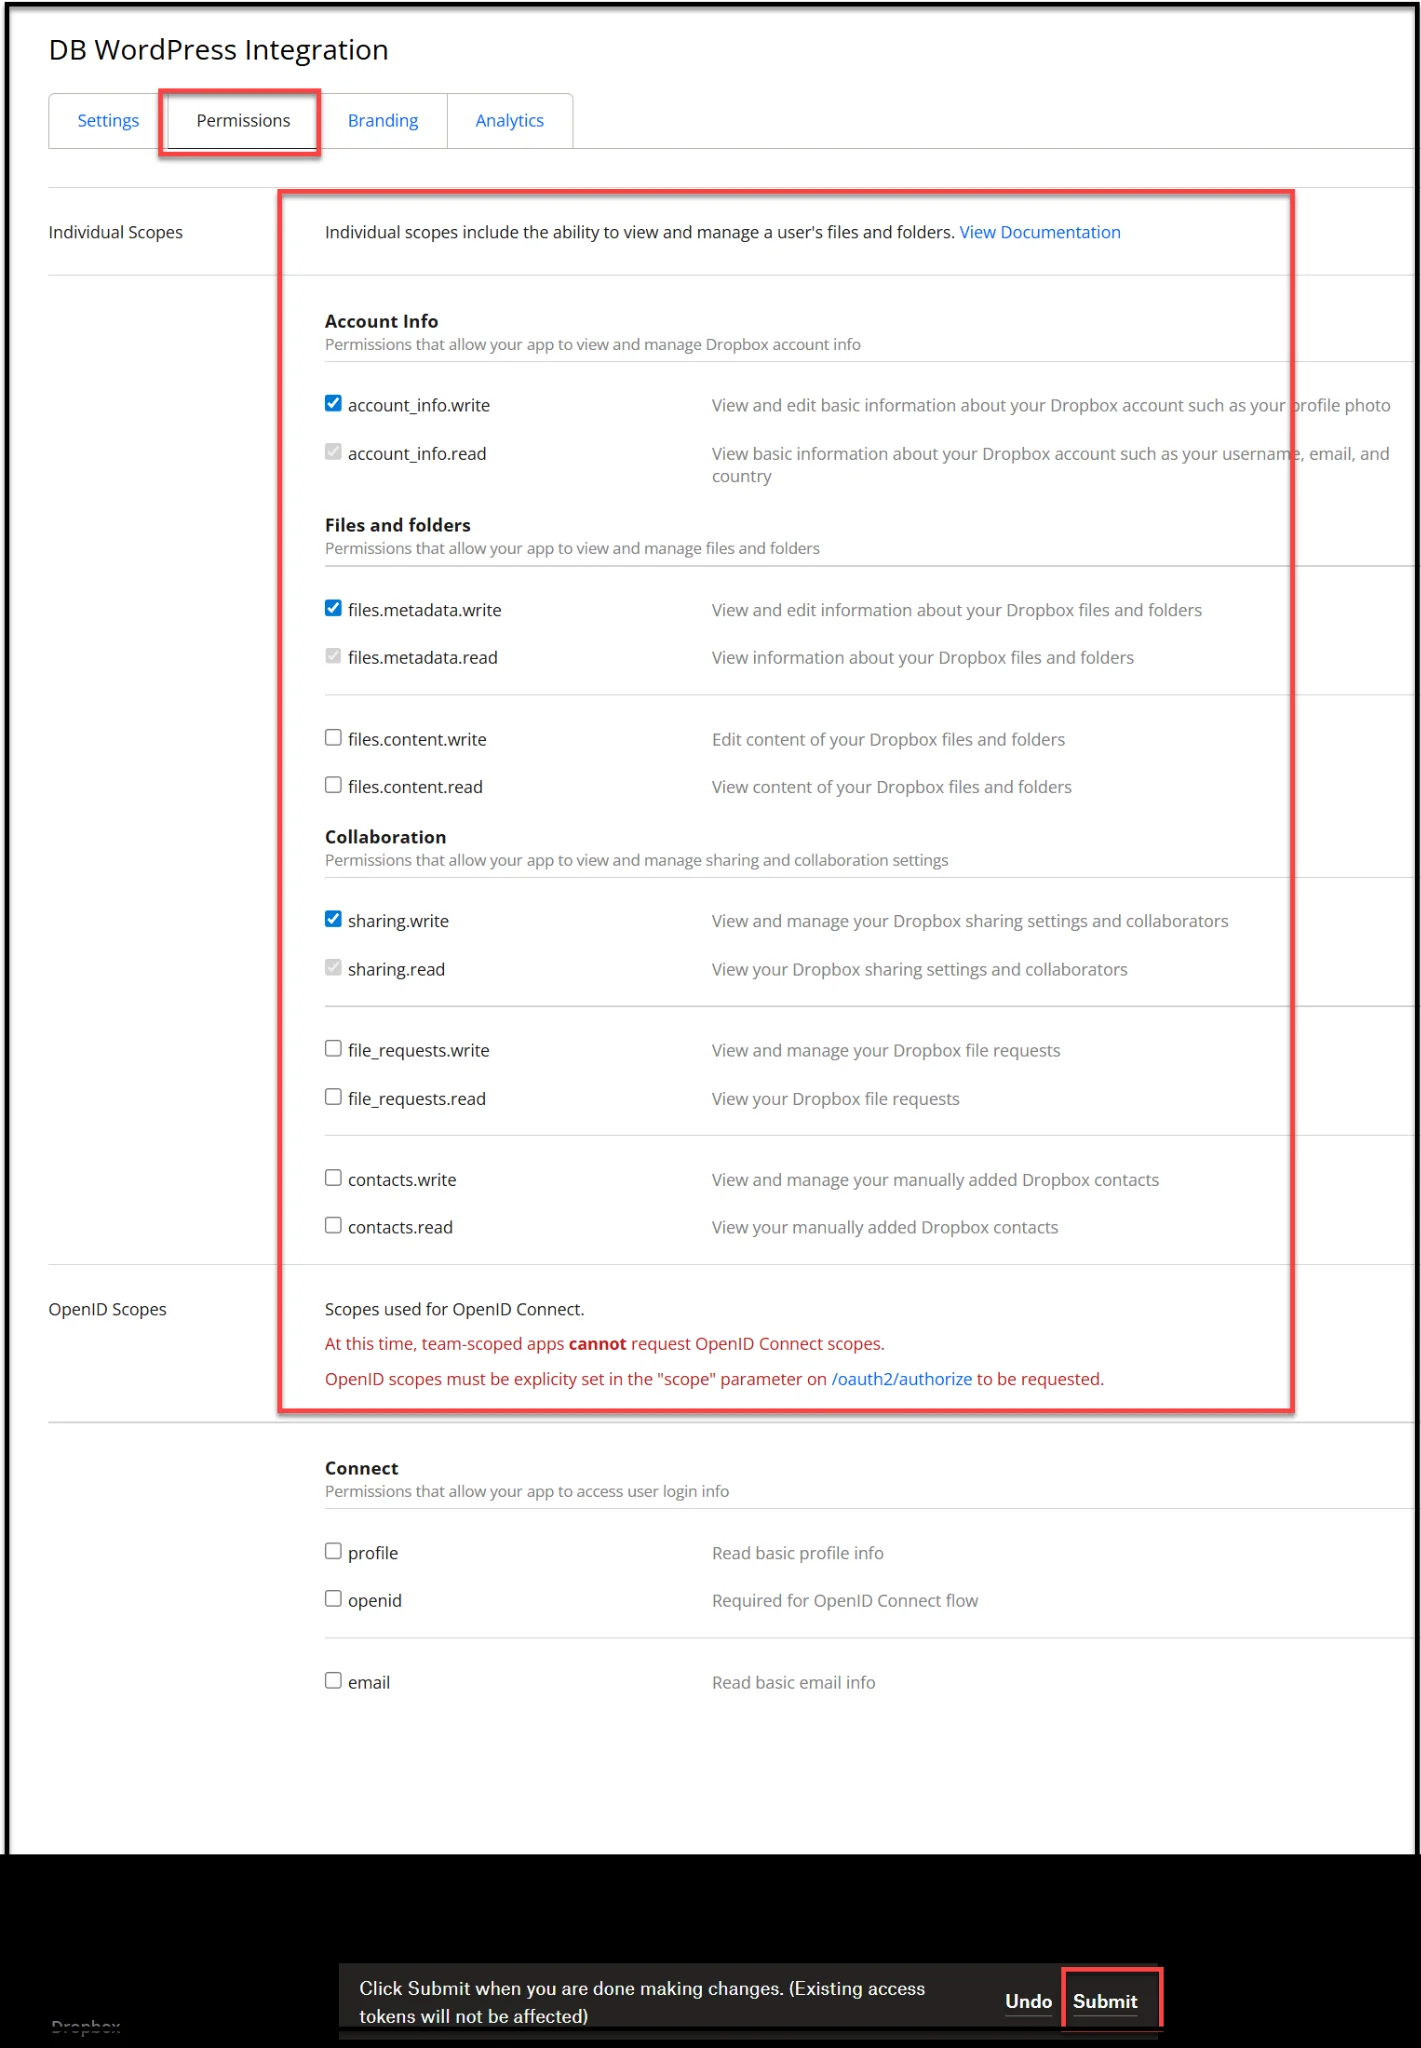
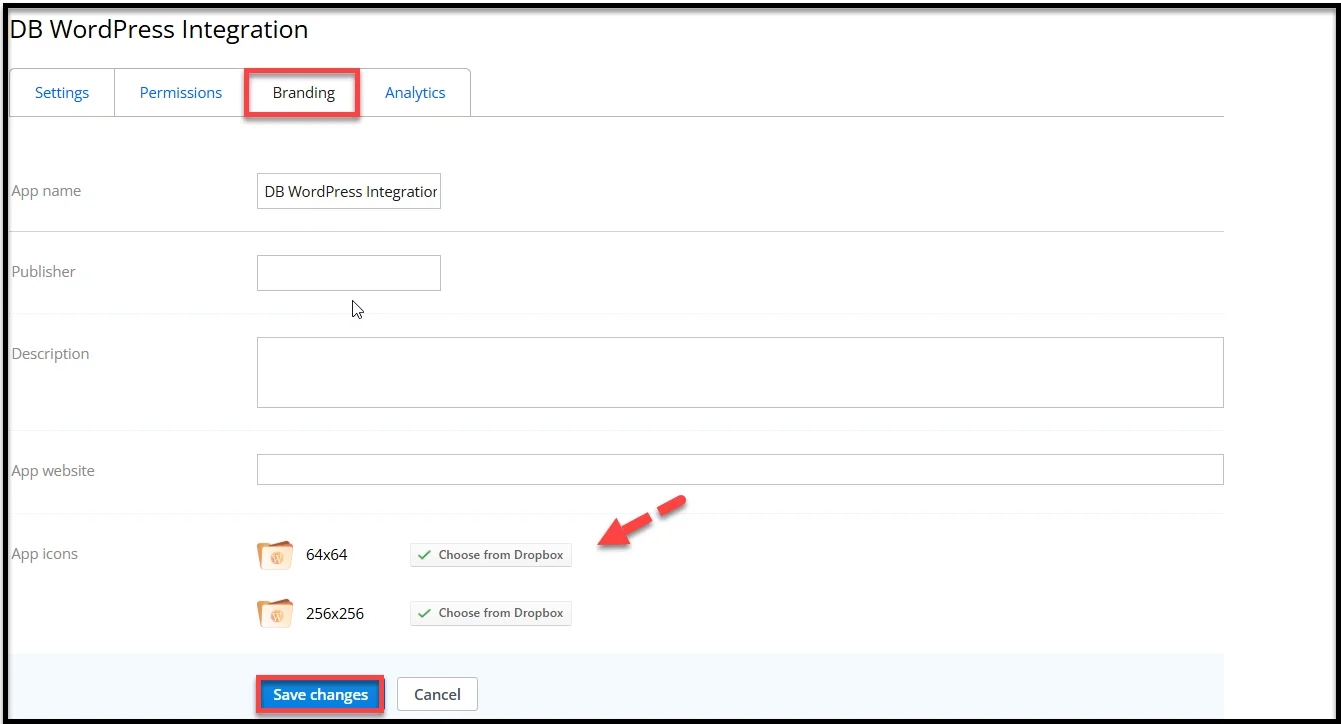
While you’re here, fill out the ‘Branding’ section too. Add a name, description, and logo if you’d like.
Step 5: Apply for Production Status
To fully connect your app to WordPress:
- Head back to the Settings tab.
- Click the ‘Apply for Production’ button.

- Fill out the short form Dropbox provides.
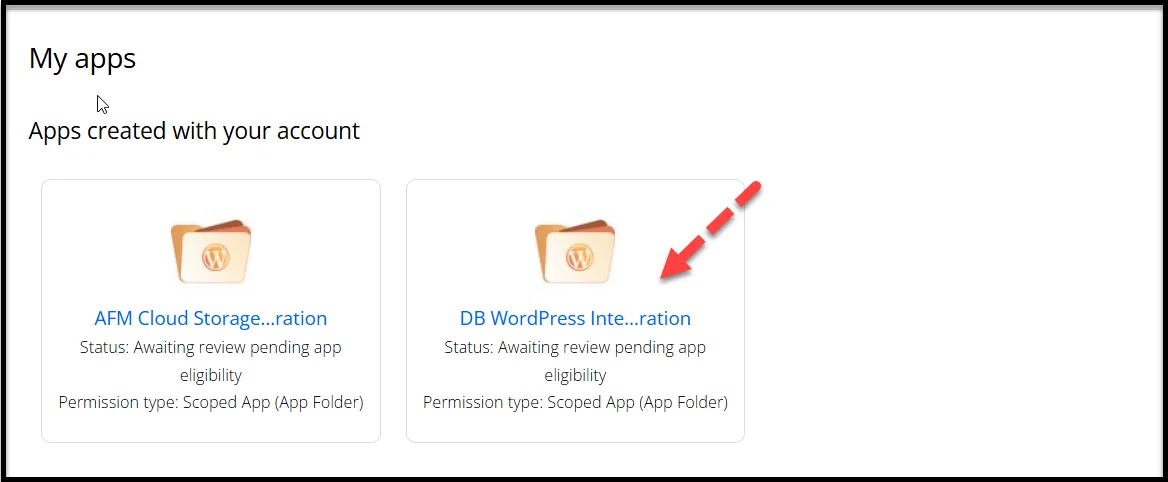
- After submitting, wait for approval (this usually happens quickly).
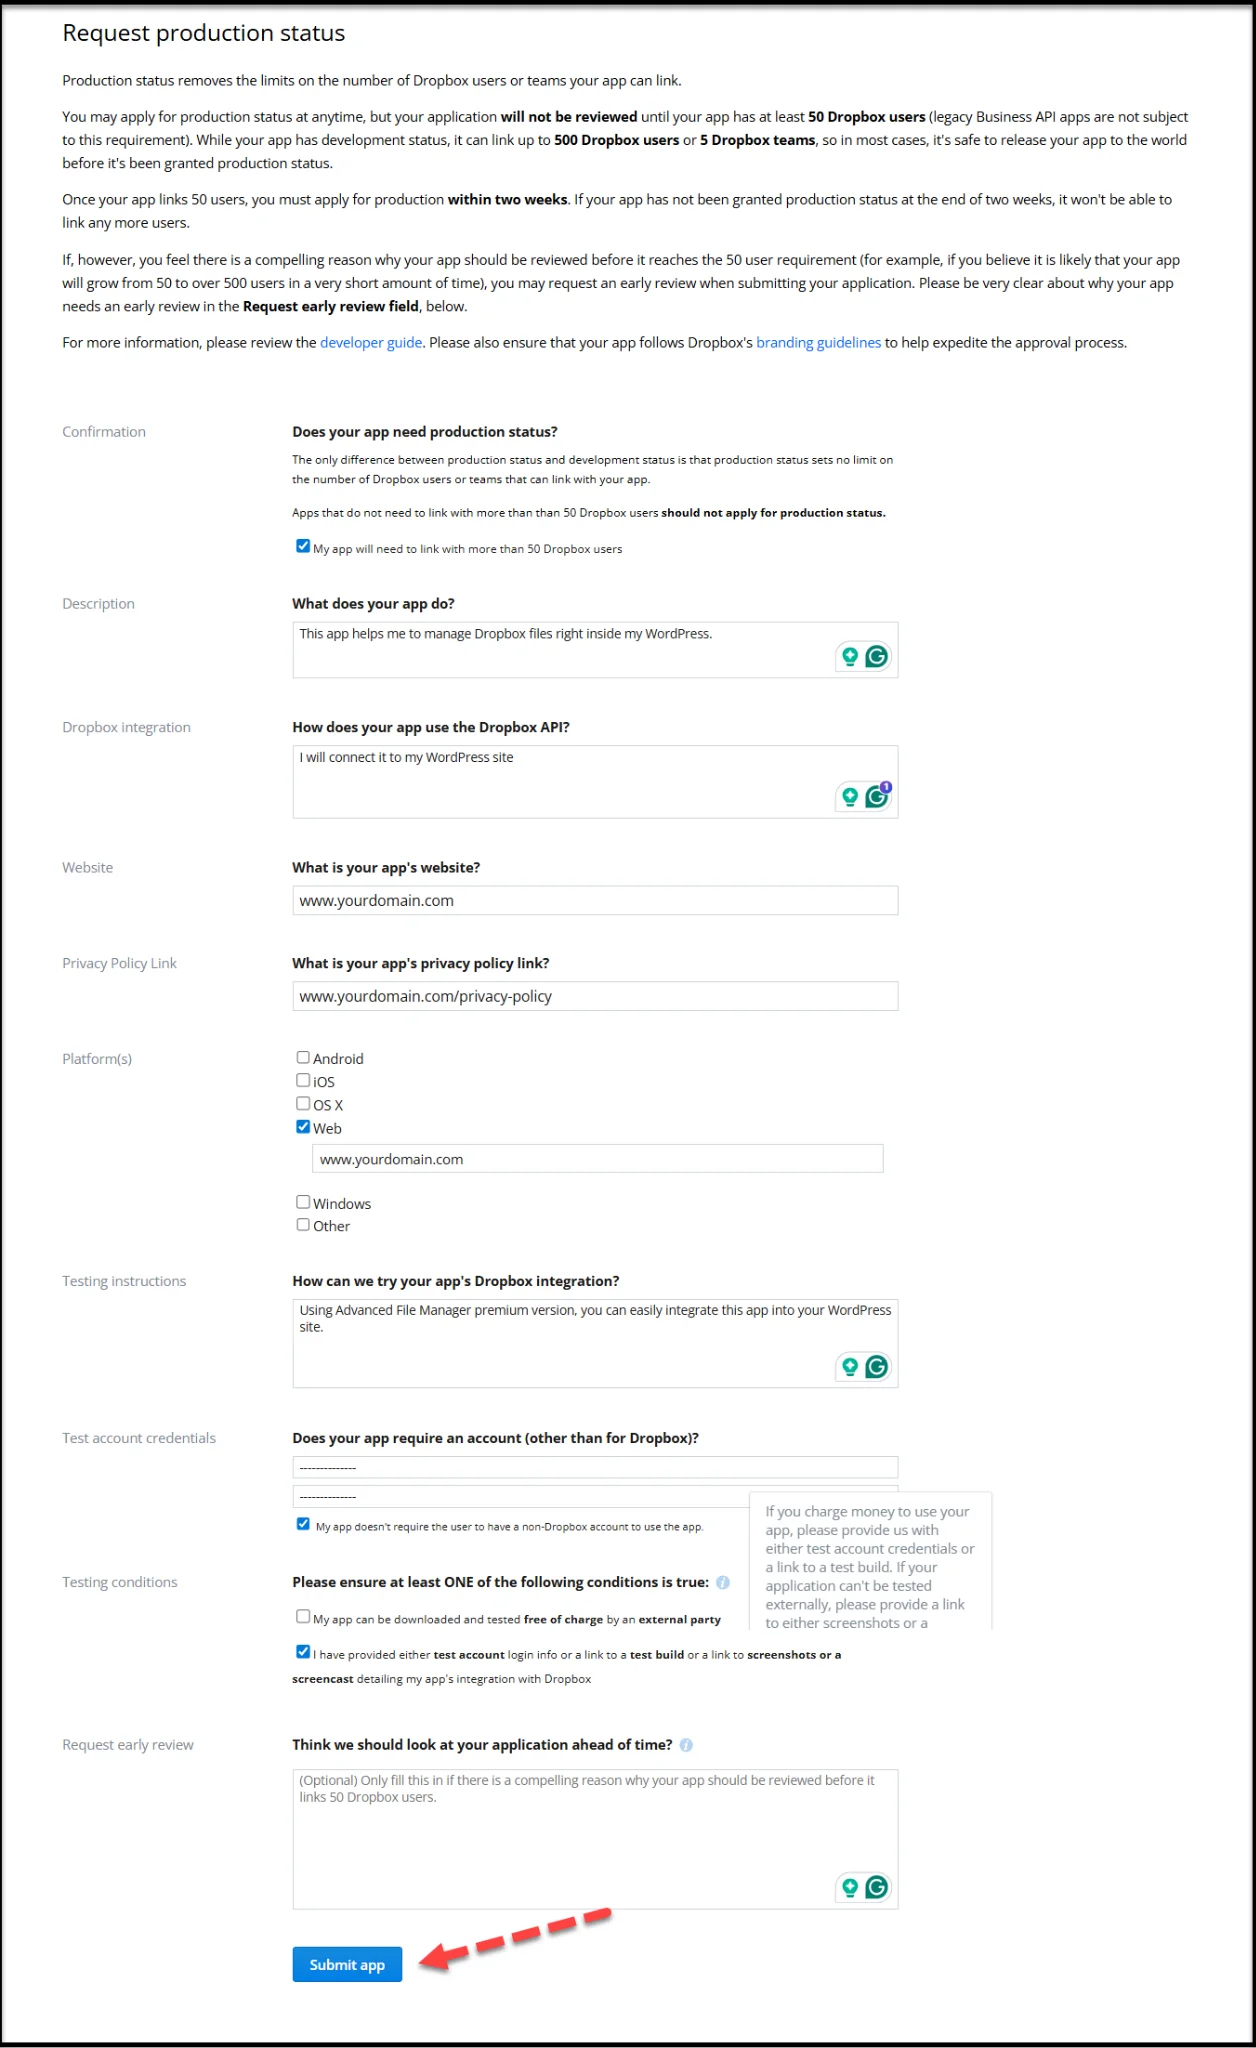
Once approved, your app is officially ready to use.
Step 6: Connect Your Dropbox App to WordPress
- Go back to the Dropbox app’s Settings tab.
- Copy the App Key and App Secret.
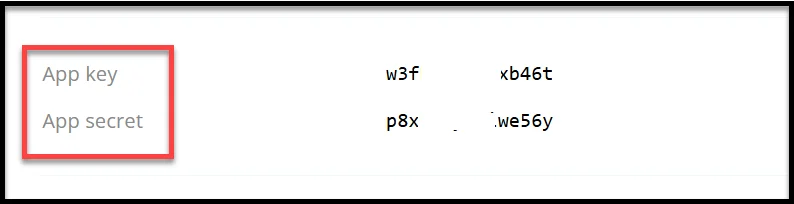
- Paste both into the corresponding fields in your WordPress Advanced File Manager → Dropbox settings.
- Click Save Changes.
- Now hit Connect Dropbox—and you’re done!
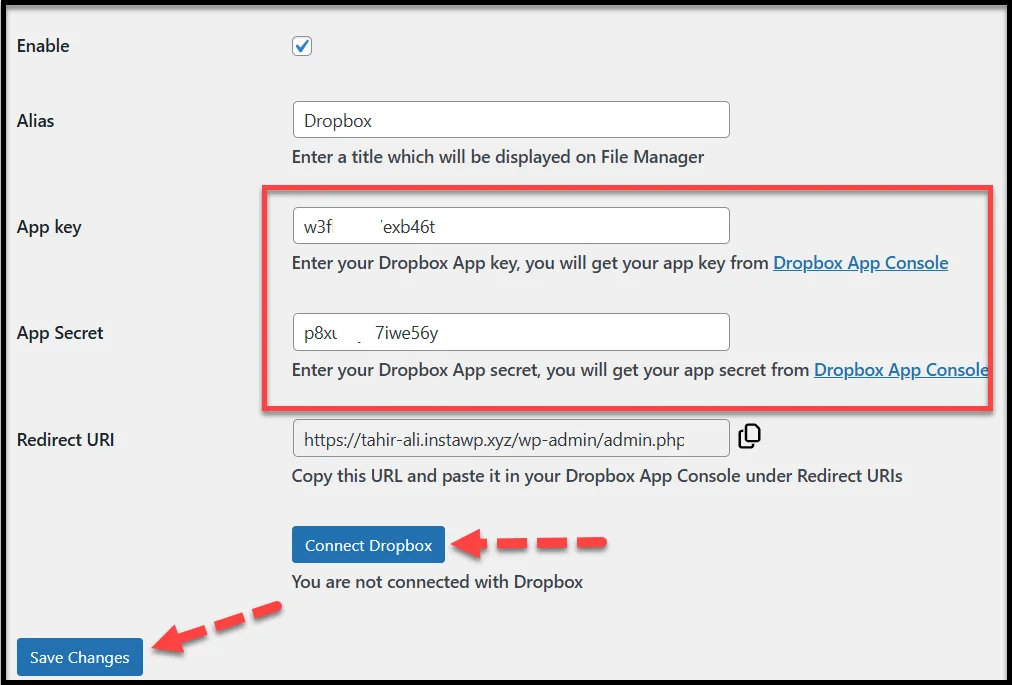
Your WordPress site is now fully connected to your Dropbox account. You can begin accessing, uploading, and managing Dropbox files directly inside your dashboard.
What You Can Do After Dropbox WordPress Integration
Congratulations! You’ve successfully connected Dropbox to your WordPress site.
This integration unlocks new ways to manage your files, streamline content workflows, and keep everything organized.
Here’s what you can now do directly from the WordPress dashboard:
- Access Dropbox Files Instantly: No need to leave your site. Browse Dropbox folders and files directly inside the Advanced File Manager interface.
- Upload to Dropbox in Real-Time: You can now upload files from your WordPress dashboard to Dropbox instantly. Want to push site backups or high-res media off your server? Just drag and drop into your Dropbox folder.
- Organize and Manage Dropbox Content: Rename, move, or delete files inside Dropbox without switching tabs. All file operations are handled within the plugin, providing you with complete control in one place.
- Build a Cloud-First Workflow: Instead of keeping everything inside WordPress, you can offload heavy content to Dropbox and link it as needed, helping your site stay lighter and load faster.
- Create Off-Site Backups for Safety: Backup your themes, exports, and media to Dropbox as an extra layer of protection. If your server crashes, your files are still safe and accessible from the cloud.
Final Step: Sync Dropbox Files to Media Library
Uploading files to Dropbox through the Advanced File Manager plugin is a huge time-saver.
Something most users miss is that files stored in Dropbox won’t appear in the WordPress Media Library by default.
Why, you may ask?
That’s because the Media Library only recognizes files inside the /wp-content/uploads/ directory that are also registered in the WordPress database.
So, if you want to insert Dropbox-hosted images or documents into your posts or pages, you’ll need to add them to the WordPress database.
To do so, follow the steps below:
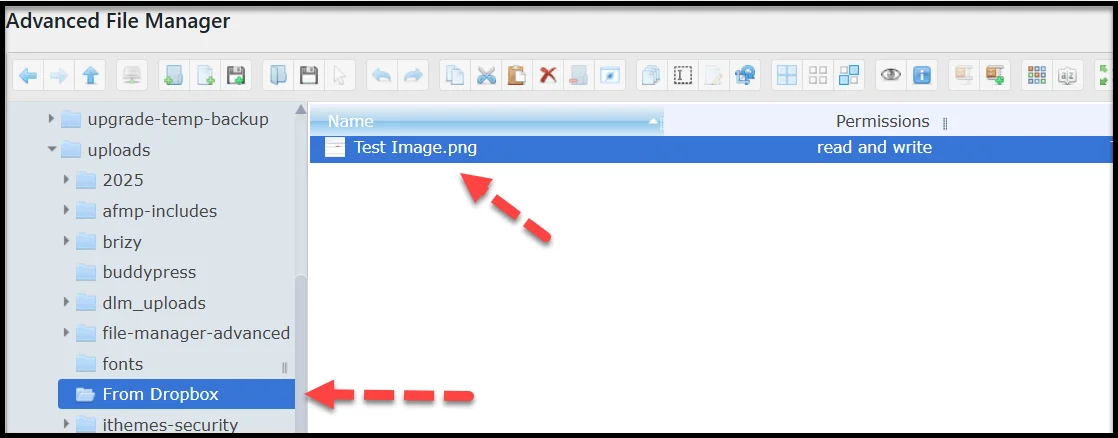
Step 1: Copy Dropbox Files to /wp-content/uploads/
After uploading files to Dropbox using the file manager:
- Locate the files inside the Advanced File Manager → Dropbox folder.
- Select the media files you want to use in WordPress.
- Copy or move them from Dropbox into the WP-Content Uploads folder using the plugin’s built-in file manager.
- You can even create a subfolder for organization (e.g., /uploads/from-dropbox/).
Step 2: Sync Files Using the Media Sync Plugin
Now that your files are in the correct directory, it’s time to make them visible inside your Media Library.
#1: Install the Media Sync Plugin
- Go to Plugins → Add Plugin.
- Search for Media Sync.
- Install and activate it.
#2: Scan and Register Files
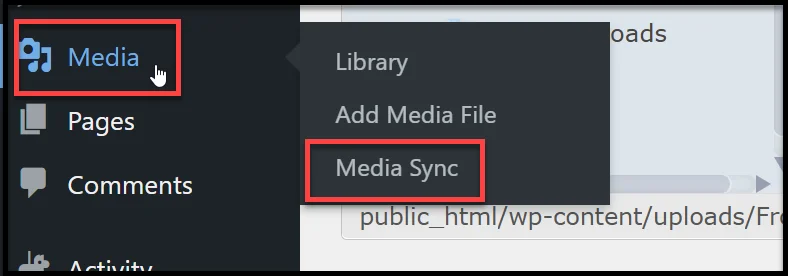
- Head over to Media > Media Sync.
- Click Scan Files—the plugin will search /wp-content/uploads/ for any unregistered files.
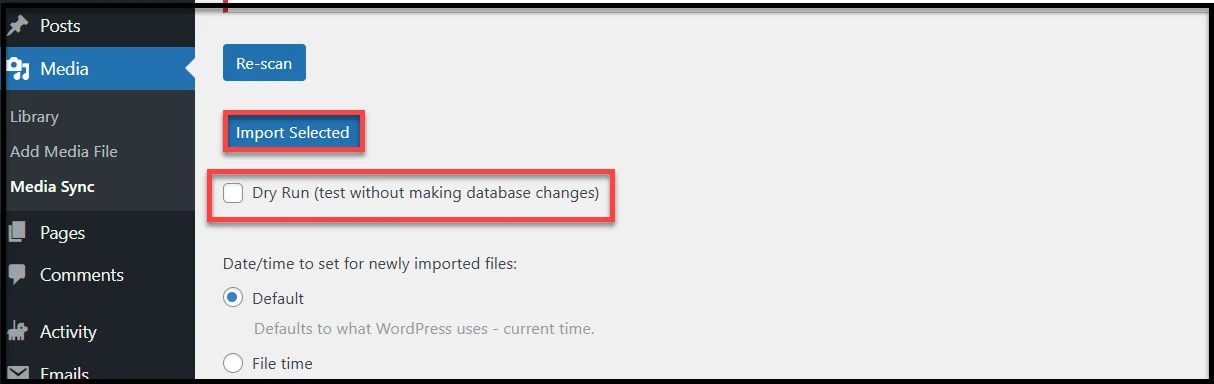
- On the next screen:
- Uncheck Dry Run
- Scroll down and select the files you copied from Dropbox
- Click Import Selected
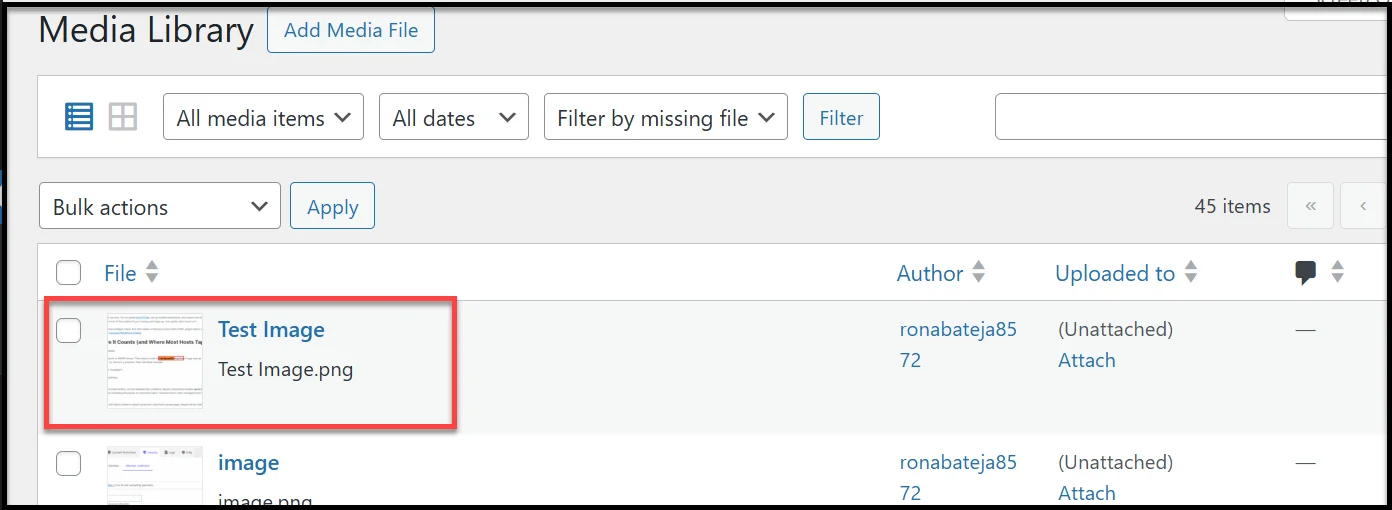
Now, go to the Media Library and you can see our selected ‘Test Image’ is appearing inside the media library.
You might want to read 👉 How to Create a WordPress Document Library [Step-by-Step]
Need Help? We’ve Got You Covered
Setting up Dropbox with WordPress can feel a bit technical. But don’t worry, you’re not alone.
If you hit a roadblock, whether it’s a connection issue, file access error, or plugin conflict, our expert Support Team is here to help
👉 Submit a support ticket via our official support portal
We’ve helped thousands of users fix Dropbox sync issues, and would love to help you too.