Managing files in WordPress can get tricky as your website grows. You may upload hundreds of images, videos, PDFs, and other media over time. All these files take up space and can slow down your site.
That’s where taking assistance from cloud storage becomes essential. Services like Google Drive and Dropbox allow you to store files safely without filling up your website. They also make it easier to share, back up, or organize your content.
But connecting WordPress to a cloud storage service isn’t simple.
But you don’t have to worry. This guide explores how to link your WordPress site with cloud storage. We’ll also discuss the tools you need to do this quickly without needing any technical skills.
Connect WordPress to Cloud Storage: 2 Effective Methods
As discussed, cloud storage helps you store large files without putting pressure on your website’s hosting space. It also adds a layer of safety and gives you more control over how you manage media and documents.
There are a few different ways to connect cloud storage services with WordPress. Some are quick and beginner-friendly, while others need more setup or technical skill.
We will be exploring the two effective methods:
- Use Advanced File Manager. The plugin offers a simple and fast way to connect your site to the cloud.
- Manually connecting through APIs.
- Uses FTP or desktop syncing apps to manage cloud files manually.
Each method has pros and cons. Let’s examine each one and see which one best suits your needs:
Method #1: Use a File Manager Plugin
A file manager plugin is a tool for managing your website’s files directly from the WordPress dashboard. It works just like your computer’s file system, allowing you to upload, edit, move, rename, and delete files or folders without needing FTP access or a hosting control panel.
Making it extremely simple to handle core files, themes, plugins, and media in one place.
This one is the easiest and the most effective method.
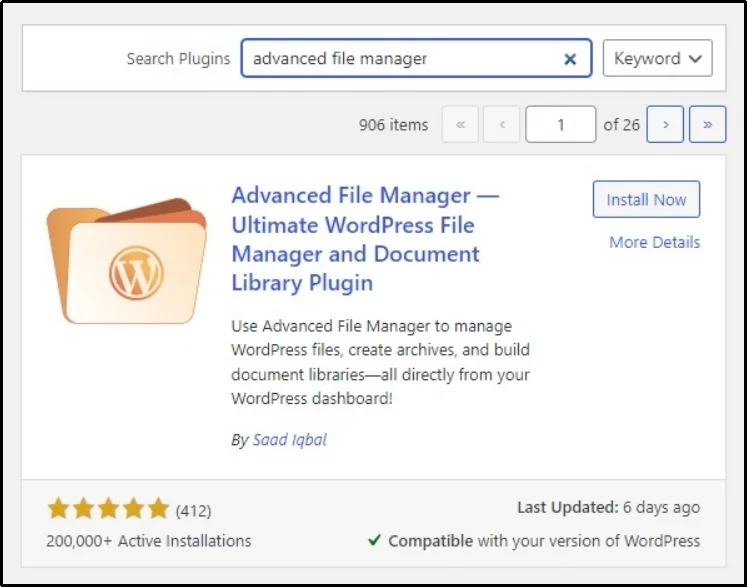
For this guide, we will use Advanced File Manager, the best file manager plugin in the WordPress plugin directory.
To download the plugin, go to WordPress ⇒ Add Plugin. Search for Advanced File Manager using the search box. Next, install and activate the plugin.
It’s important to note that cloud integration is a premium-restricted feature and can only be used if you upgrade.
Also note: You can not use the premium version without the free one. Ensure to download the free one using the aforementioned process, regardless of the plan you choose.
After installing the free version, visit the facial website and buy the subscription plan of your choice and install the premium version of the Advanced File manager.
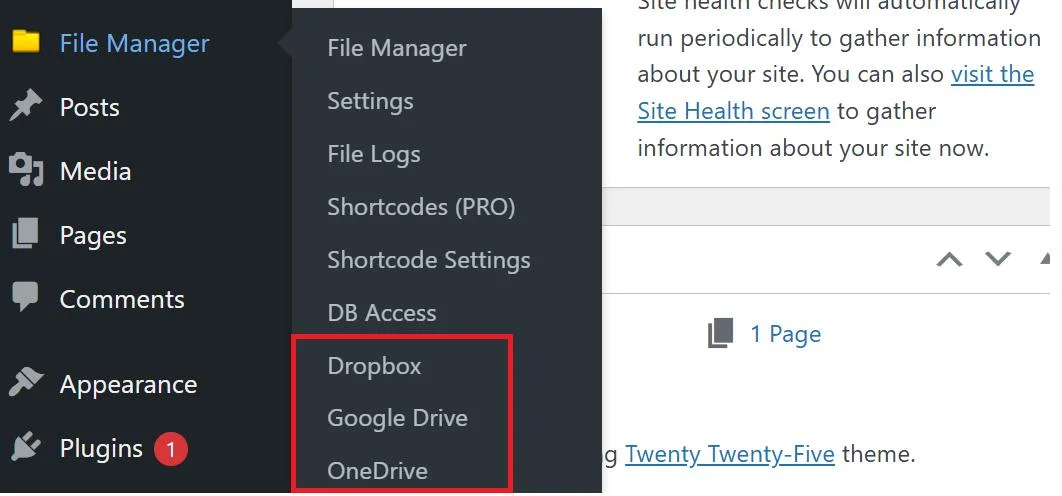
Once done, go to the Advanced File Manager’s settings ⇒ Google Drive or Dropbox (choose the one you want). We will be using Google Drive in this article.
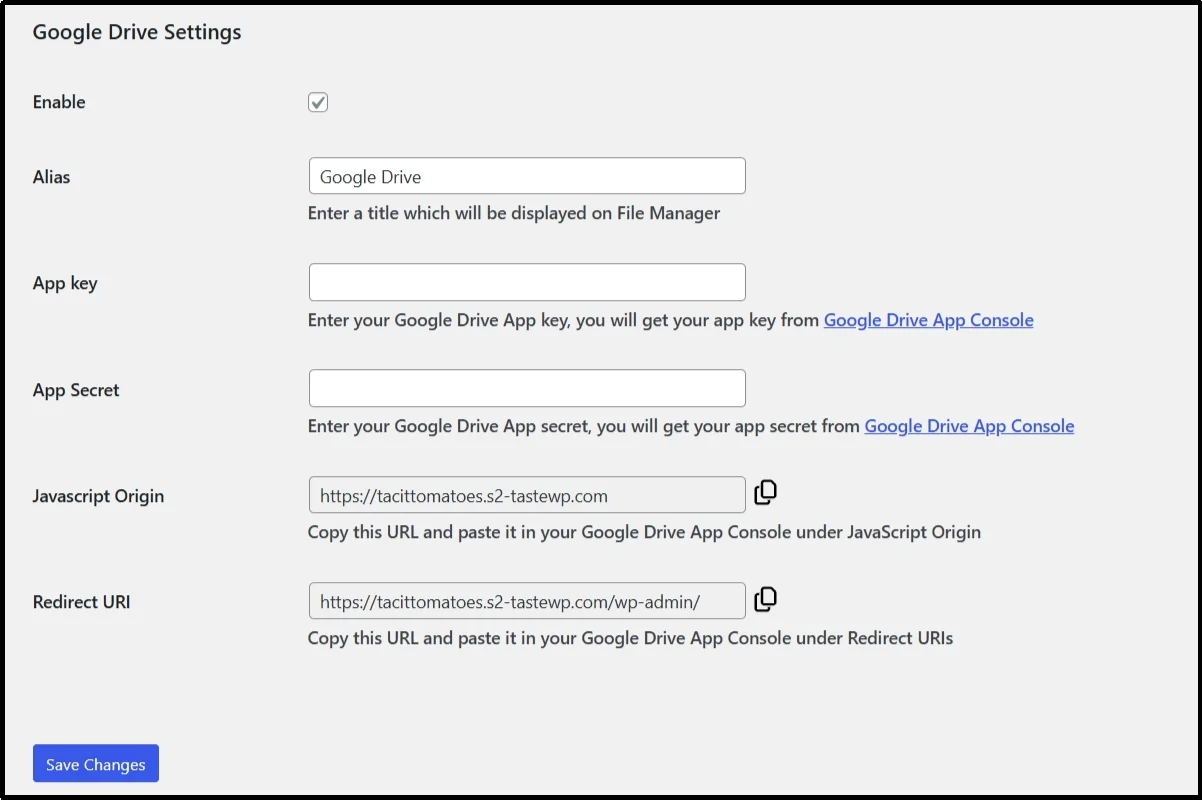
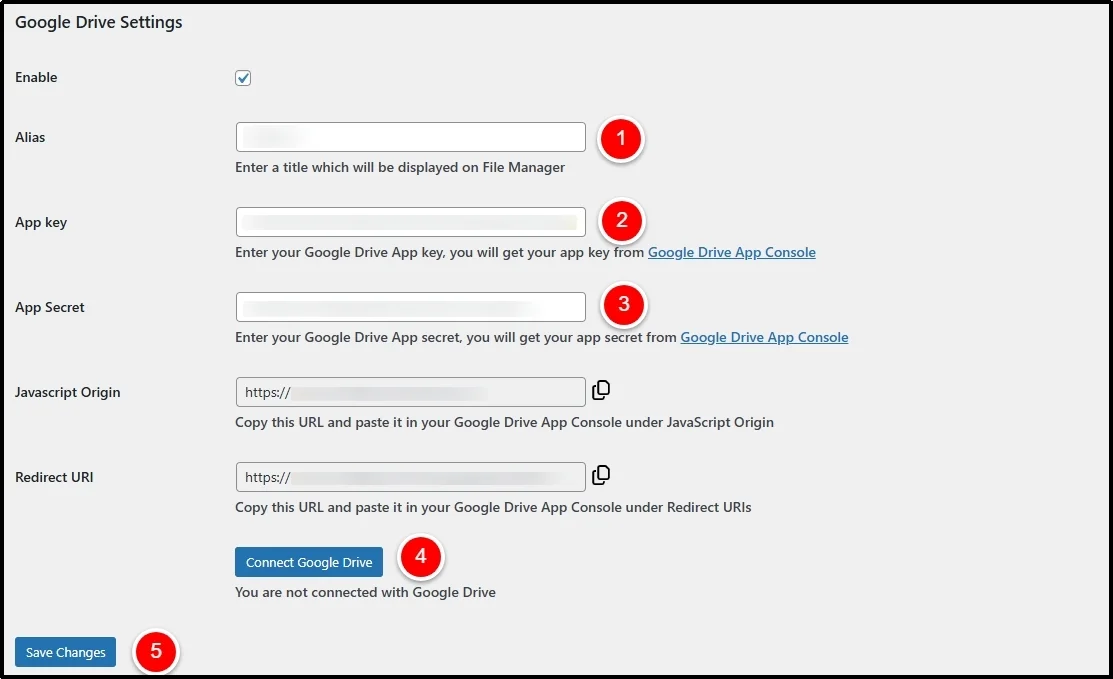
Once inside the Google Drive Settings, check the Enable checkbox.
Access Google Cloud Console, create a project using the Create Project button at the top of the screen.
Once the project is created, click +Enable API and services.
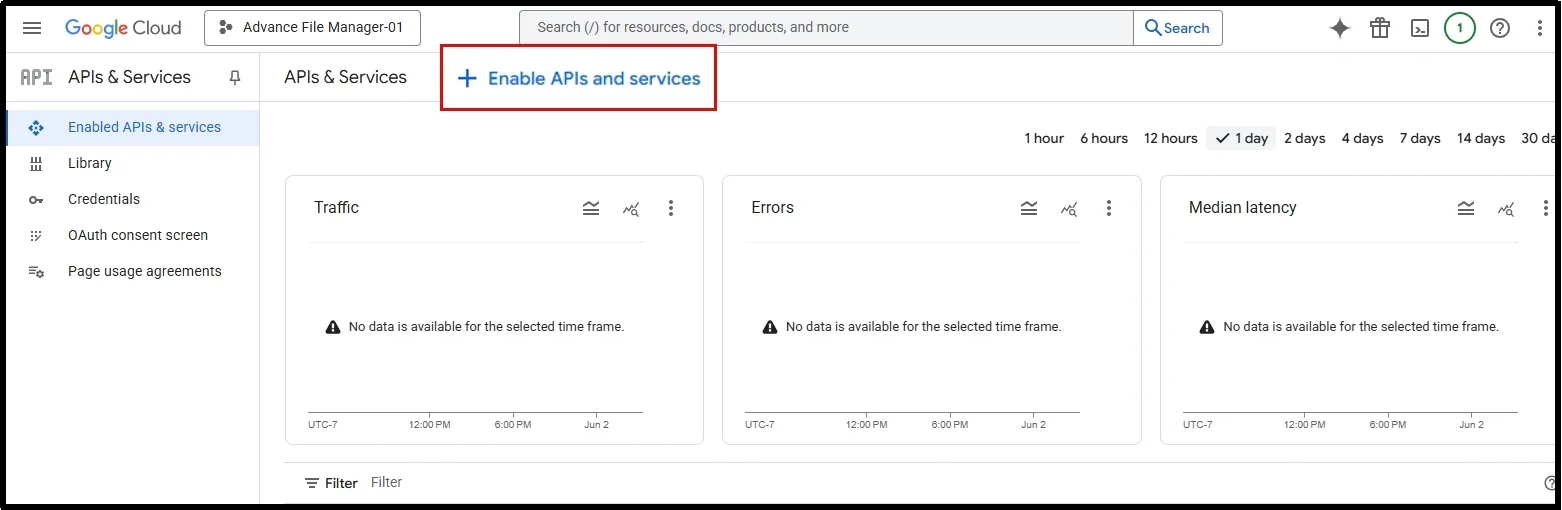
Enable the Google Drive API.
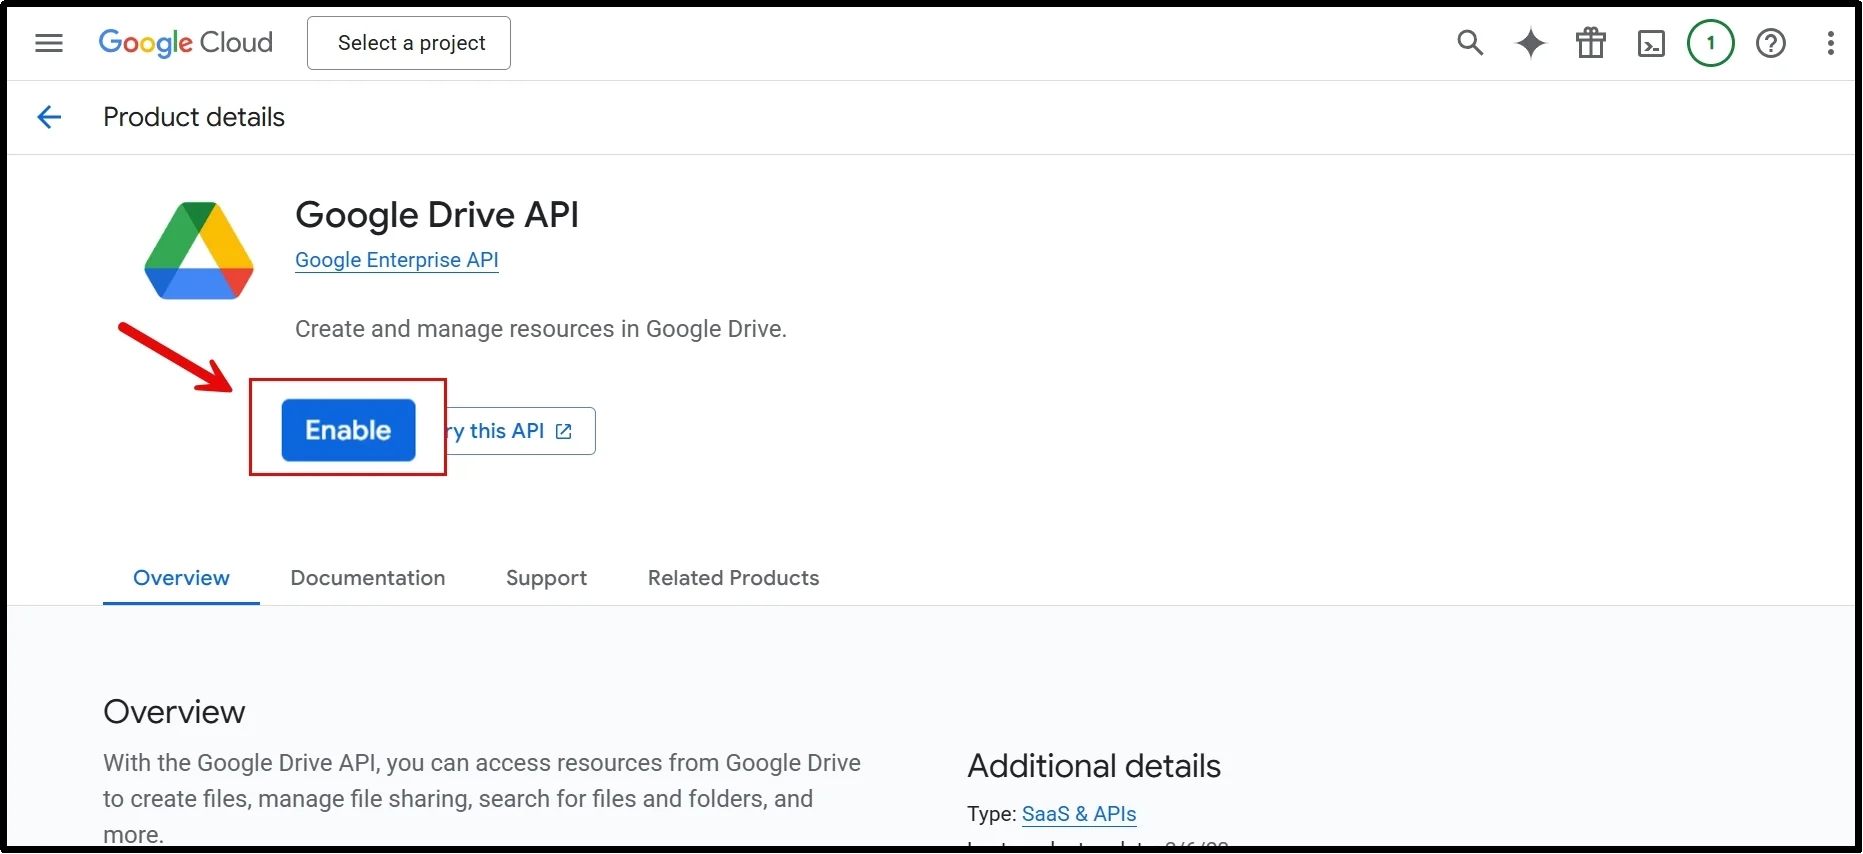
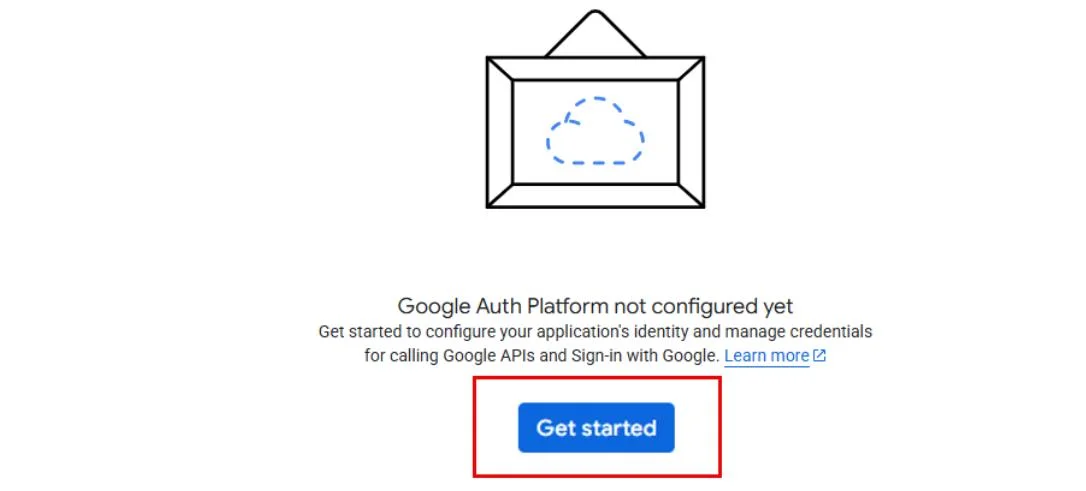
Once done, switch to the OAuth consent screen tab.
Click Get Started.
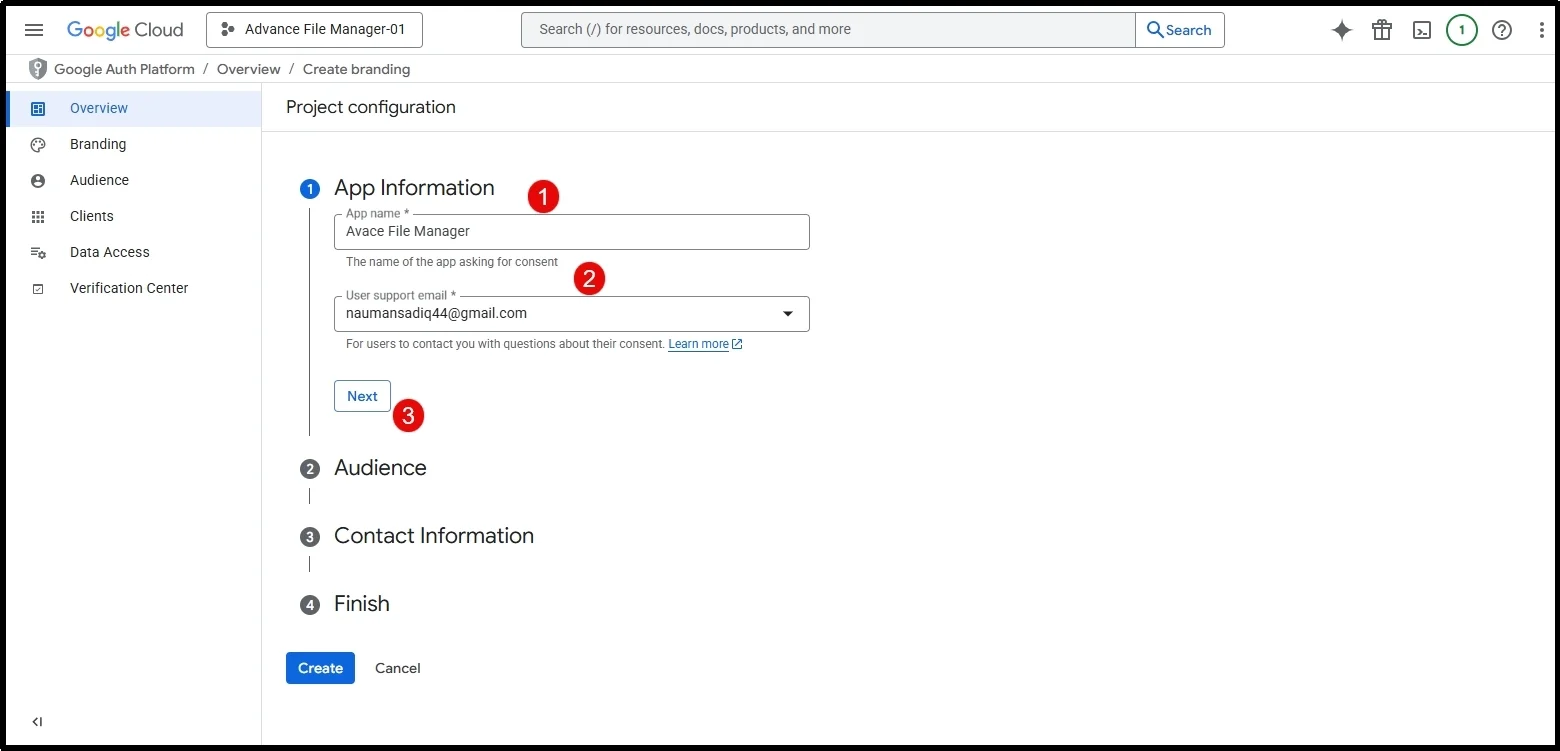
Fill out the necessary information. Including:
- App name.
- User support email.
- Choose your audience.
- Add the contact information.
Finally, read the Google API service’s user data policy, and check the box to give consent.
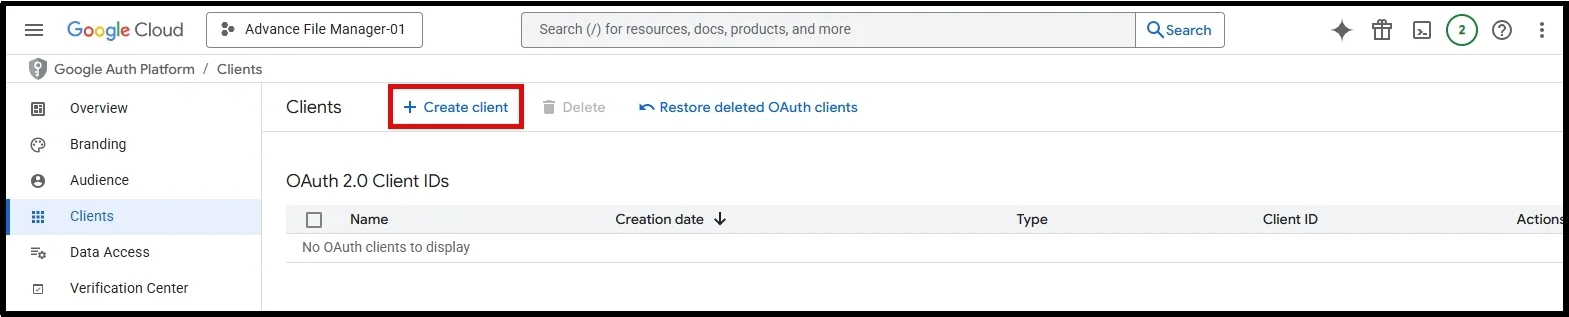
Once done, create OAuth credentials by going to the Clients tab and clicking + Create client.
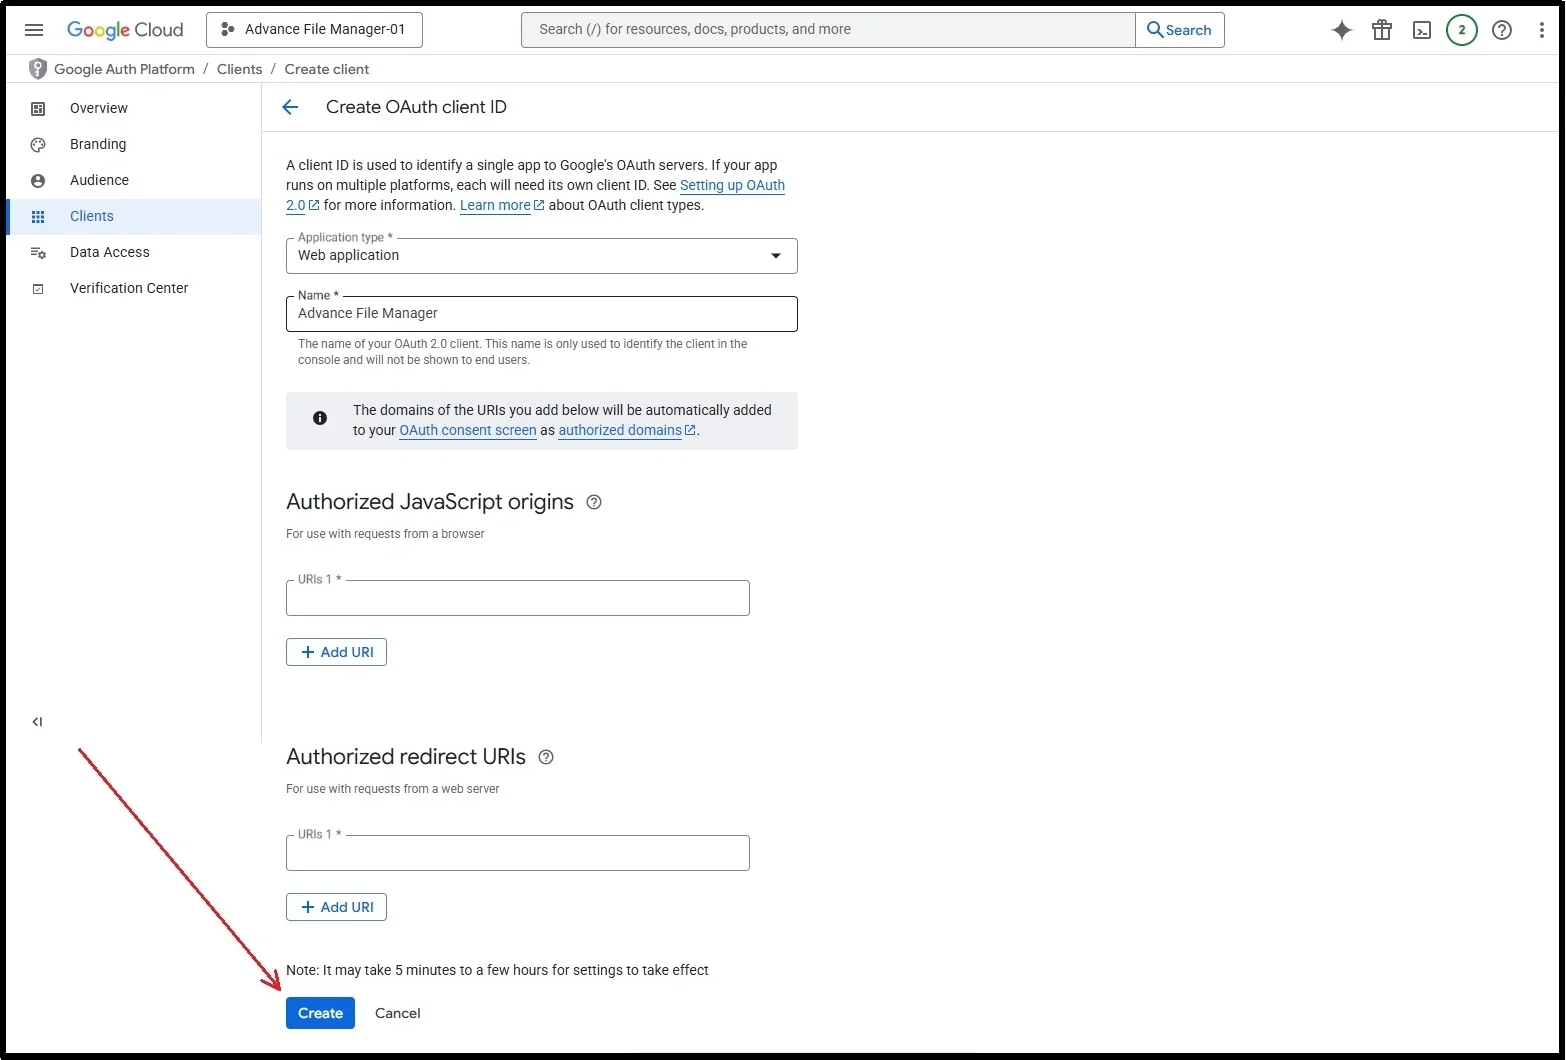
Fill out the necessary information.
Name the APIs, enter the JavaScript origins and Authorized redirect URLs from the plugin’s settings, and press Create.
Now, you’ll see the following screen, you only need Client ID and Client secret, copy them.
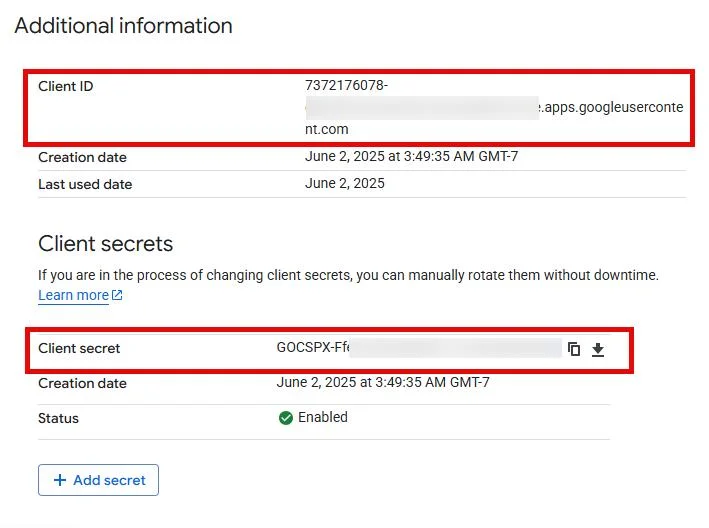
Next, return to the plugin’s settings, give it a name, paste the Client ID and Client secret, and click Connect Google Drive and Save Changes.
You will be redirected to the verification page for access. Choose the account, grant permission, and there you go!
Now, you can access Google Drive from the Advanced File Manager.
For a detailed explanation of each cloud storage integration, check out the following links:
Method #2: Manually Connecting Through APIs & Custom Code
Alternatively, you can connect the two using third-party integration tools if you don’t want to go with Advanced File Manager. However, it is important to note that this method does require technical and coding experience.
Most cloud services, like Google Drive or Dropbox, offer public APIs. These APIs allow your website to communicate with your storage account. To use them, you’ll often need to:
- Create an app or project inside your cloud storage account, similar to what we did in the previous method.
- Generate API keys or tokens for secure access.
- Add those credentials to your WordPress site using a custom code or a connection tool.
Some third-party platforms like Zapier or Make (formerly Integromat) allow you to build workflows that move files between your WordPress site and cloud storage services. These tools can automate file uploads, backups, and syncing without writing code, but that would require even more coding knowledge.
This method takes more time to set up. You must read the API documentation of the platform you wish to use, test your settings, and ensure the connection stays secure.
If you’re uncomfortable working with code or API keys, this method might not be the best starting point. Instead, a plugin-based approach, as we discussed in the first method, can help you get started faster with fewer steps.
Method #3: Syncing Files Using FTP or Desktop Apps
Another way to connect WordPress with cloud storage is by syncing files outside of WordPress using FTP or desktop apps. This method does not require code or plugins, but it does require switching between different tools.
Most cloud services offer desktop apps that let you create a local folder on your computer. Any files you move into that folder automatically sync to the cloud. You can then use an FTP client, like FileZilla, to upload those files from your computer to your WordPress site.
Here’s how the process usually works:
- Install a cloud storage app (like Dropbox or Google Drive) on your computer.
- Save your files in the synced folder.
- Open your FTP client and connect it to your WordPress hosting server.
- Upload the files to the proper WordPress directory (usually /wp-content/uploads/)
This method works well if you want to back up files, organize them locally, or avoid logging into WordPress often. But it also means you must manage files manually and understand where to place them in your WordPress folders.
Moreover, it is also imperative for you to know where each file belongs. Uploading files to incorrect directories may cause complications and even cause your website to shut down abruptly.
Also, WordPress won’t automatically recognize new files uploaded via FTP. You must either refresh it manually or use a plugin to refresh the media library whenever you upload something. So, while this approach offers more control, it can feel slow or disconnected from your website.
Final Words
Connecting your WordPress site to a cloud storage service can make file management easier, safer, and more flexible. Whether you’re backing up files, saving space on your server, or organizing media better, cloud storage can help your site run smoothly.
In the article, we learned that manual methods, such as using custom code to add APIs or using an FTP client, are slower, unreliable, and require technical knowledge. On the other hand, a plugin like Advanced File Manager lets you connect to services like Google Drive, Dropbox, and OneDrive without needing to write any code.
If you’re looking for the easiest way to get started, Advanced File Manager offers a clean and powerful solution right inside your WordPress dashboard. It’s simple to set up, works reliably, and helps you manage cloud storage without leaving your site.
The other key strength of Advanced File Manager is that it offers FTP free file management for WordPress. The plugin offers a feature-rich toolbar with tons of helpful features and allows you to easily create a front-end document library with greater control.
Frequently Asked Questions
How do I verify if my WordPress site is connected to a cloud storage URL?
To verify the connection, upload a file from your WordPress dashboard and check whether it appears in your cloud storage account (e.g., Google Drive, Dropbox). You can also open the file’s URL to see if it points to your cloud storage domain. Additionally, if you’re using a plugin like Advanced File Manager, go to the plugin’s settings and check the connection status under the respective cloud storage tab.
Will moving media to the cloud break existing image links on my site?
Yes, it can if not appropriately handled. When you transfer media to the cloud, existing links may break unless you update all image URLs across your site to reflect the new storage location. Always backup your site and test URL replacements before going live.
What happens if I disable or delete my cloud storage plugin in WordPress?
Disabling the plugin will stop new uploads from syncing to cloud storage and may break features that depend on it. Deleting the plugin removes all its files from your server and disconnects your site from the cloud service. Existing file links may also break if they were routed through the plugin.