Have you ever wondered what the WordPress root directory actually is?
The WordPress root directory is one of the most important concepts every site owner should understand. Knowing the exact location of the WordPress root folder helps you manage website files, troubleshoot errors, and maintain your installation. It acts as the central hub for all WordPress core files.
This critical directory contains your WordPress core files and configuration data. Knowing how to access the WordPress root directory makes site maintenance, debugging, and recovery much easier.
Without further ado, let’s learn about it.
What is the Root Directory in WordPress?
The WordPress root directory, often called the WordPress root folder, is the top-level directory of your WordPress installation, which may be located in public_html or a subdirectory. Think of it as the main folder that contains everything needed for your site to run. This is the starting point for all your WordPress core files.
When a visitor accesses your domain name, the server loads the document root (typically public_html), where WordPress core files such as index.php are located. This folder houses key configuration files and the main WordPress folders.
It is important to differentiate the WordPress root directory from its subdirectories. Subdirectories are folders located inside the WordPress root directory that organize different parts of the system. For example, folders like wp-admin, wp-content, and wp-includes are subdirectories, but the root directory is the parent that holds them all.
A few common and essential files are located right in this directory. Let’s take each of them.
Essential Files Found Inside the Root Directory in WordPress
Several files inside the WordPress root directory are essential for your site’s configuration, loading process, and overall functionality. These files handle the configuration, loading, and display of your website. Understanding what each file does is key to managing your website successfully.
index.php
The index.php file is the main entry point for your WordPress site and controls how content is loaded and displayed to visitors. It is the file that a web server processes first when someone visits your domain. This file directs the flow of data to display your website’s content.
wp-config.php
The wp-config.php file is arguably the most critical file in the entire WordPress installation. This file contains your site’s database name, username, password, and host information. It also stores critical configuration constants, making the wp-config.php file location especially important for site security and stability.
wp-settings.php
The wp-settings.php file is responsible for loading all the fundamental settings for your WordPress site. It sets up the environment and loads the necessary functions before WordPress actually executes. This file ensures that your site’s configuration is properly initialized.
wp-load.php
The wp-load.php file handles the loading of WordPress’s core functionality. If any other WordPress file needs to load the entire framework, it calls this specific file. In simple terms, it tells WordPress to load its core framework before executing any functionality.
wp-blog-header.php
This file is a vital part of the loading sequence for your public-facing site. It is responsible for initiating the process that displays the content of your blog or website. The index.php file calls this file to start rendering the page.
.htaccess
The .htaccess file is important on Apache-based servers, where it controls redirects, permalinks, and security rules. Other servers like Nginx handle these settings differently.
robots.txt
The robots.txt file is a small text file that tells search engine crawlers which parts of your site they should or should not access. It’s an important tool for search engine optimization (SEO). This file controls how search engine crawlers access parts of your site, which can indirectly affect indexing behavior.
Why Do You Need to Know About the WordPress Root Directory?
Sometimes, WordPress sites encounter critical errors that prevent access to the admin dashboard entirely. When your site is stuck, and you cannot access the standard dashboard, you must go into the core files from the “back end” to fix the issue. Knowing the location of your WordPress root folder allows you to perform these essential emergency repairs.
There are many other important reasons why understanding this core file location is beneficial, such as:
- Editing wp-config.php for database settings: As discussed, this file holds the details your website uses to connect to your database. If you change your database password or move your site, you must manually edit wp-config.php to update these settings.
- Adding custom code snippets: Sometimes, you need to add small pieces of custom code to your site that affect the entire installation. Some site-wide configurations require edits to files like wp-config.php in the root directory, while most custom code should be added using a child theme or a dedicated code snippet plugin.
- Some site-wide customizations require inserting code into core configuration files, such as wp-config.php, which are stored in the root directory.
- Troubleshooting plugin/theme conflicts: If a new plugin or theme update breaks your site, accessing the root directory lets you quickly find and rename the problematic folder. This instantly deactivates the broken item, getting your site back online fast.
- Managing security and backups: For manual backups or advanced security checks, you often need direct access to all your files. The root folder gives you a single place to copy every essential file and folder, ensuring your backup is complete and your security measures are in place.
How to Find the Root Directory in WordPress: 3 Methods
Locating your WordPress root directory can be done easily through one of three main methods. You can choose the method that you are most comfortable with, whether it is using your hosting control panel, a dedicated application, or a plugin.
Method 1: Using a cPanel
cPanel is a popular control panel provided by many web hosting companies. It offers a graphical interface for managing your website files and settings. You can use cPanel’s built-in file manager to find your root directory.
Here’s how to access the root directory in WordPress using cPanel.
- Access your web host’s control panel using the credentials they provided.
- Look for the file manager icon under the files section and click it. This tool shows you a tree view of all the files on your server.
- In the left sidebar, locate and open the public_html directory, which is the default WordPress root folder on most hosting providers.
- Click on public_html to open it and confirm you see key files like wp-config.php and folders like wp-admin. This folder is the root directory of your WordPress site.
Method 2: Using FTP/SFTP Clients
Using an FTP (File Transfer Protocol) or SFTP (Secure File Transfer Protocol) client is another professional way to connect directly to your server. This method requires a separate desktop application like FileZilla. SFTP is generally preferred as it is a secure connection.
To access, you need your host (usually your domain name), your SFTP username, password, and port (often 22 for SFTP). You can find these details in your hosting account dashboard.
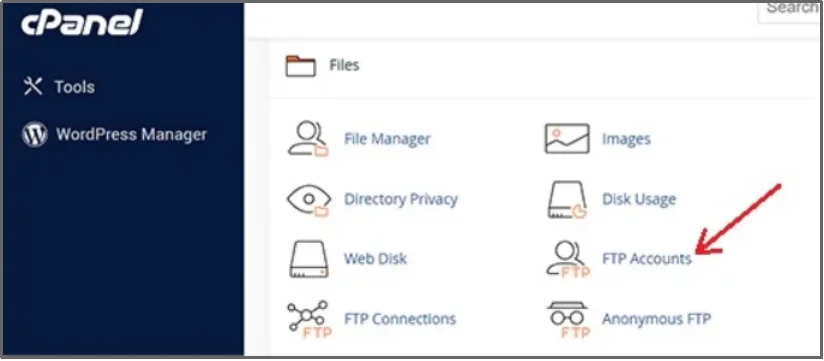
You can find your FTP or SFTP login credentials in your hosting account under the FTP Accounts section.
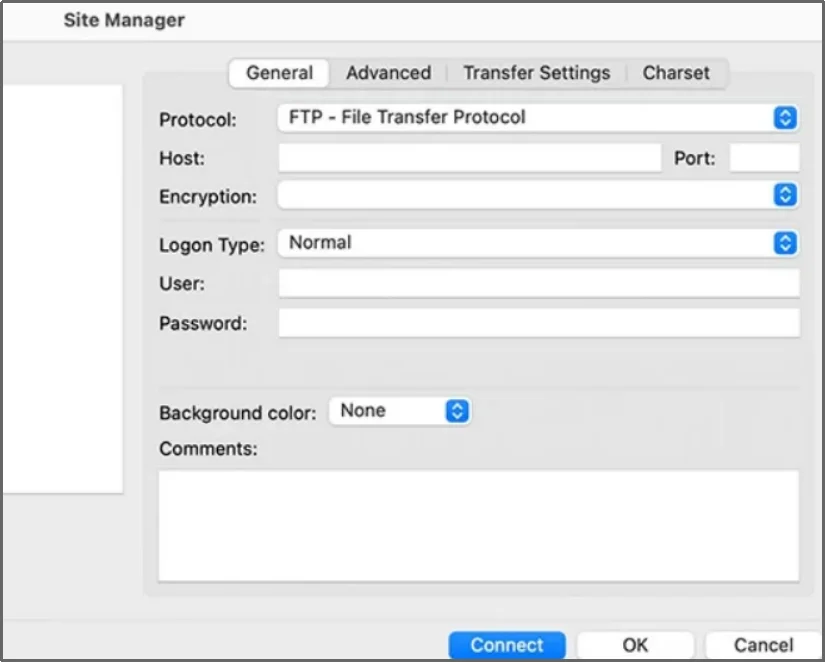
Once you have the details, establish a connection from the Site Manager that you can get to by right-clicking on the File tab.
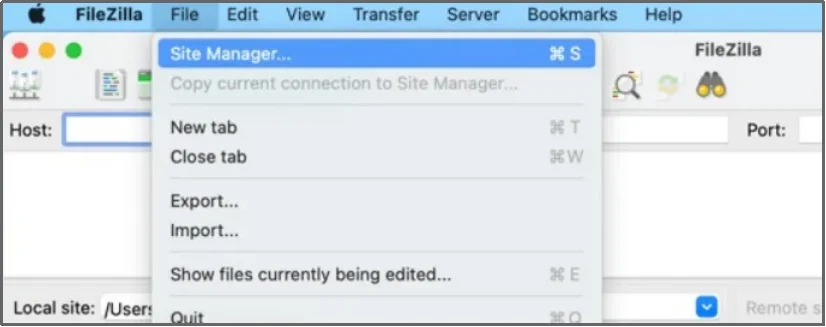
Enter the necessary details.
Once connected, the client window will display your server’s files. The files for your main website will be located within the directory labeled public_html or sometimes www.
The folder containing the wp-config.php file and the wp-content folder is your WordPress root directory.
For more details on connecting via FTP, you can refer to this article: How to Use FTP to Upload Files to WordPress [Ultimate Guide]
Method 3: Using a File Manager WordPress Plugin
The third and most convenient way to access and manage your files is by using a WordPress file manager plugin. This option lets you bypass complex external tools like cPanel or FTP (File Transfer Protocol), keeping all your work right in your WordPress dashboard. It is a quick and efficient way to handle your WordPress core files.
While several file manager plugins exist, Advanced File Manager stands out for its balance of usability, control, and security. It provides the most comprehensive and user-friendly solution for managing the root directory of your WordPress site and all its contents.
Why Choose Advanced File Manager?
Advanced File Manager is more than just a file viewer; it is a powerful tool designed to give you complete control over your files without any technical hurdles. If you need to quickly check the wp-config.php location or upload large files, this plugin makes it simple.
It saves you the trouble of setting up complex connections and remembering separate server credentials. Using this plugin means you can manage your files easily and securely, whether you are a beginner or an advanced user.
Here are the key features that make Advanced File Manager a reliable choice for managing the WordPress root directory:
- Complete File Operations: Easily perform basic tasks like copy, paste, delete, rename, and edit any file or folder directly in your dashboard.
- Drag-and-Drop Uploads: Quickly upload single or multiple files from your computer to your server using a simple drag-and-drop interface.
- FTP-Free File Management: Manage all your WordPress files directly from the dashboard without using FTP clients or hosting control panels. This makes file handling faster, simpler, and more beginner-friendly.
- Front-End File Management: Allow selected users to upload, edit, or organize files from the front end of your website without accessing the WordPress admin area. This is ideal for client dashboards, membership sites, and team collaboration.
- AI-Powered Coding Assistant: Get real-time help while editing code with the built-in AI Code Pilot. It suggests fixes, completes code snippets, and highlights potential issues in PHP, HTML, CSS, and JavaScript to reduce errors.
- Cloud Storage Integrations: Manage files from cloud services like Google Drive, Dropbox, Amazon S3, and GitHub directly within WordPress. This helps you sync, organize, and work with remote files from one central place.
- Quick File Search & Sorting: Easily find specific files or folders using built-in search and sorting tools. This is especially helpful when working with large themes, plugins, or complex directory structures.
- ZIP Archive Management: Create, extract, and compress ZIP archives directly on your server, which is perfect for backups or transferring themes/plugins.
- Built-in Code Editor: Edit crucial files like wp-config.php or functions.php instantly with syntax highlighting and line numbering, avoiding the need for external tools.
- User Role Permissions: Control which user roles (like Editor or Contributor) can access the file manager and what actions they can perform, adding an extra layer of security.
- Hide Private Files: Selectively hide certain files or folders from being displayed in the file manager for specific user roles.
- Private Folder Management: Create a private folder to store sensitive files that are not accessible via a direct URL on your site.
- Multi-Lingual Support: The plugin is translated into several languages, making file management accessible to a global audience.
- File Previews: View file contents, including PDFs, images, and other documents, without having to download them first.
And much more! Check out the complete features list.
To use a file manager like Advanced File Manager, all you have to do is download the plugin via the WordPress directory and start using it.
To find the root directory with Advanced File Manager, navigate to your admin dashboard and install the plugin—if you are unsure how a plugin is downloaded, please follow:
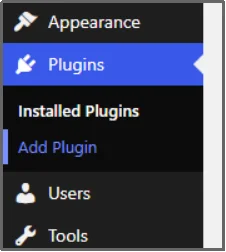
- Navigate to your admin dashboard.
- Click Plugins and then Add Plugin.
- Search for Advanced File Manager in the search plugin bar.

- Look for the Advanced File Manager — Ultimate WP File Manager And Document Library Solution.
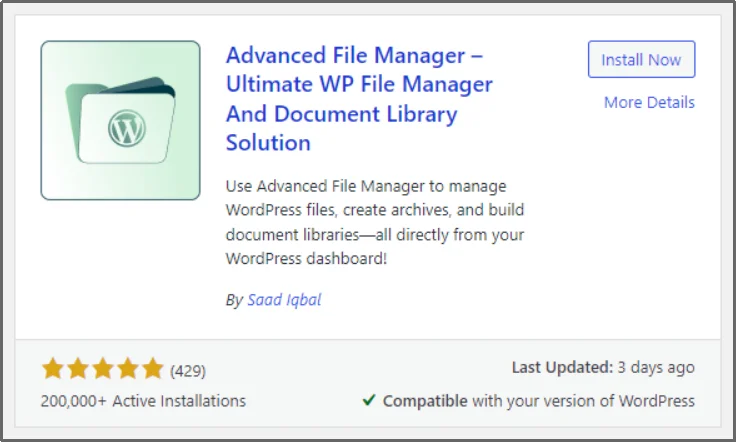
- Click Install Now.
- Wait until the Install Now button turns into Activate. Once done, click Activate, and the Advanced File Manager is live on your WordPress. Enjoy easier file management!
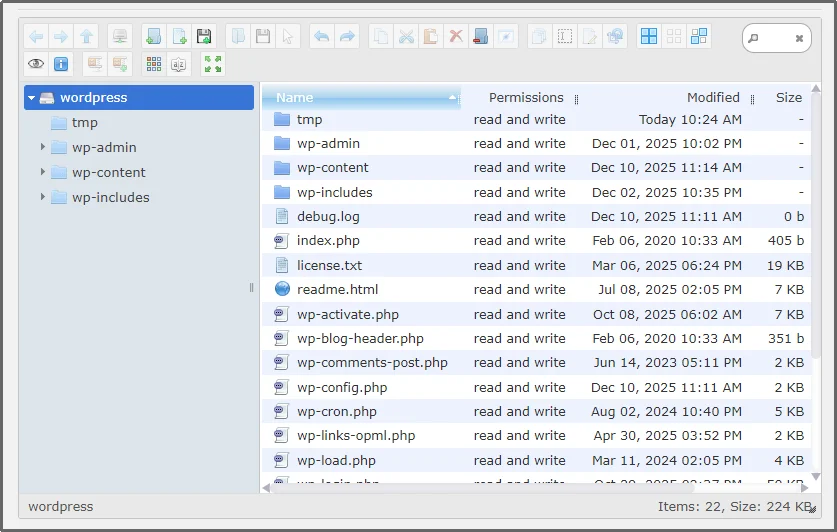
To find the root directory in WordPress, just navigate to the new File Manager tab that appears after the successful activation.
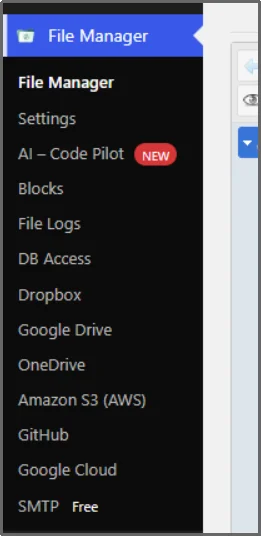
The plugin opens to the top-level directory of your WordPress installation, which is typically the root directory unless WordPress is installed in a subfolder.
How to Add Files in WordPress Root Directory
The easiest and safest way to add files to the WordPress root directory is by using a file manager plugin directly from your dashboard.
When adding essential files, such as those for site verification or security, you want a straightforward process. Using a plugin like Advanced File Manager allows you to upload or create files directly within your WordPress admin dashboard. This method reduces complexity compared to FTP or cPanel, but proper permissions and security practices are still essential.
For a detailed, step-by-step guide on this process, please refer to our article: How to Add Files in WordPress Root Directory.
Best Practices for Managing the Root Directory
Having access to the WordPress root directory is powerful, but it also comes with responsibility. Following a few best practices will help you keep your site secure, stable, and running smoothly. The root directory contains your most critical WordPress core files, so handling it with care is essential.
- Always Back Up First: Before you make any changes to files like wp-config.php or .htaccess, always create a full site backup. This simple step ensures you can quickly restore your site if an edit causes an error.
- Avoid Direct Edits: Whenever possible, avoid editing WordPress core files directly. Use child themes or dedicated code snippet plugins instead.
- Use Secure Methods: Always choose secure methods when accessing the root folder. Using an SFTP (Secure File Transfer Protocol) client or a trusted, secure plugin like Advanced File Manager is highly recommended over standard FTP.
- Restrict Access: If you use a file manager plugin, take advantage of features that restrict access to the root directory based on user roles. Only administrators should have permission to make changes to these sensitive files.
- Monitor Permissions: Ensure your file and folder permissions are set correctly for security. Incorrect permissions can leave your site vulnerable to unauthorized access.
Ready to Take Full Control of Your WordPress Files?
Understanding the WordPress root directory is a crucial skill for every serious site owner. Knowing the location of the WordPress root folder empowers you to handle everything from emergency troubleshooting to essential site security. It is the key to mastering your entire WordPress installation files.
You now have three reliable methods to access this critical location: using cPanel, an FTP/SFTP client, or the simple and powerful Advanced File Manager WordPress plugin.
While the free version offers great basic access, the Pro version unlocks essential features like advanced security controls and private folder management.
To manage your WordPress root directory confidently and securely, having the right tools makes a significant difference.Upgrade to Advanced File Manager Premium to unlock advanced security controls, private folders, and complete file management flexibility.