Restricting access to media files is essential for managing sensitive content on WordPress websites. Whether you’re running a membership site, an internal portal, or a client-based service, you may need to restrict access to certain files.
By default, WordPress lacks such control over media visibility, which poses a challenge for sites that rely on user roles to manage permissions (i.e., membership sites, password protected content, etc.)
Without proper restrictions in place, private files can remain accessible to search engines and anybody who has the direct link of that media file, which compromises privacy and control.
This article explores how to implement role-based access to media files and ensure that only the right users see the right content. But before that, let’s take a moment to understand why restricting access is necessary for WordPress security.
Why Restrict WordPress Media File Access?
Unrestricted media access can introduce risks that are often overlooked. Even if your content appears protected on the front end, direct file URLs may still expose sensitive files to the public. Here’s why implementing access control for media files is important:
- Prevents unauthorized viewing. WordPress stores media files in the “uploads” directory, which is publicly accessible by default. Anyone with a direct link can access the file, regardless of whether they are logged in. This is particularly concerning for private PDFs, internal reports, or paid downloads.
- Protects membership or client-only content. If you’re running a site with exclusive content for specific user roles, restricting media ensures that these files remain visible only to the intended audience.
- Maintains professionalism and trust. Letting confidential documents leak or become easily downloadable reflects poorly on your site’s credibility. Visitors and users expect their data to be handled securely.
- Comply with privacy or data handling standards. Certain industries are required to comply with data protection regulations. Failing to comply with such policies may cause your site to fall short of basic compliance measures, resulting in substantial fines. More on this later.
- Avoids bandwidth misuse. Publicly accessible files can be hotlinked or shared without your knowledge, leading to excessive bandwidth usage. Restricting access ensures that only authenticated users are consuming your resources.
The problems are prominent, but you don’t have to worry! Since we are about to introduce a super simple solution.
A Smarter Way To Control Media Files Access in WordPress
Even if WordPress doesn’t offer built-in features for restricting media files by user role, with the right setup, you can define exactly who sees what, enforce role-specific access, and tighten control over your file library.
Instead of writing custom code or managing multiple plugins, there’s a much better option. One that makes media file restrictions easier to implement and maintain, even on sites with complex user hierarchies.
We are talking about Advanced File Manager. A file manager plugin that enables you to control who can access certain files on your website based on user roles. The plugin can do much more than that; the following section will elaborate on its capabilities.
Also Read: 6 Convincing Reasons Why You Should Use WordPress File Manager in 2025
Why We Choose Advanced File Manager?
Advanced File Manager is built to handle real-world content management needs. Here’s what makes Advanced File Manager suitable for restricting media access:
- Role-based file access control. You can define which user roles can view, edit, delete, or upload files. This makes it easy to enforce boundaries between users without relying on third-party permission plugins.
- Private directory per user. Assign private folders to individual users, ensuring that files uploaded by one user remain inaccessible to others. This is useful for membership sites or client dashboards.
- Frontend file manager interface. Users don’t need admin access to manage their files. Advanced File Manager provides a frontend file manager with customizable permissions, so users can upload, download, or manage files based on the access you’ve configured.
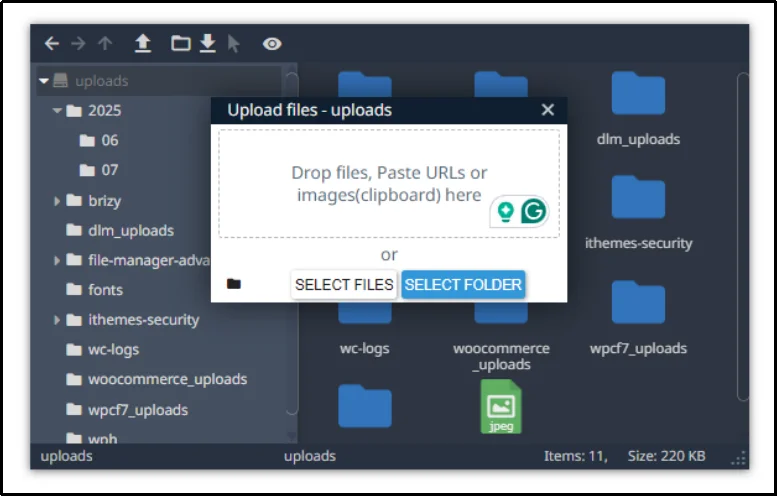
- Drag-and-drop file management. Despite its advanced capabilities, this plugin maintains a user-friendly interface. Drag-and-drop functionality and intuitive controls enable you to upload files by simply dragging and dropping them.
- Support for shortcodes and Gutenberg blocks. You can add a file manager anywhere on your site easily using shortcodes or a dedicated Gutenberg block. This makes it simple to place file access points exactly where they’re needed.
- No FTP dependency. Advanced File Manager does not rely on FTP to access files, reducing the surface area for potential vulnerabilities. All file operations happen through WordPress’s framework.
3 Easy Steps to Restrict WordPress Media Files Access To Specific User Roles Using Advanced File Manager
If you want to create a secured document media on your WordPress site with built-in user roles permissions, then follow the steps below:
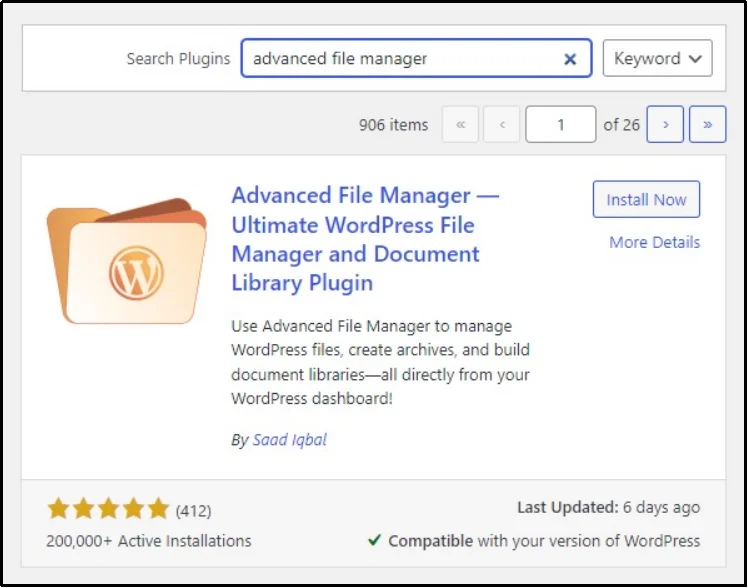
Step 1. Install Advanced File Manager
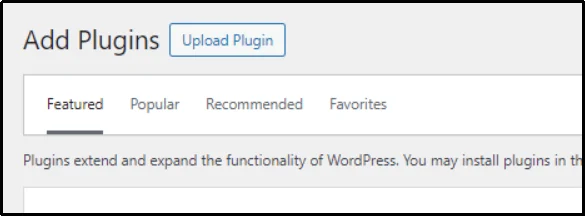
Let’s begin with installing Advanced File Manager. You can do so by navigating to your WordPress ⇒ Add Plugin ⇒ Search for Advanced File Manager, as shown below ⇒ Install and Activate.
Since Shortcodes—the feature used for creating document libraries—is exclusive to premium, you must also purchase a premium plan. Visit the official website and choose a plan that fits your needs to get the AFM premium’s ZIP file and a license key.
Once you have received the file, click the Upload Plugin button, browse the ZIP file, install the file, and you’re done.
Once done, the plugin will prompt you to enter the license key before activation. Enter the key in the input box to activate the Advanced File Manager Pro.
That takes us to our next step.
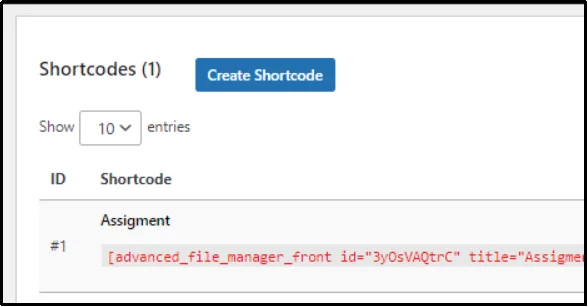
Step 2. Create a Shortcode
Navigate to File Manager ⇒ Shortcodes (PRO)
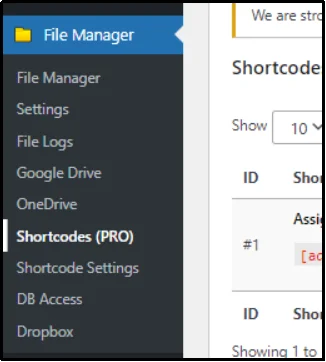
Click Create Shortcode.
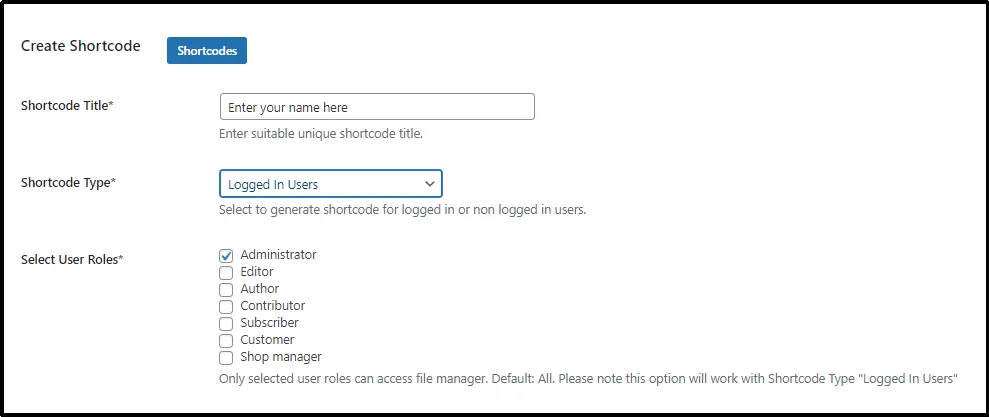
Now comes the fun part, customizing your shortcode.
Delegate a title to your shortcode and use the Shortcode Type drop-down to specify whether you want it for logged-in users or non-logged users, which also means visitors.
Here comes the restricting part. Use the checkboxes to restrict access based on users.
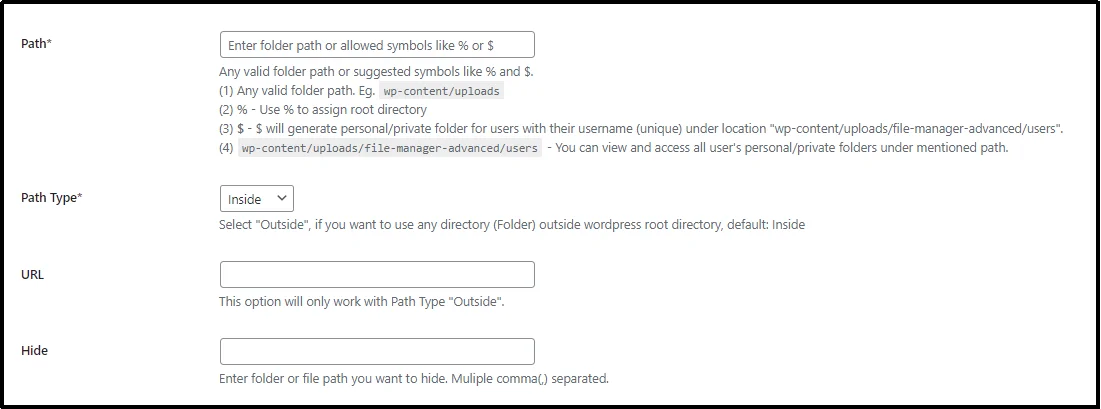
Next, choose the path or the destination you would want permitted users to download/upload files from/to.
Choose Path Type using the drop-down from Inside or Outside. The inside one is the default; use Outside only if you want to use a directory outside the WordPress root directory. If you choose Outside, add the URL of the directory in the URL input box.
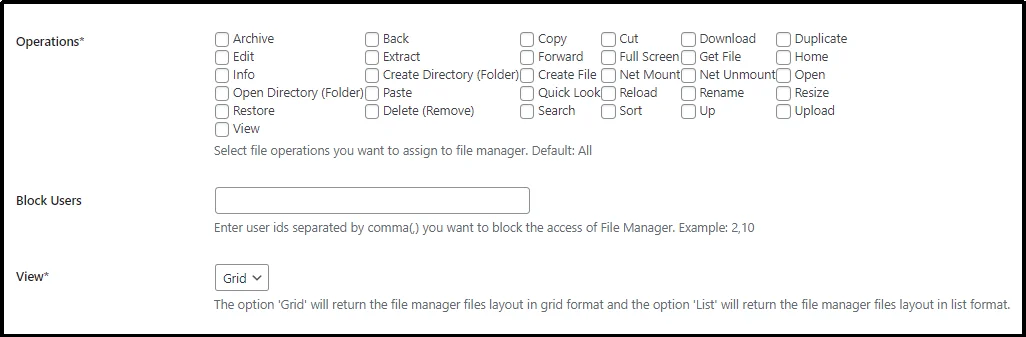
Choose the operations you want to allow permitted individuals to perform. For example, you may want to check download or upload for a student portal that requires students to download an instruction doc and upload an assignment.
For security reasons, you can also block users by typing their user IDs.
After going through these numerous options, including the view, theme, language, and more, make sure to switch the Hide Path to Yes. This ensures the files remain hidden even if someone has the direct URL.
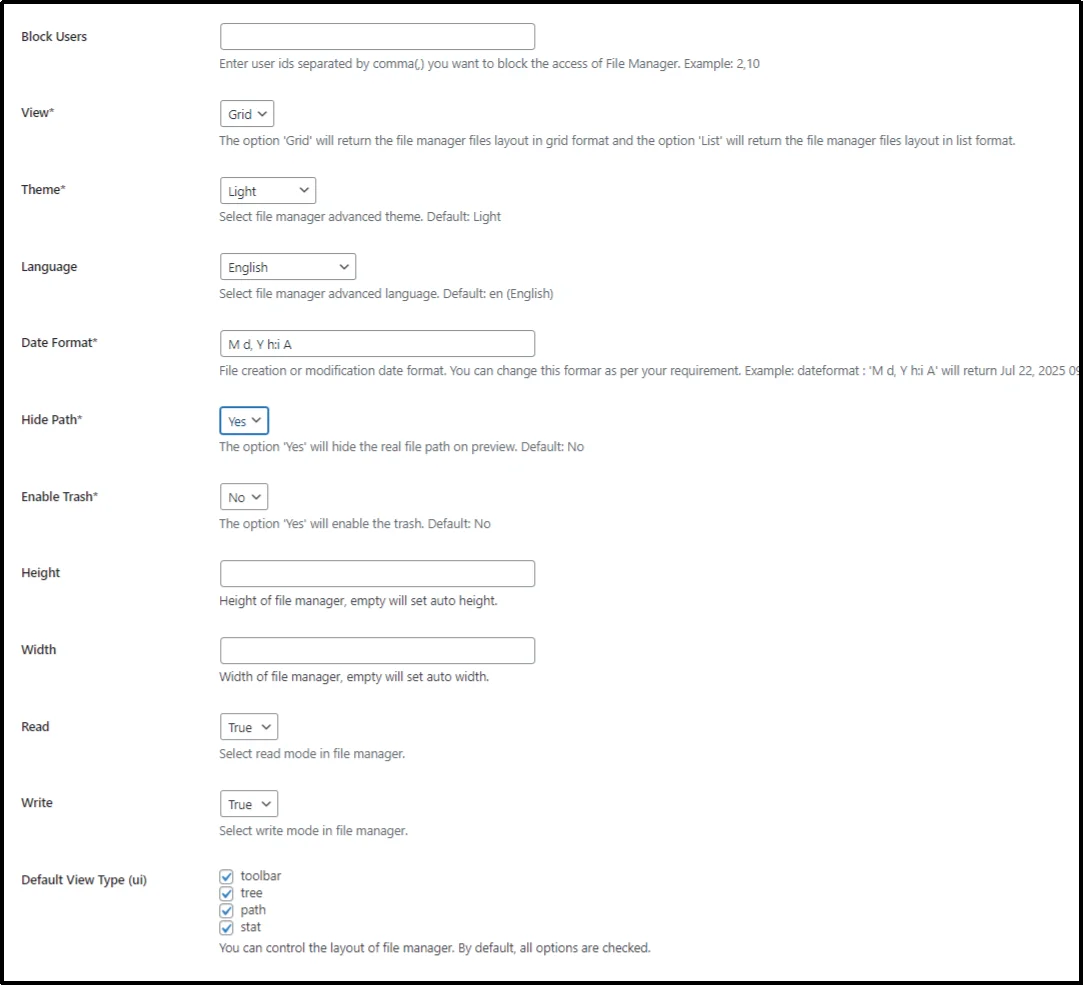
Note: If you don’t hide the path, media files will still be visible via direct links. In such a case, use a plugin like Download Monitor to ensure such files remain inaccessible.
Control the layout by checking/unchecking boxes next to elements you may or may not want. For example, unchecking the toolbar box eradicates the toolbar.
Lastly, once all the settings are done, save progress with Save Changes.
Step 3. Paste The Shortcode
Navigate to the page or post and embed the shortcode we just created in the last step. Looking back at the example of creating a student portal, we allowed downloads and uploads.
Here’s how it looks at the front-end.
That’s about it.
If you want to learn more about creating a document library, this article can help:
How To Create a WordPress Document Library [Step-by-Step]
Why Compliance With Data Handling Standards Is Necessary
Restricting access to sensitive media files isn’t just about security; it’s also a matter of compliance.
If your WordPress site collects, stores, or processes data such as personal documents, payment receipts, or transaction records, you are responsible for protecting that information in accordance with applicable data protection laws and regulations.
One of the most relevant frameworks in this context is PCI DSS (Payment Card Industry Data Security Standard). If your site handles payment data—even indirectly—you are expected to follow PCI guidelines to ensure data is stored and transmitted securely.
Failing to comply with PCI requirements can lead to serious consequences:
- Fines and penalties. Businesses found to be non-compliant may face monthly fines ranging from $5,000 to $100,000, depending on the size of the breach and the duration of non-compliance. These penalties are often imposed by payment processors or banks and can continue until the issues are resolved.
- Increased liability after a breach. If a security breach exposes cardholder data and your site is found to be out of compliance, you may be held fully liable for damages. This includes costs for investigations, remediation, and compensation to affected parties.
- Loss of payment processing privileges. Repeated violations or serious data leaks can result in the suspension or termination of your ability to process payments altogether, disrupting business operations and eroding customer trust.
It’s also imperative to note that even if clients or other users on your WordPress site are submitting such information in the form of PDFs, images, documents, spreadsheets, etc., you, as the owner, are responsible for protecting it. Which also means, you will incur consequences and fines.
Restricting access to media files containing sensitive or transactional data is the least you can do to protect yourself and your users.
Final Words
Managing file access is necessary for websites that handle sensitive, role-specific, or private content. WordPress may not offer this control out of the box, but with Advanced File Manager, you can enforce strict, flexible, and user-friendly access rules without writing a line of code.
Whether you’re running a membership portal, internal documentation system, or a client dashboard, restricting media files based on user roles helps you protect content, maintain compliance, and enhance your site’s credibility.
There is much more to Advanced File Manager. Check out all the features here.
If you need help, feel free to contact us by opening a support ticket. We would love to help you!
Have a nice day!