The WordPress root directory is home to all the vital files that help your website function smoothly. This includes essential configuration files like .htaccess, wp-config.php, core WordPress files, directories for your themes, plugins, and any media you’ve uploaded.
Adding or accessing this directory can be deadly unless you do it safely.
A tiny alteration or a slip of the hand—accidentally deleting a file—can break the website completely. Therefore, caution is recommended.
For this exact reason, this article is here to dissect the process of adding files in the WordPress root directory without risking a complete breakdown. But before that, let’s understand what lurks in the root directory and what it is in the first place.
What is the Root Directory in WordPress?
The WordPress root directory, sometimes called the document root or root folder, is where all the files and folders that power your website are stored. It is the foundation of your WordPress installation, containing files whose absence abruptly shuts your website down.
All the core files are placed inside this directory when you install WordPress. This includes critical files like:
- wp-config.php — This is one of the most critical files. It contains your database connection details, secret keys, and other configuration settings that allow WordPress to communicate with your database.
- .htaccess — A hidden file the web server uses to manage URL rewriting, redirects, security restrictions, and caching rules.
- wp-content/ — This folder holds all your themes, plugins, and media uploads. It’s where all your custom content lives.
- wp-includes/ and wp-admin/ — These directories contain the core WordPress files responsible for the backend functionality and admin dashboard.
As discussed, the root directory must be treated carefully because it holds everything your website needs to function. Making changes here without the proper knowledge or precautions can cause your entire site to break or become inaccessible.
Understanding the structure and contents of the root directory is the first step to safely adding or modifying files. Whether you need to upload a custom script, add security files like robots.txt, or troubleshoot by replacing corrupted files, knowing what you’re dealing with prevents costly mistakes.
Before diving in, you might wonder why you would need to access a file that can have deadly consequences.
Well, there are plenty of reasons.
Why Would You Need to Add Files to the Root Directory?
Adding files to the WordPress root directory might seem technical or risky, but it’s often necessary for several important reasons. Here are some common scenarios where adding or modifying files in the root directory becomes essential:
Customizing Website Behavior and Security
Some files, like .htaccess or robots.txt, live in the root directory and control how your website behaves.
For specific purposes, such as setting up redirects, rewriting rules to improve SEO, handling URL changes, blocking malicious bots, or restricting access to particular files for enhanced security, may require alteration of these essential files.
Installing or Configuring Plugins and Themes
Certain plugins or themes require you to upload specific files directly into the root directory. This could include custom scripts, license files, or verification files to authenticate services like SSL certificates or site ownership verification with search engines.
For instance, some security plugins add special files for scanning or hardening your site’s security, which may or may not reside in the root folder.
Troubleshooting Issues
When your WordPress site experiences issues like a white screen of death or errors caused by corrupted files, you may need to replace or add fresh copies of core files, such as the ones we discussed earlier, to get it back online.
Safely uploading files directly to the root directory allows for quicker recovery without relying solely on your hosting provider or developers.
Adding Verification and Tracking Files
Many third-party services, such as Google Search Console, Bing Webmaster Tools, or other analytics platforms, require uploading a specific verification file to your root directory. This file confirms your website’s ownership and enables you to access valuable tools and insights.
Advanced Configuration
Developers often add custom PHP files or scripts in the root directory to extend WordPress functionality or integrate with external systems. While this is less common for casual users, it is crucial for advanced site customization.
There can be multiple scenarios and needs why you may want to access the root directory.
Accessing the root directory is typically done via FTP clients like FileZilla, which isn’t practical. In the following section, we will see why.
Why Are FTP Clients Not a Good Choice?
While FTP clients like FileZilla are commonly recommended for accessing the WordPress root directory, they’re not always the most practical or user-friendly option, especially for beginners. Here’s why:
Not Beginner’s Friendly
FTP clients have an outdated interface that can be overwhelming. It’s a straight-up raw folder structure of your website, with no guidance or instructions. One wrong move, such as dragging a file into the wrong folder or deleting a core file, can take your entire site offline.
Requires Additional Setup
To use an FTP client, you would require additional configuration. First, you need to find your FTP credentials (host, username, password, and port) from your hosting provider and then enter these correctly in the FTP client, not to mention the persistent fight with critical connection issues like firewall blocks or SFTP mismatches that happen all the time.
This setup process can be confusing, especially if you’ve never done it before or don’t have quick access to your hosting account.
No Undo Button
Unlike Advanced File Manager, FTP has no undo button or revision history. If you overwrite or delete a file, it’s gone forever. There’s no “trash bin” or confirmation pop-up; mistakes are instant and often irreversible unless you have a backup.
Security Risks
If you’re not careful, FTP can expose your site to unnecessary risks. For example, using plain FTP instead of secure SFTP sends your credentials in plain text, which bad actors can intercept or eavesdrop on.
In short, while FTP clients give you full access to your website files, they also have multiple disadvantages. You’re better off using a safer alternative, like Advanced File Manager, which is packed with helpful features enabling you to access core files without risking the site’s security.
How to Add Files in WordPress Root Directory: 3 Easy Steps
Let’s jump right into the steps now.
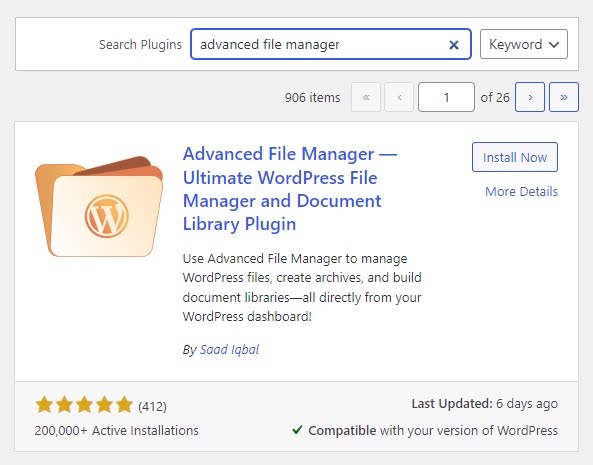
Step #1. Download Advanced File Manager
Firstly, we have to download the Advanced File Manager plugin. To do so, log in to WordPress ⇒ Add New ⇒ Search for the plugin ⇒ Install and Activate.
You might want to read this 👉 How to Set Up a File Manager in WordPress [Step-by-Step]
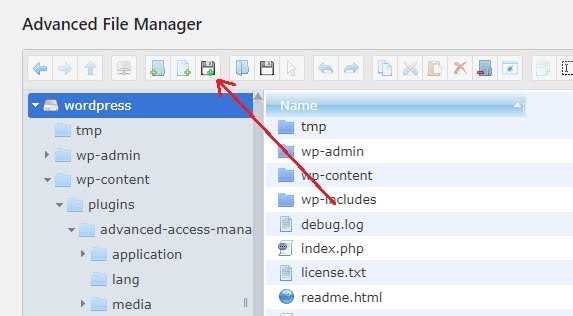
Step 2. Go to the File Upload Lcation/Path
Go to the Advanced File Manager and navigate to where you want to upload the file.
Unlike FTP clients, Advanced File Manager offers appealing undo and redo buttons. This feature enables immediate correction of an inadvertent touch or a shift in preference.
Step 3. Upload The File
Once there, use the Upload button.
It will reveal the dropper. You can drop the file here, or use the “Select files” button to browse from your computer.
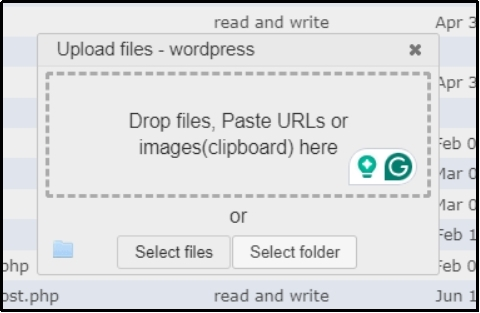
Upload the file, and there you go! You just add a file to the WordPress root directory without risking a potential breakout of the entire site.
Advanced File Manager Is More Than Just Accessing the Root Directory
As the heading suggests, Advanced File Manager is much more than just accessing the root directory. The plugin is packed with numerous features to help with file management.
The feature-rich toolbar looks like this and offers benefits such as copying, pasting, uploading, downloading, undoing, redoing, sorting files (with date, size, name, and more), file selection, and much more. This article can help you explore the features further.

Download it today for free! For additional features, feel free to upgrade.
Frequently Asked Questions
How do I upload a file to the WordPress root directory?
You can easily upload a file to the WordPress root directory using an FTP client like FileZilla. However, FTP clients are unreliable and prone to attacks. Thus, switch to Advanced File Manager. A file manager plugin that offers tons of benefits.
How do I add files to a WordPress site?
To add files to a WordPress site, you can use the WordPress default media library. Navigate to Media ⇒ Add Media File. Alternatively, you can use a file manager plugin, such as Advanced File Manager, to do so.
Can I organize the root directory with folders to keep it clean?
Of course you can! With Advanced File Manager, you can create a folder anywhere you want. Enabling users to tidy their root directory and make it more manageable.
Why can’t I see the uploaded file in my browser even though it’s in the root directory?
If you’re having trouble seeing an uploaded file in the root directory of your browser, it might be a problem with permissions, server settings, or even some browser caching. Just double-check that the server has the right permissions for the file and make sure your browser isn’t holding onto an old version. You might also want to switch to a file manager if you use an FTP client.